| Topic |
|---|
| Finite Element Analysis |
| Level |
| Beginner |
| Time to complete |
| 10 minutes |
| Authors |
| Bernd |
| FreeCAD version |
| 0.16.6377 or above |
| Example files |
| None |
| See also |
| None |
Introduction
This example is meant to show how a simple Finite Element Analysis (FEA) in FreeCAD's FEM Workbench looks like in the FreeCAD interface and how the results can be visualized. It illustrates how to trigger a FEA and how to change the load value and load direction. Furthermore, since the example file is provided with any FreeCAD installation, it is a useful and easy check to run for the purpose of ascertaining if the FEM Workbench is set up properly.

Requirements
- A compatible version of FreeCAD designated in the tutorial overview.
- Use the Help → About FreeCAD to see the version of FreeCAD installed
- No external software is needed for loading the example file, viewing the mesh and geometry as well as for visualizing the results.
- For rerunning the FEA the solver software CalculiX has to be installed on your computer. Probably the solver has been installed together with FreeCAD already. If the solver CalculiX is not installed see FEM Install.
Set up the example file
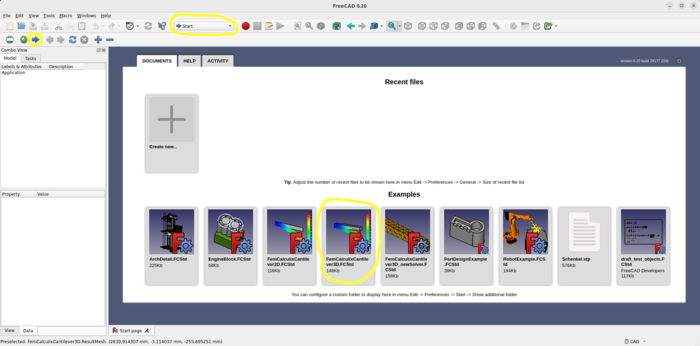
Load the example file
- Start FreeCAD.
- If the Start Workbench is not activated, load it and open the start page.
- Open the example file FemCalculixCantilever3D.FcStd 0.21 and below, or FEMExample.FcStd 1.0 and above.
Activate the analysis container
- To work with an analysis it has to be activated. In the Tree View do one of the following:
- Double click on the
 Analysis container.
 - Right click on the Analysis container, and choose Activate analysis from the context menu.
- Double click on the
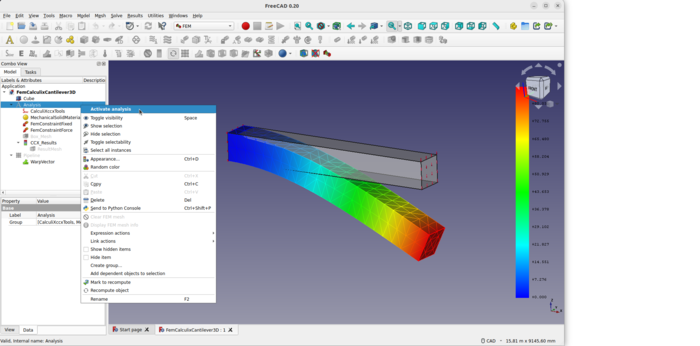
Analysis container and its objects
- If the analysis is activated, FreeCAD itself will change the current workbench to FEM.
- 1.0 and above: The following objects can be found in the
 Group container 3D.
 - The Analysis container holds at least the 5 objects needed to make a static mechanical analysis:
 a solver
 a material
 a fixed boundary condition
 a force load
 a FEM mesh
- In this example,
 results are already included as well.
Visualizing Results
- Be sure the analysis is activated.
- Be sure the analysis still contains the result object, if not just reload the example file.
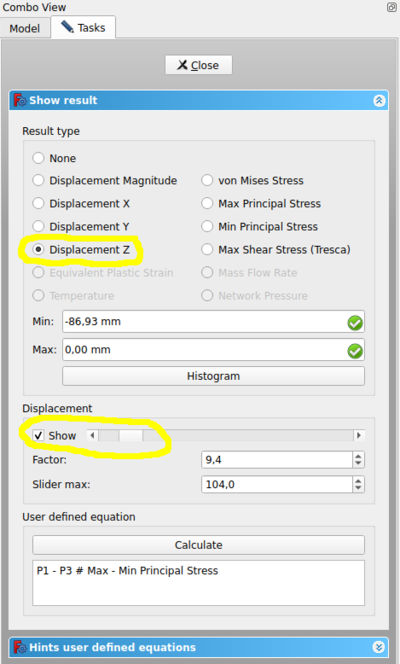
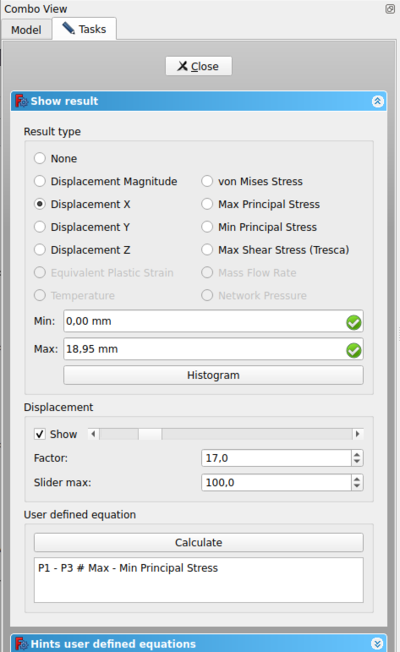
- Double click the result object , or select it and press the Show result button.
- In the task window, choose
z-Displacement. It shows-86.93 mmin negative z-direction. This makes sense since the force is in negative z-direction as well. - Activate the check box besides the bottom slider of displacement show.
- The slider can be used to alter the mesh to view the deformation in a simplified manner.
- Choose among the different Result types to view all in the GUI available result types.
Purging Results
- Be sure the analysis is activated.
- To remove the results: press the
 Purge results button.
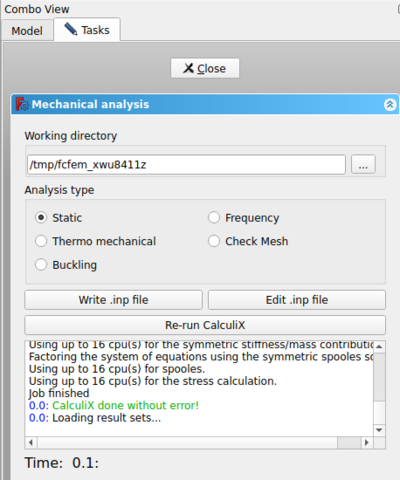
Running the FEA
- In the Tree View double click on the solver object .
- The task panel of the solver object opens.
- Make sure that analysis type Static is selected.
- Press the Write .inp file button and watch the log window until it prints "write completed".
- Press the Run CalculiX button. Since this is a very small analysis it should take less than a second to run.
- Wait for the text window to print "CalculiX done without error!" in green letters, and "loading result sets …" in the following line.
- You just have finished your first FEA in FreeCAD if there has not been any error message.
- Press the Close button in the task panel.
- A new result object should be created. You know how to visualize the results already.
- If you get the error message "no solver binary" or a similar one when triggering the analysis check FEM Install.
Running the FEA the fast Way
- In Tree View select the solver object of the analysis .
- Press the
 Run solver calculations button.
 - The Calculix input file will be written, CalculiX will be triggered and the result object should be created.
Changing Load Direction and Load Value
- In the Tree View expand CCX_Results and select the
 ResultMesh object and press the Space key.
- Result: The visibility of the FEM mesh will be turned off. The geometrical model is still visible.
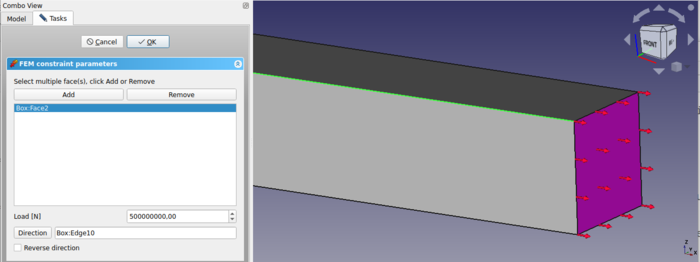
- In the Tree View double click on the FEMConstraintForce object.
- The task panel of the analysis element opens:
- Change the load value to 500000000 N = 500 MN (Note 0.21 and below: force unit in task window has to be in N)
- On the geometrical model click on one of the long edges in x-direction.
- Click on the Direction button.
- Result: The red arrows that illustrate force will change their direction in x-direction. They indicate the force direction.
- Since tension should be applied towards the box Reverse Direction has to be checked.
- The red arrows of the force will change their direction.
- Press the OK button in task panel.
- You know how to trigger an analysis and how to visualize results already.
- The deformation in x-direction should be 18.95 mm.
What next?
- We are now finished with the basic workflow for the FEM Workbench.
- You are now prepared to do the second FEM tutorial.
- We will create the CalculiX cantilever by ourselves and compare the results with the beam theory.
This page is retrieved from https://wiki.freecad.org/FEM_CalculiX_Cantilever_3D