| Тема |
|---|
| Modeling |
| Уровень |
| Beginner |
| Время для завершения |
| 1 час |
| Авторы |
| EmmanuelG |
| FreeCAD версия |
| 0.16 или выше |
| Примеры файлов |
| Thingiverse 2403310 |
| Смотрите также |
| None |
Проблема повседневной жизни
Электрические зубные щетки редко поставляются с подставкой для насадок, в то время как в семье вы часто увидите, что несколько насадок используются одним устройством. Многие люди, сталкивающиеся с общей проблемой, приводят нас к различным решениям, как вы можете видеть на Thingiverse (с этим связано 200-800 проектов). Вот первый ответ и как его спроектировать.
В этом руководстве вы пройдете через шаги, необходимые для моделирования детали, показанной на рисунке ниже, с использованием базовых инструментов из верстака Part Design (многие инструменты и возможности не описаны).

Первая идея : пластина
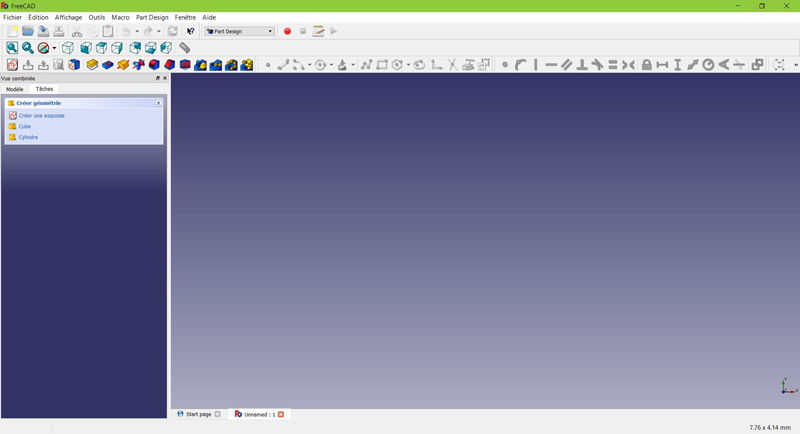
- На странице запуска, выберите верстак
 Part Design, или создайте новый документ, выбрав верстак Part Design.
Создание эскиза
- Нажмите на
 Создать эскиз. Либо из контекстного меню задач слева, либо с панели инструментов вверху, либо из меню "Part Design" вверху.
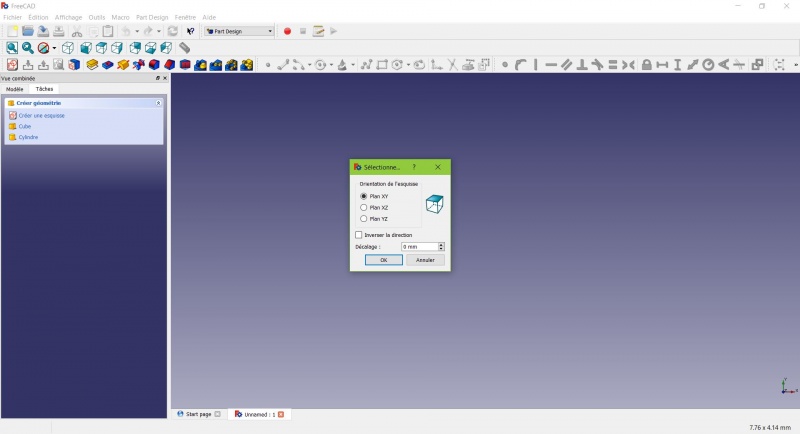
В диалоговом окне вам будет предложено выбрать ориентацию эскиза и указать смещение.
- Мы выберем плоскость XY, как показано на рисунке выше (эта ориентация соответствует общей схеме сборки большинства 3D-принтеров), затем нажмите кнопку ОК.
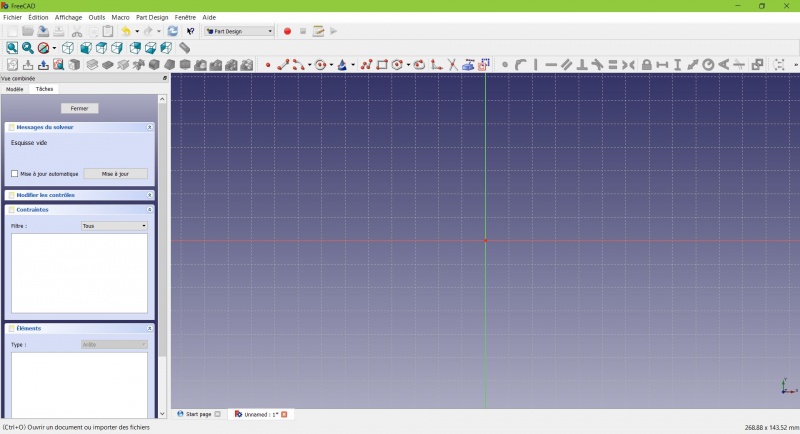
Теперь вы смотрите на плоскость XY сверху и имеете доступ к инструментам рисования.
- Нажмите на
 Прямоугольник.
 - Нажмите, чтобы создать первую точку.
- Нажмите, чтобы создать конечную точку.
- Нажмите ESC или нажмите ПКМ для выхода из режима прямоугольника.
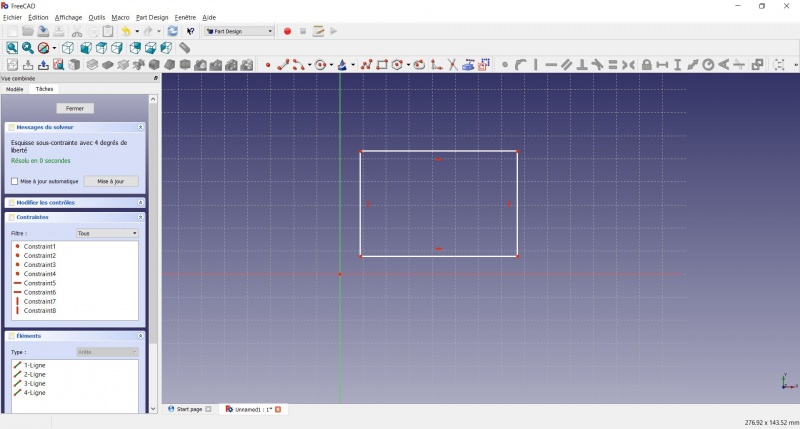
Теперь у вас есть прямоугольник неопределенных размеров.
- Нажмите на линию прямоугольника, и нажмите на
 Расстояние
 - Введите 80мм в диалоге и нажмите OK.
- Повторите действие с другой стороной прямоугольника.
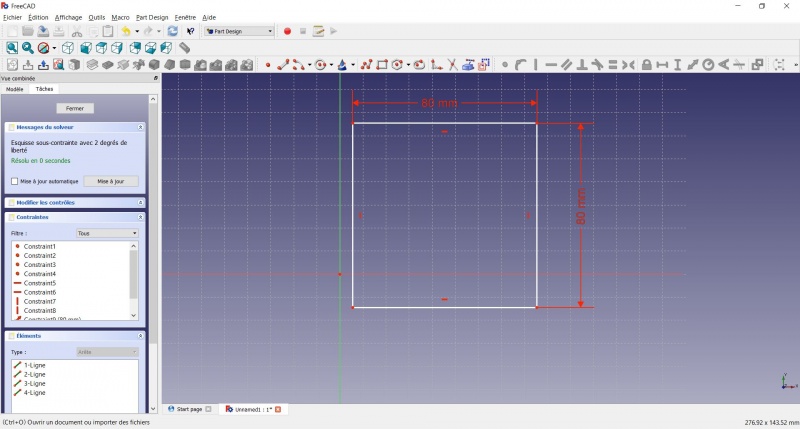
Теперь у вас есть квадрат.
- Нажмите на нижнюю левую точку квадрата.
- Нажмите с Ctrl на точку пересечения двух толстых линий.
- Нажмите на
 Совпадение.
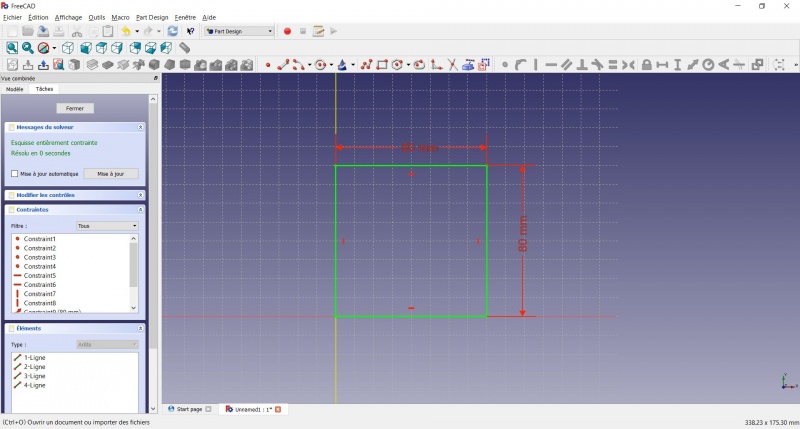
Теперь у вас есть полностью ограниченный эскиз, как вам сообщает решатель слева и изменение цвета. Хорошей практикой является всегда иметь полностью ограниченный эскиз.
Эскиз с недостаточными ограничениями может оставить место для нежелательных изменений, если вы что-то измените позже.
Напротив, чрезмерно ограниченный эскиз также не годится. В этом случае решатель предупредит вас о избыточных ограничениях, и вам следует удалить некоторые из них.
- Чтобы закрыть эскиз, нажмите либо на Закрыть слева, либо на значок
 на панели инструментов, либо нажмите ESC.
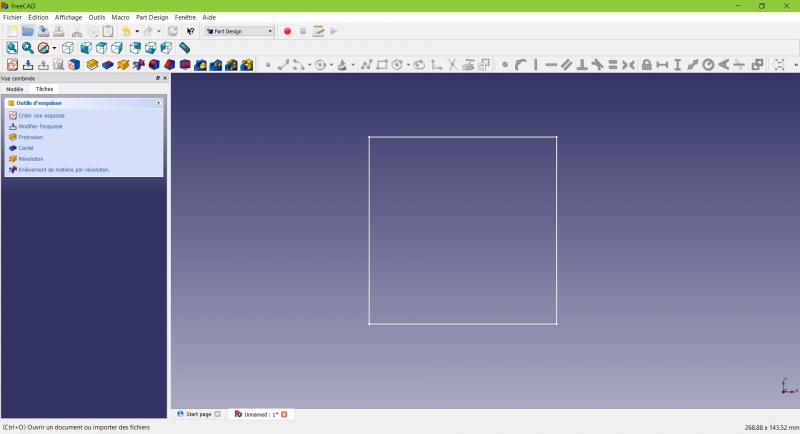
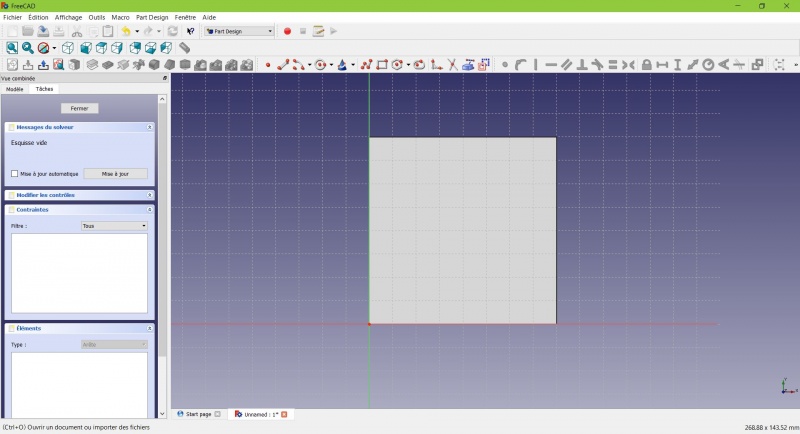
Теперь вы видите только квадрат, а контекстное меню задач слева показывает вам больше опций, чем раньше.
Выдавливание
- Нажмите на
 Изометрия среди стандартных видов, чтобы лучше увидеть, что произойдет.
 - Нажмите на
 Выдавливание.
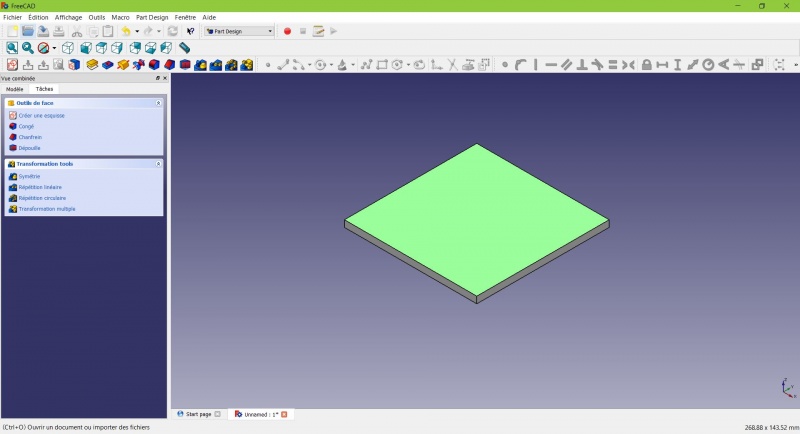
 - Введите 4 мм и нажмите кнопку ОК.
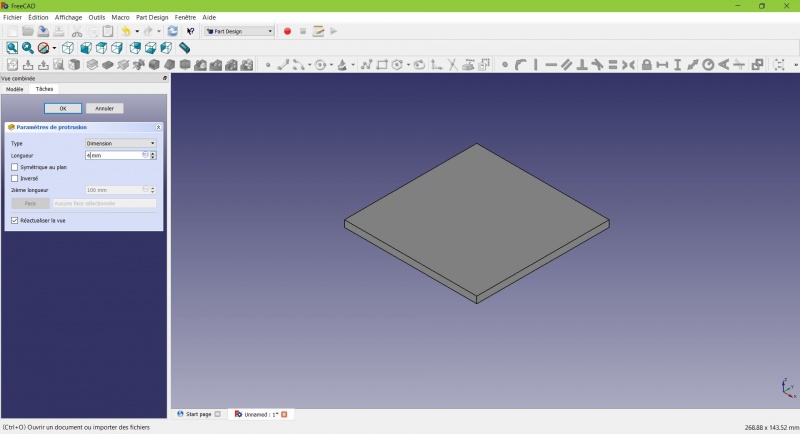
Теперь ваш эскиз стал объемным!
Создание эскиза на грани
- Выберите верхнюю грань
Цвет грани изменится, и у вас появится больше возможностей в контекстном меню задач.
- Click on New sketch. As a face was selected it will not ask you to choose a plane.
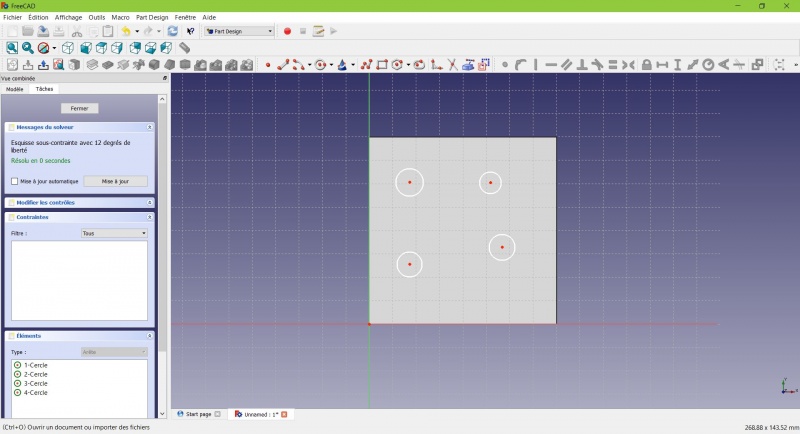
- Click on
 Circle, click to place the center, move the pointer and click to define the radius.
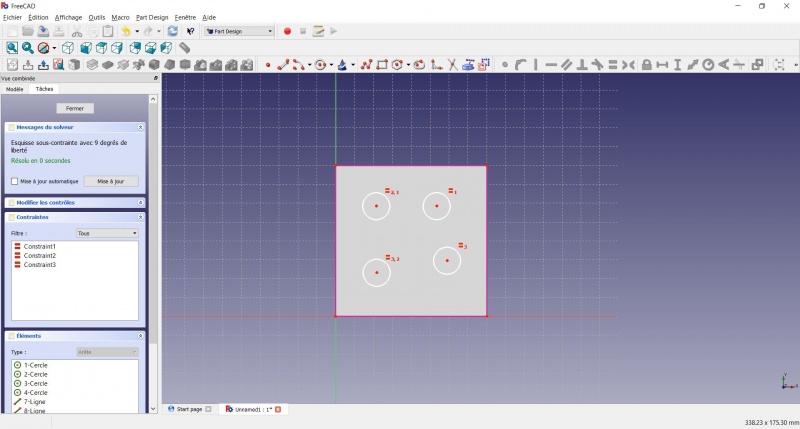
 - Draw 4 circles on the pad (of any size)
- Press ESC or click the right mouse button to stop using the tool.
- Select the circles
- Click on
 Equal Length
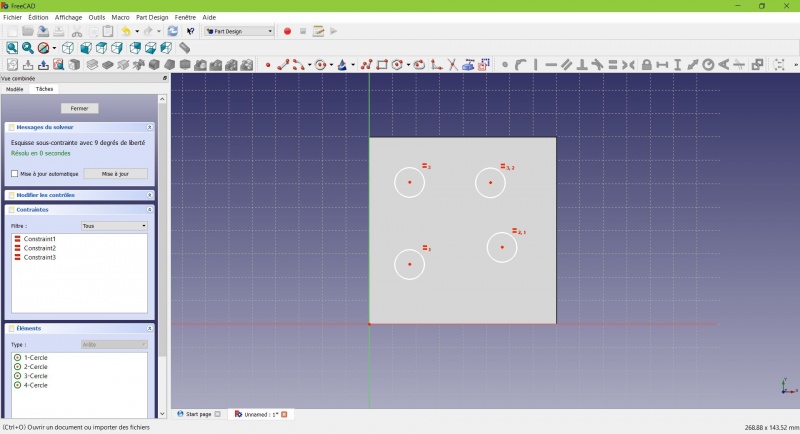
Now the circles share the same radius.
- Click on
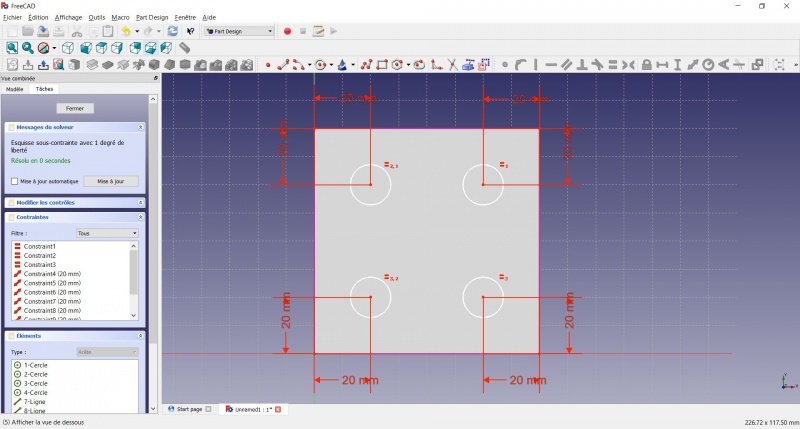
 External geometry.
 - Click on the four sides of the square, it add lines, color magenta.
Theses lines will serve as reference to position the circles.
- Click on Distance.
- Click on a center of a circle.
- Click on a magenta line.
- Set distance (20mm from each side).
- Click on a circle
- Click on
 Radius and set it at 1,5mm.
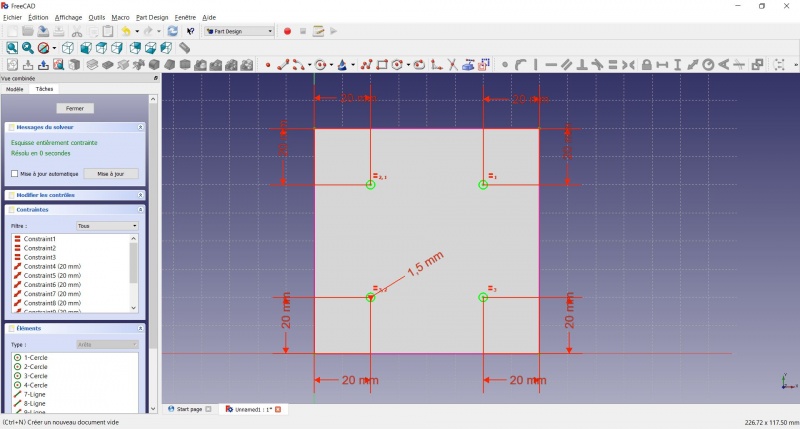
- To leave the sketch, click either on the "Close" button on the left, or the icon in the toolbar, or press ESC.
Create a pad
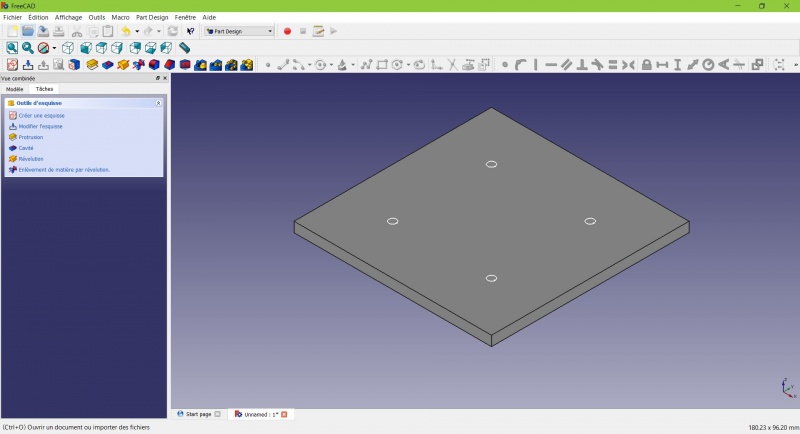
- Click on Axonometric among the standard views, to better see what will happen.
- Click on Pad.
- Enter 25mm and click OK.
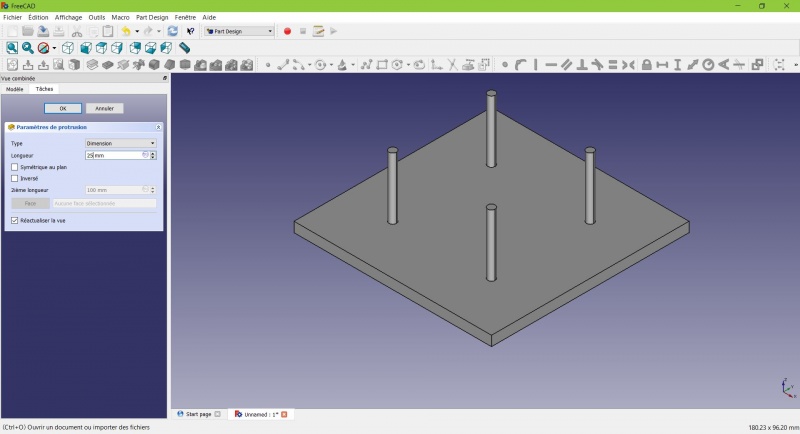
You have the basic shape, it just need final touches.
Rounding the corners
- Holding CTRL click on the vertical edge at each corner to select the four of them.
Don't hesitate to help you by switching the display mode (just at the left of the Axonometric View) between ![]() Wireframe and
Wireframe and ![]() Wireframe and shadow.
Wireframe and shadow.
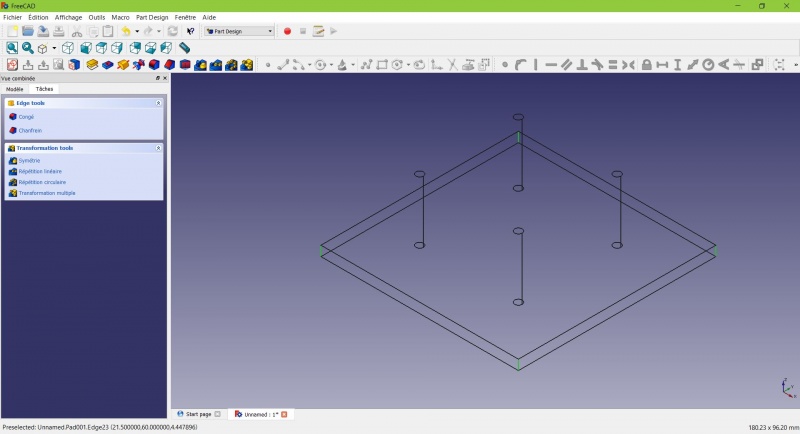
- Click on
 Fillet.
 - Set the radius at 20mm.
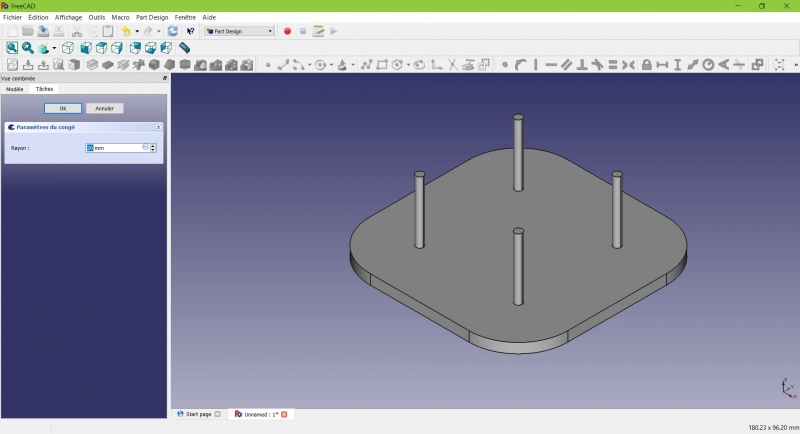
Much better.
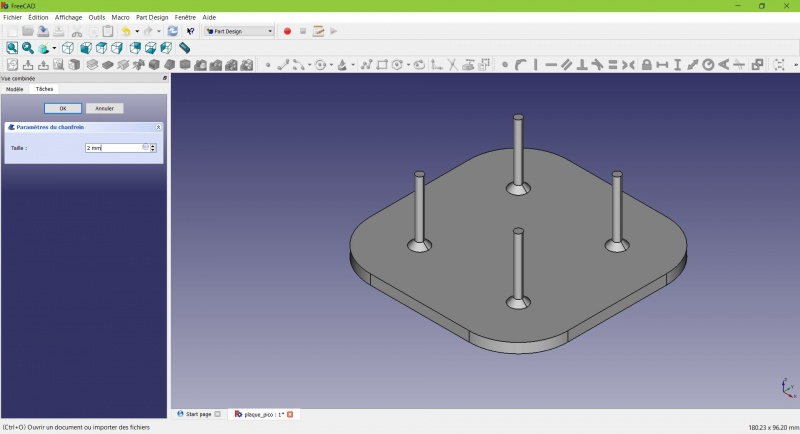
Making it more robust
We need to add material at the base of the cylinders to make them less prone to snap. Because of the printing orientation these small surfaces will be fragile at the junction with the base.
- Select the circles at the base of the cylinders
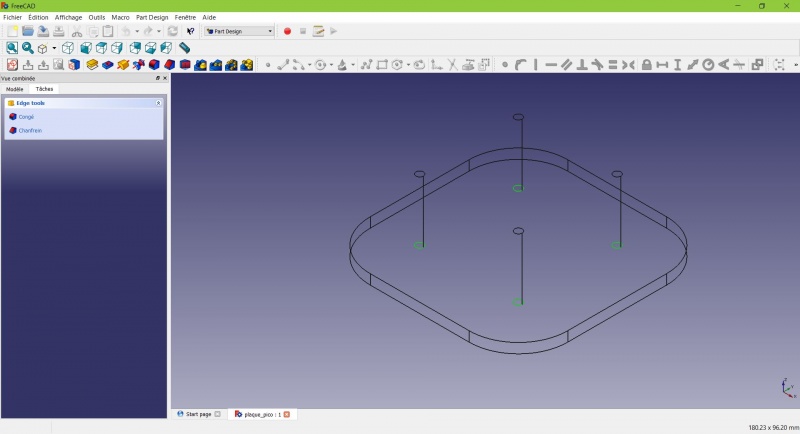
- Click on
 Chamfer.
 - Set it to 2mm.
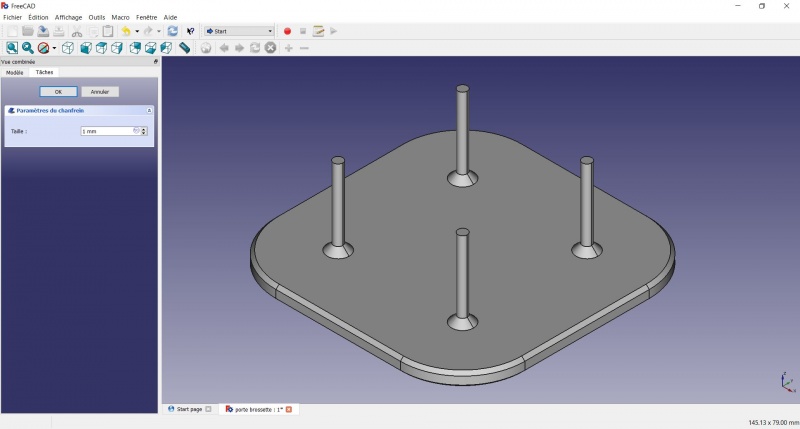
Chamfer the edges
- Select the face under the base, add a Chamfer of 0,5mm.
The first layer of plastic is often being squashed a little too much, this will compensate that and save you time in cleaning the model. If the first layer is ok that will make it only nicer

- Select the edges at the border of the upper face (holding CTRL ).
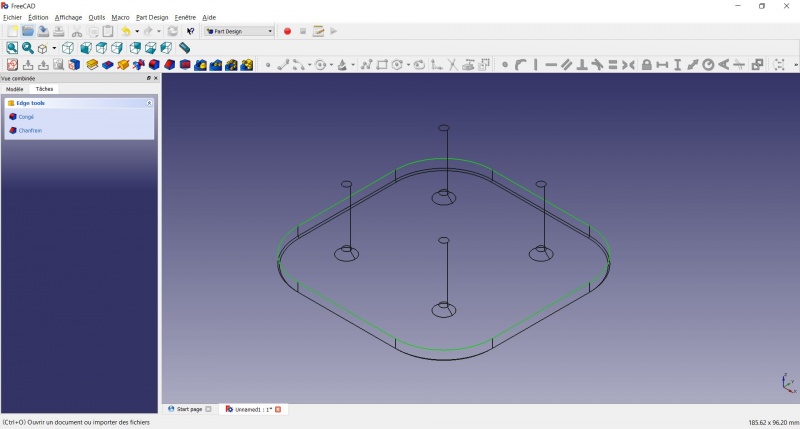
- Add a Chamfer of 1mm. This one is only aesthetic.
Tadaa!
Export as a .STL
- In the Combo View on the left, select the tree view instead of the contextual task menu, click on the last feature (the chamfer).
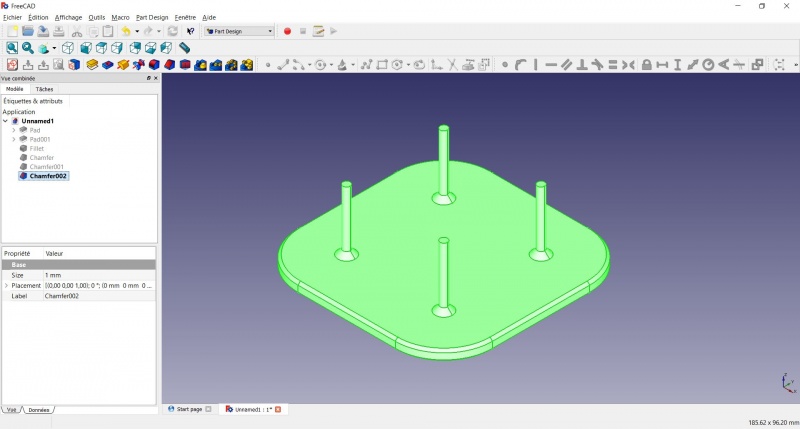
- Now you can select "Export..." from the File menu at the top left, and select the file format .STL.
- Just print it :-)
Inspiration
The above model make a good starting point to use FreeCAD, but as a toothbrush head stand it have its flaws : due to the print orientation and small surface the sticks are prone to break.
Inspired by the variety of solutions other people came up with, we will make this second version which will be much better.
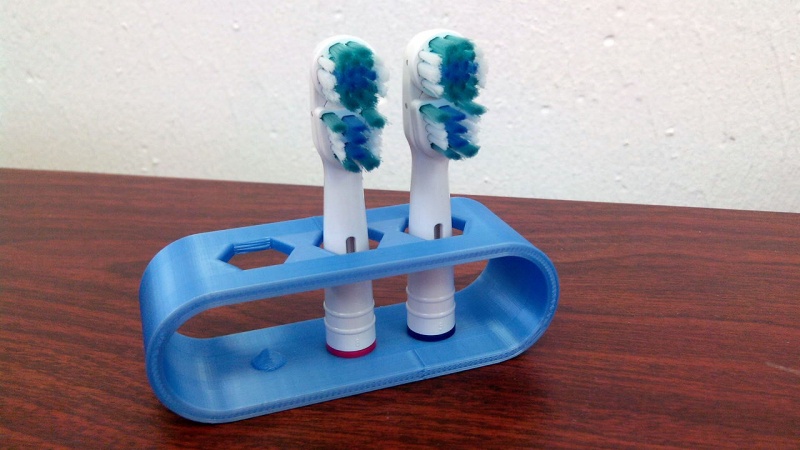
Don't worry it is often needed to go through several revision for an idea (e.g. : once the prototype on the picture was used, we added more space between the heads so that they should not touch).
In this second part you will also learn to use more tools, like the powerful Linear repetition.
Second idea : a band
- Create a new document and select the Part Design workbench.
Create a sketch
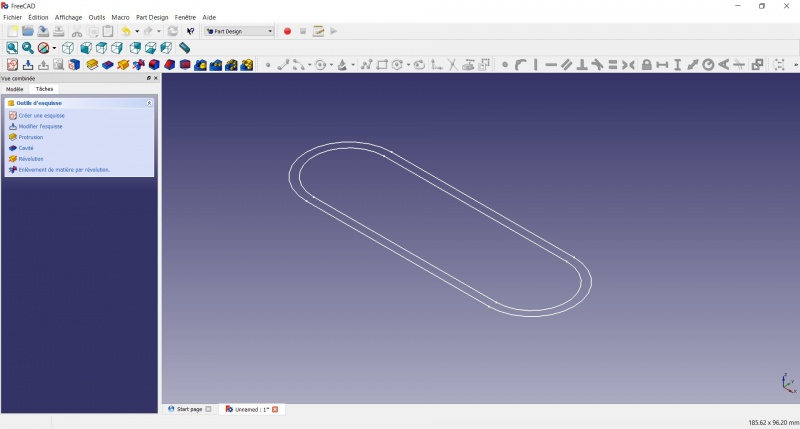
- Create a New sketch, on the XY plane.
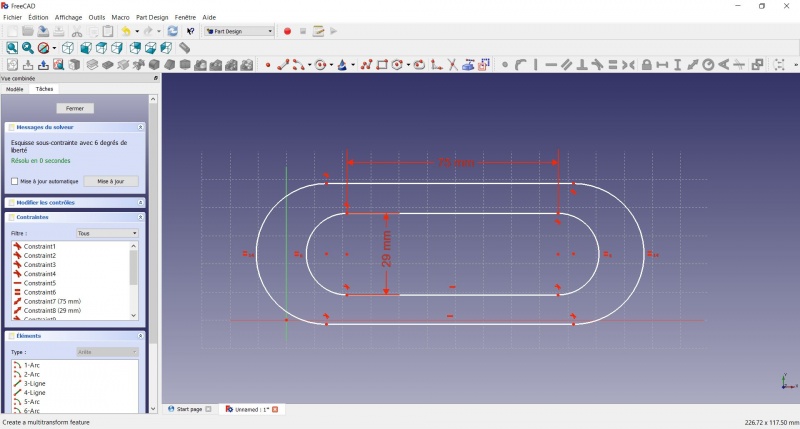
- Draw a
 Slot
Slot
- Click to place the first center
- Move to define the length and radius
- Click to set the second center.
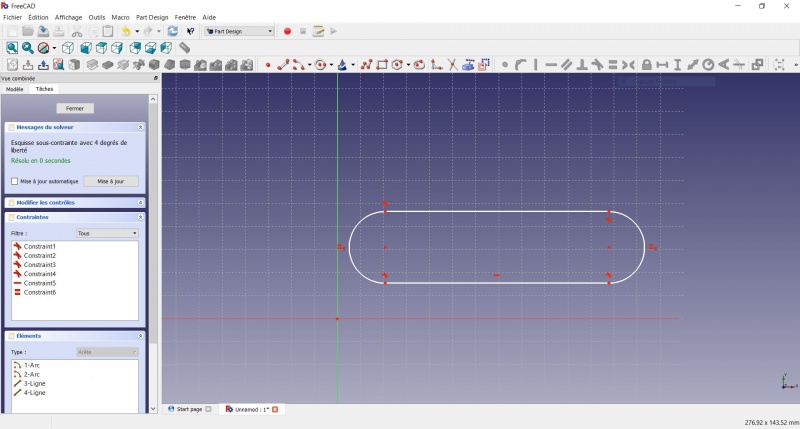
You now have a floating slot of unspecified dimensions.
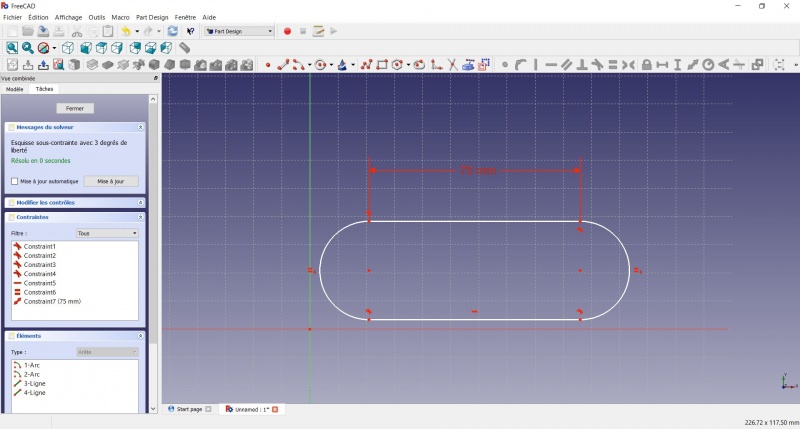
- Click on one of the horizontal lines of the slot
- Click on Distance
- A dialog prompts you to set a dimension. Enter 75mm, click OK.
- that's for a 3 head stand, count 25mm for each, if you want more
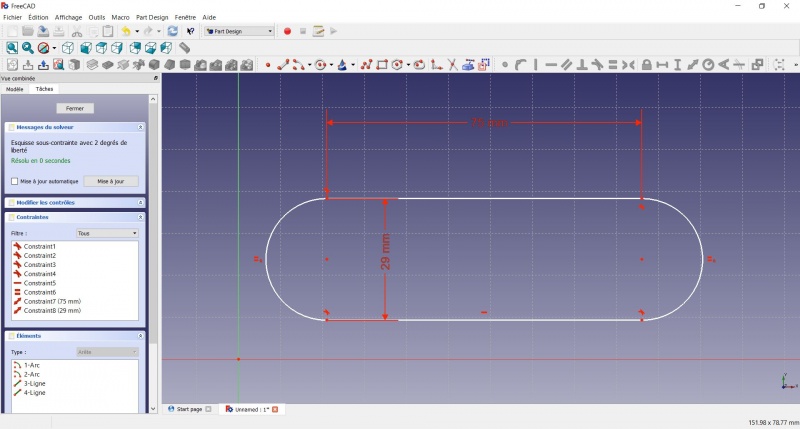
- Click on one point of the horizontal line
- Click on one point of the other horizontal line
- Click on Distance
- A dialog prompts you to set a dimension. Enter 29mm, click OK.
- Draw a Slot around the first slot.
- Make the centers of the second slot coincident with the centers of the first slot with Coincident.
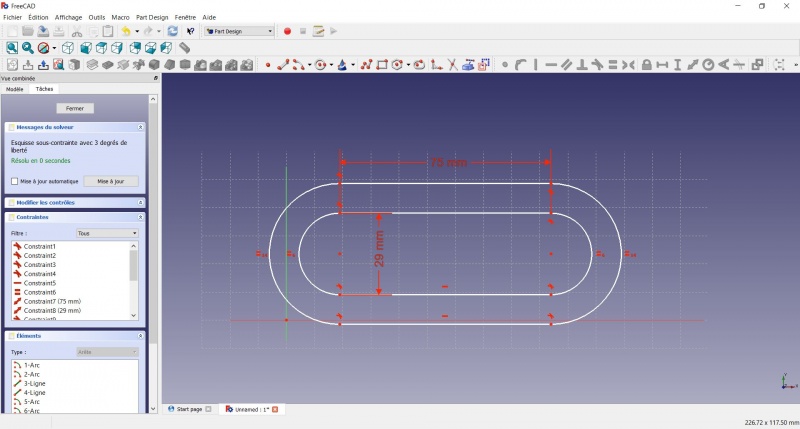
- Click on one point of the horizontal line of the first slot
- Click on one point of the nearest horizontal line of the second slot
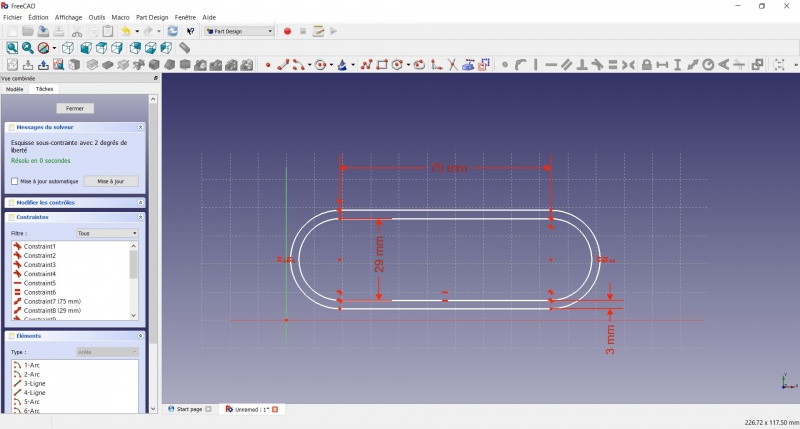
- Click on Distance
- A dialog prompts you to set a dimension. Enter 3mm, click OK.
- To make the sketch fully constrained
- Click on the lower left point of the second slot
- Click on the origin of the XY plan
- Click on Coincident
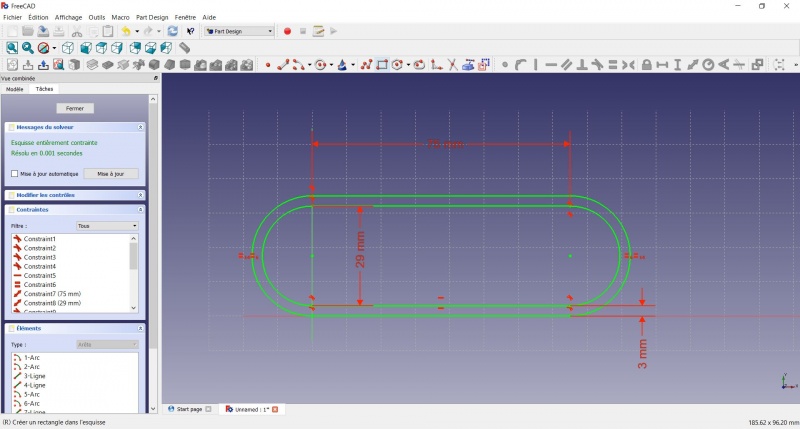
- To leave the sketch, click either on the "Close" button on the left, or the icon in the toolbar, or press ESC.
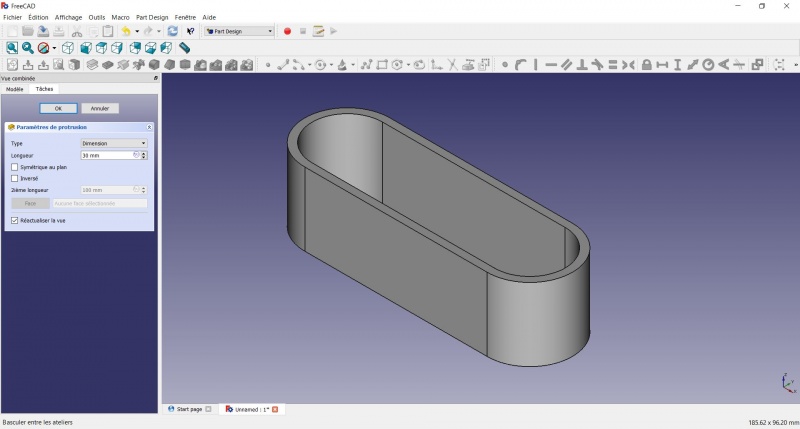
Create a pad
- Click on Axonometric among the standard views, to better see what will happen.
- Click on Pad.
- Enter 30mm and click OK.
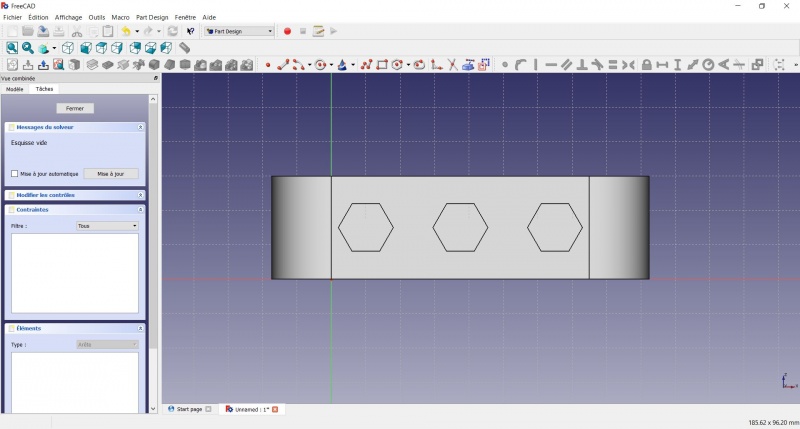
Create a sketch on it
- Select the upper face
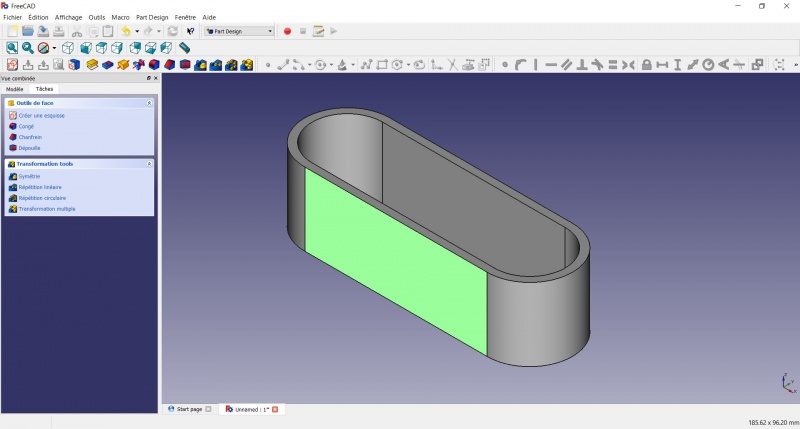
- Create a New sketch. As a face was selected it will not ask you to choose a plane.
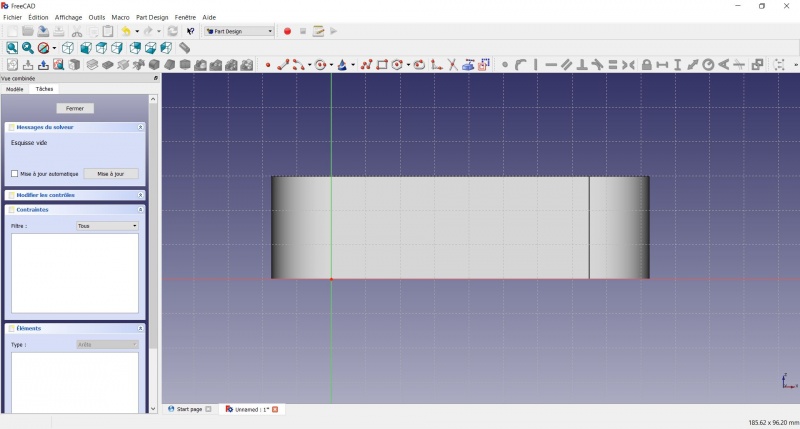
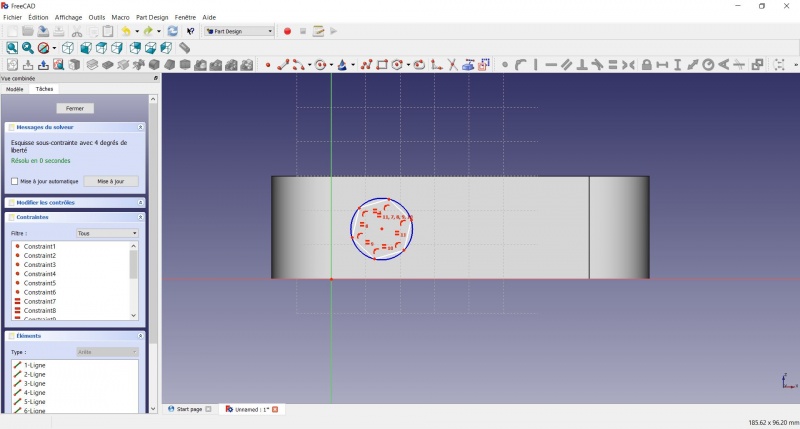
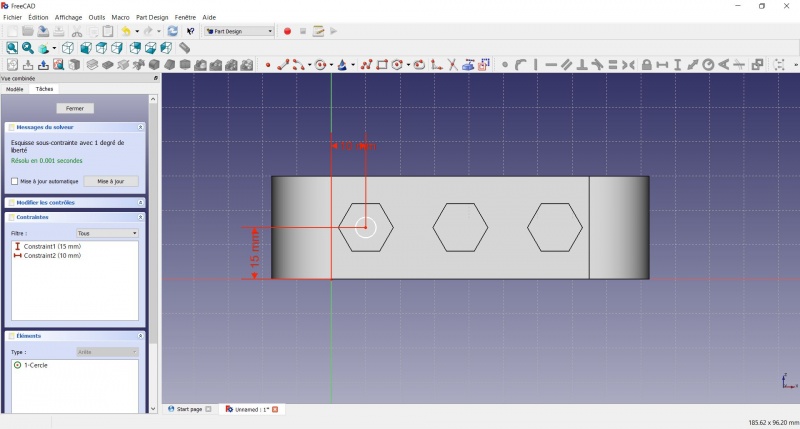
- Draw an
 Hexagon
- Click to place the center
- Move to define the radius
- Click to set
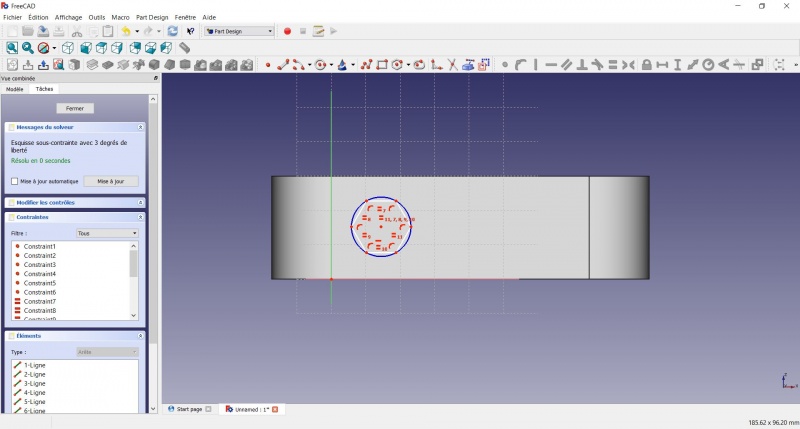
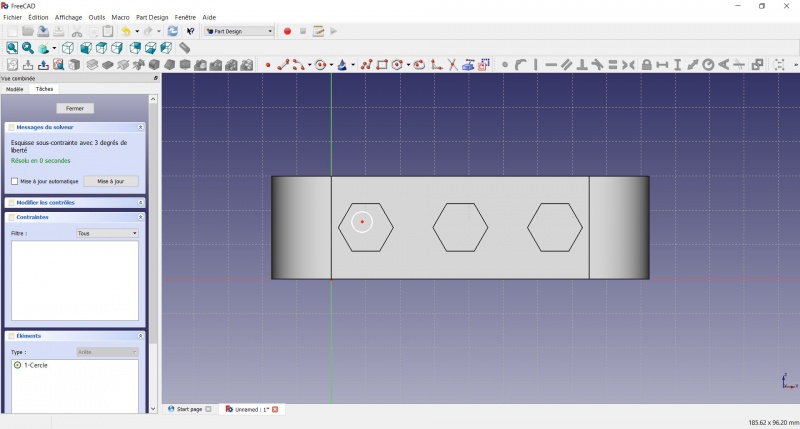
- Click on an edge of the hexagon
- Click on
 Horizontal
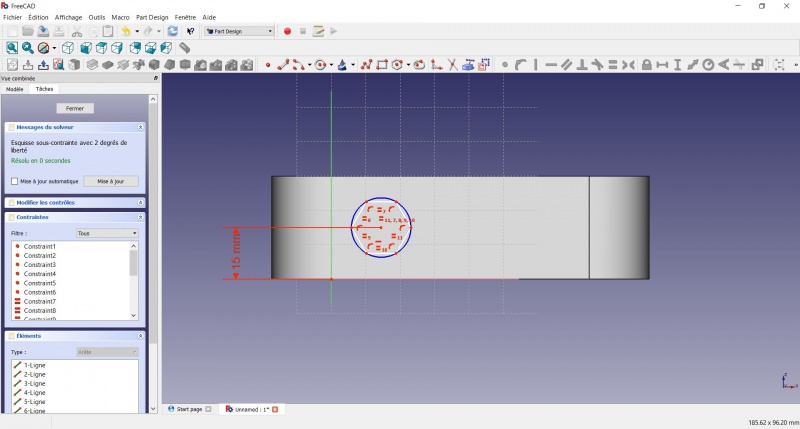
- Click on the center of the hexagon
- Click on the horizontal line of the XY plane
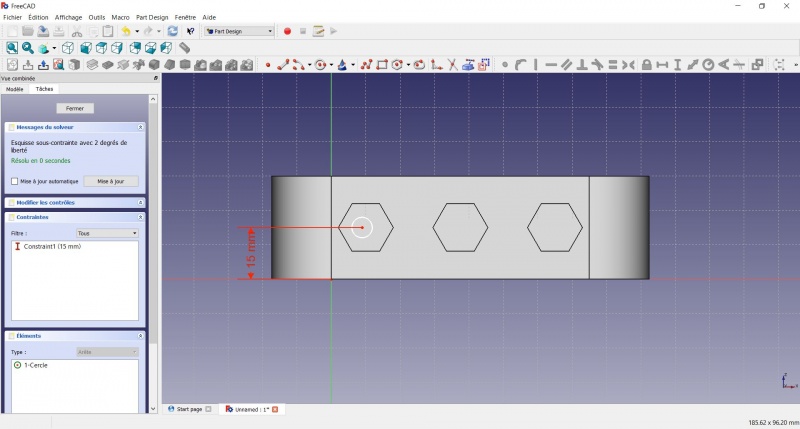
- Click on Distance
- A dialog prompts you to set a dimension. Enter 15mm, click OK.
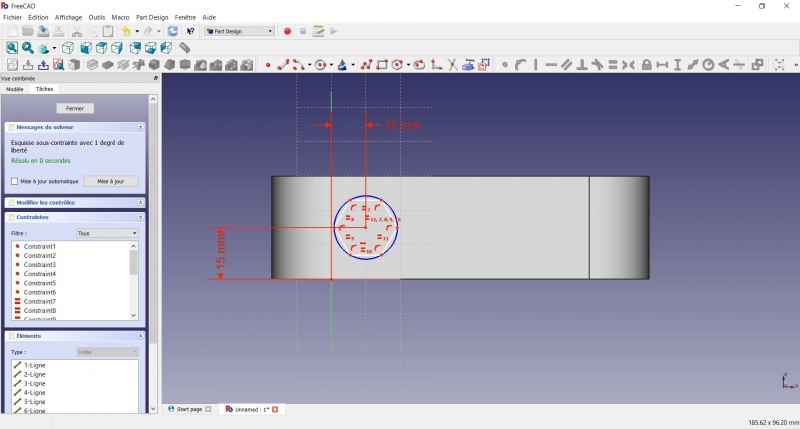
- Click on the center of the hexagon
- Click on the vertical of the XY plane
- Click on Distance
- A dialog prompts you to set a dimension. Enter 10mm, click OK.
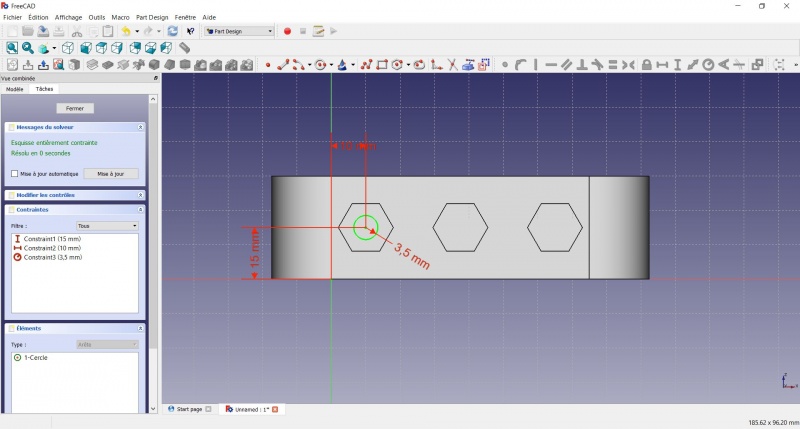
- Click on the blue circle of the hexagon
- Click on Radius
- A dialog prompts you to set a dimension. Enter 8mm, click OK.
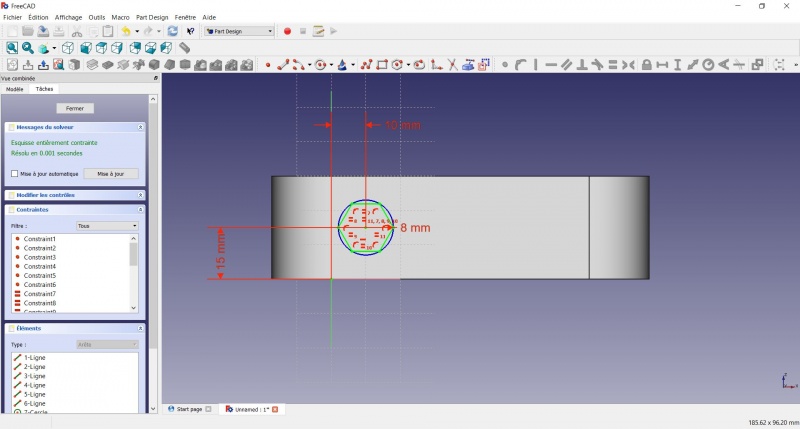
- To leave the sketch, click either on the "Close" button on the left, or the icon in the toolbar, or press ESC.
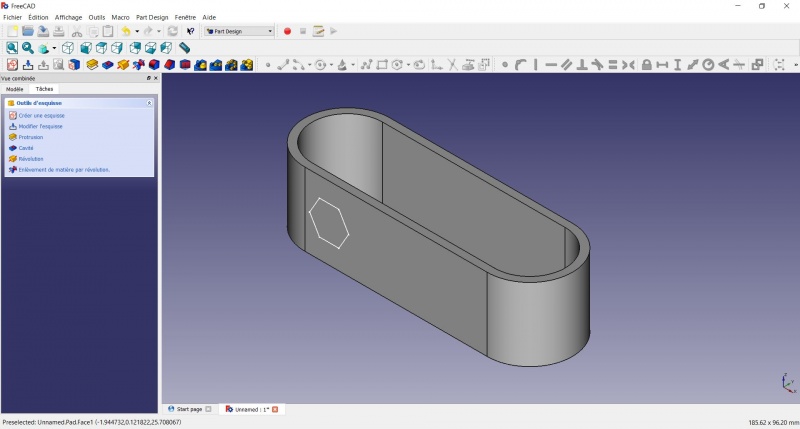
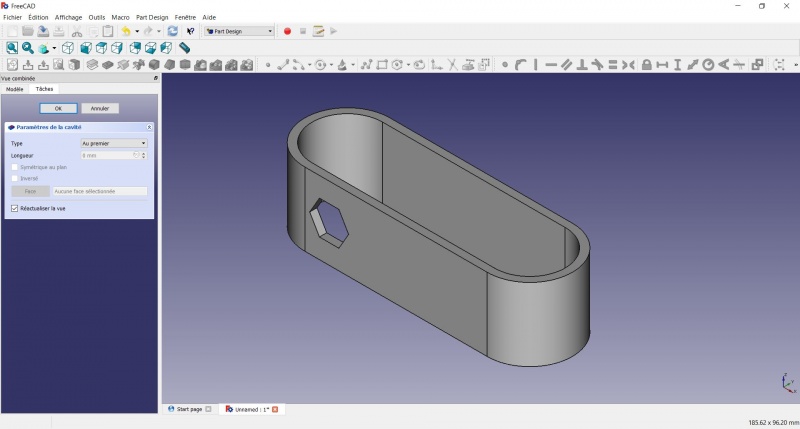
Create a hole
- Click on Axonometric among the standard views, to better see what will happen.
- Click on
 Pocket.
 - Select to the first in the dropdown menu and click OK.
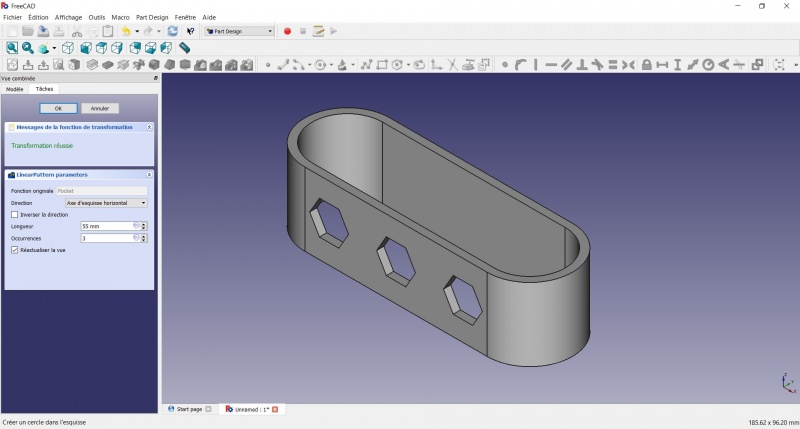
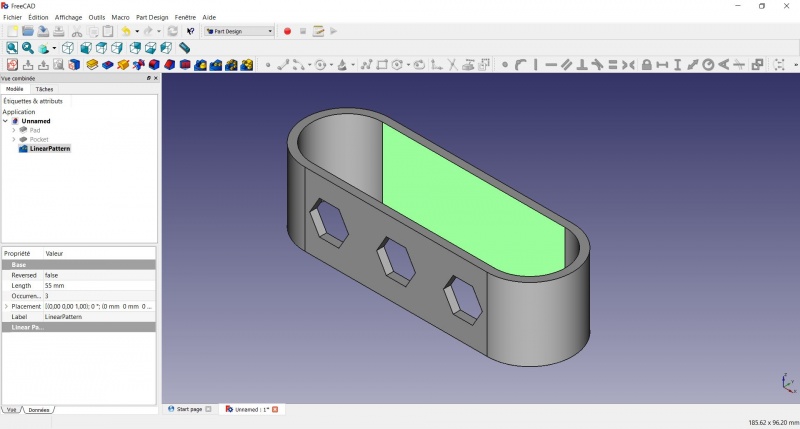
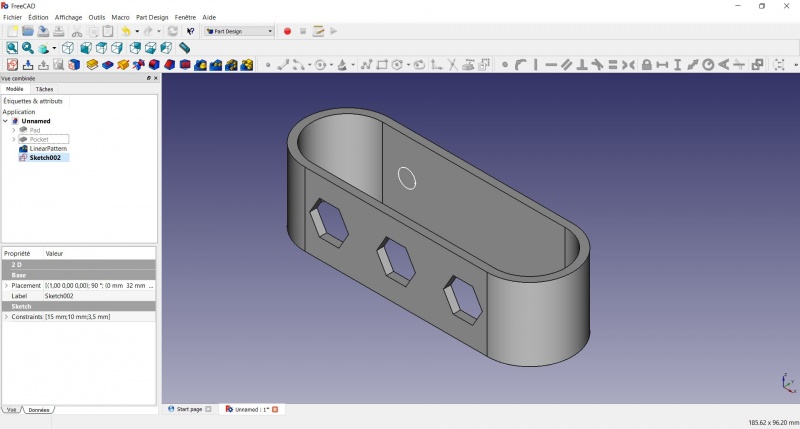
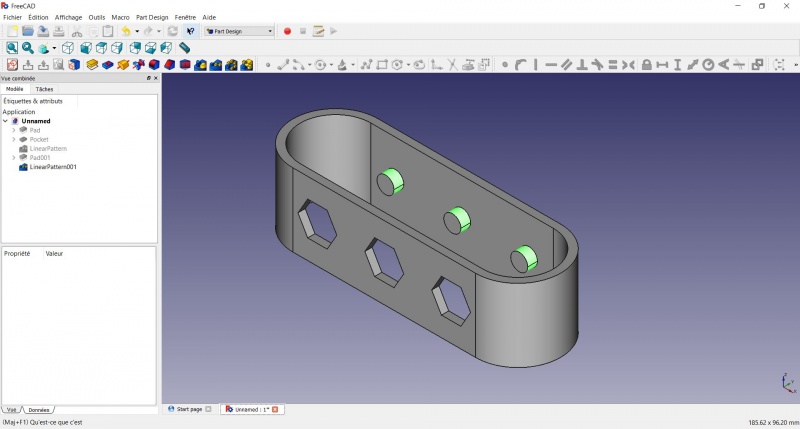
Linear repetition
- In the Combo View on the left, select the tree view instead of the contextual task menu, click on the pocket feature.
- Click on
 LinearPattern.
 - Set the length at 55mm and occurencies at 3, then click OK.
Create a sketch on it
- Select the inner face
- Create a New sketch. As a face was selected it will not ask you to choose a plane.
- Click on Circle, click to place the center, move the pointer and click to define the radius.
- Click on the center of the circle
- Click on the horizontal line of the XY plane
- Click on Distance
- A dialog prompts you to set a dimension. Enter 15mm, click OK.
- Click on the center of the circle
- Click on the vertical of the XY plane
- Click on Distance
- A dialog prompts you to set a dimension. Enter 10mm, click OK.
- Click on the circle
- Click on Radius
- A dialog prompts you to set a dimension. Enter 3.5mm, click OK.
- To leave the sketch, click either on the "Close" button on the left, or the icon in the toolbar, or press ESC.
Create a pad
- Click on Axonometric among the standard views, to better see what will happen.
- Click on Pad.
- Enter 4mm and click OK.

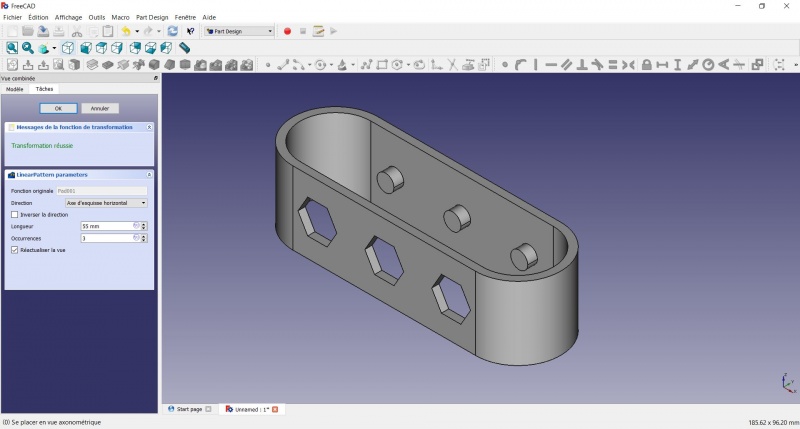
Linear repetition
- In the Combo View on the left, select the tree view instead of the contextual task menu, click on the pad feature.
- Click on LinearPattern.
- Set the length at 55mm and occurencies at 3, then click OK.
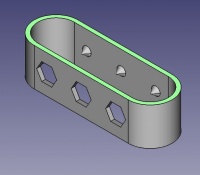
Draft
- Select the side of each round pads
- Click on
 Draft.
 - Set the draft angle at 40°.
- Click on "Neutral plane" and select the face on which the sketch is drawn.
- Tick "Invert the draft direction".
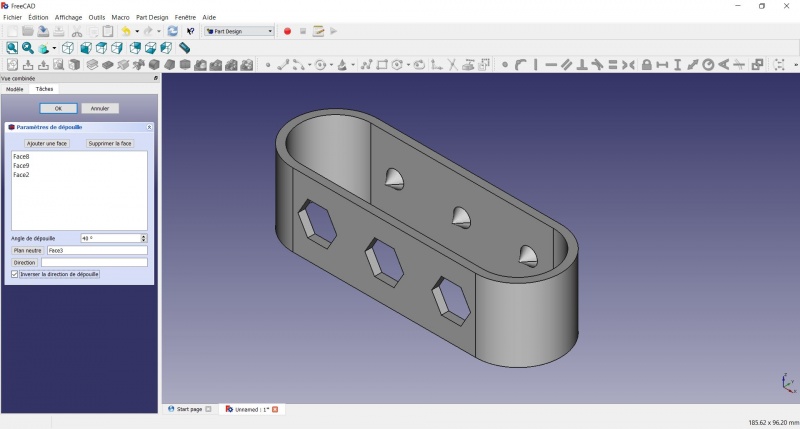
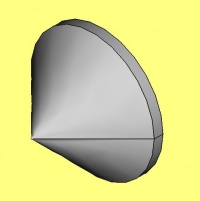
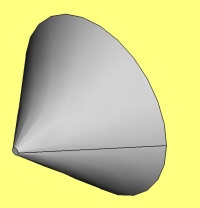
We could have used a chamfer to do something similar, but the draft is more appropriate in this case.
Chamfer = left / Draft = right
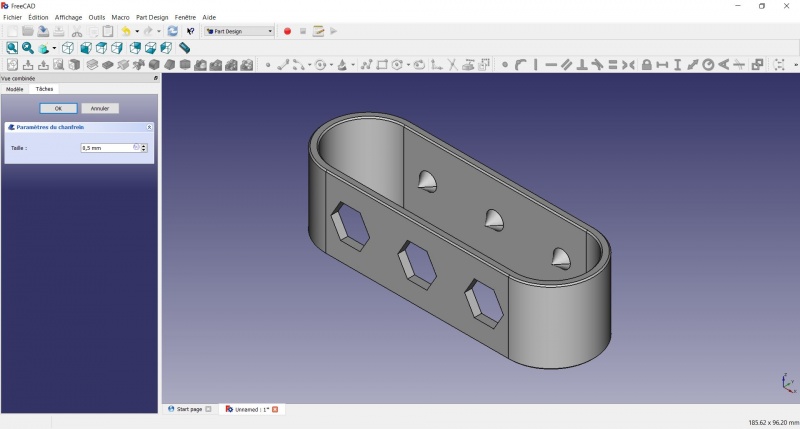
Finishes
- Holding CTRL select the bottom and top faces.
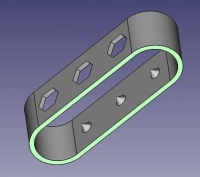
- Add a Chamfer of 0,5mm.
- Add a
Perfect!
Export as a .STL
- In the Combo View on the left, select the tree view instead of the contextual task menu, click on the last feature (the chamfer).
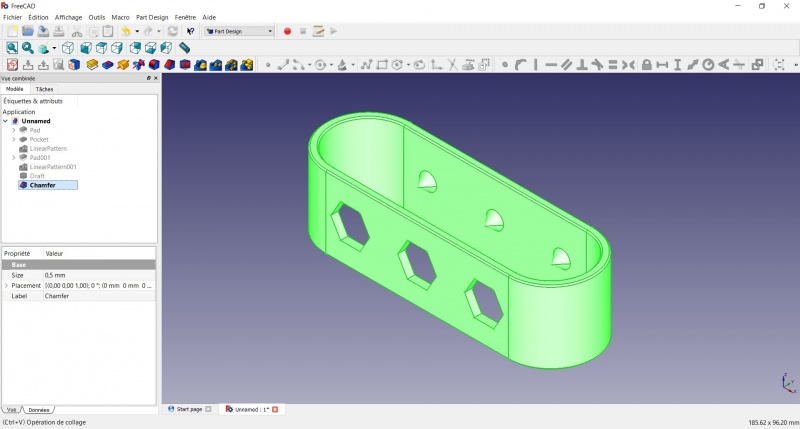
- Now you can select "Export..." from the File menu at the top left, and select the file format .STL.
- Print it instead of the first version or to replace it if it eventually broke ;-)
Эта страница получена от https://wiki.freecad.org/Toothbrush_Head_Stand