|
|
| poziția meniului |
|---|
| Draft → Line |
| Ateliere |
| Draft, Arch |
| scurtătură |
| L I |
| Prezentat în versiune |
| - |
| A se vedea, de asemenea, |
| Draft Wire |
Description
Descriere
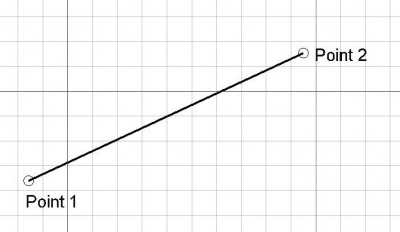
Instrumentul Linie creează o linie dreaptă, definită prin două puncte. Ea utilizează Draft Linestyle definită în bara de instrumente Draft. Instrumentul Linie se comportă exact ca instrumentul Draft Wire , cu excepția faptului că se oprește după două puncte.
A Draft Line is in fact a Draft Wire with only two points.
Usage
See also: Draft Tray, Draft Snap and Draft Constrain.
Cum se utilizează
- Apăsați butonul
 Draft Line sau apăsați tastele L apoi I
 - Faceți clic pe un prim punct din vizualizarea 3D sau tastați un coordinate
- Faceți clic pe un al doilea punct din vizualizarea 3D sau tastați un coordinate
Options
The single character keyboard shortcuts available in the task panel can be changed. See Draft Preferences. The shortcuts mentioned here are the default shortcuts.
Opțiuni
- Apăsați X, Y sau Z după primul punct pentru a restrânge al doilea punct de pe axa dată.
- Pentru a introduce manual coordonatele, pur și simplu introduceți numerele, apoi apăsați ENTER între fiecare componentă X, Y și Z.
- Apăsați tasta R sau faceți clic pe caseta de selectare pentru a bifa/debifa butonul Relativ. Dacă modul relativ este activ, coordonatele celui de-al doilea punct sunt relative la prima. Dacă nu, ele sunt absolute, luate din punctul de origine (0,0,0).
- Apăsați tasta T sau faceți clic pe caseta de selectare pentru a bifa/debifa butonul Continue. Dacă modul continuat este activat, instrumentul Linie se va reporni după ce dați cel de-al doilea punct, permițându-vă să desenați un alt segment de linie fără a apăsa din nou butonul Linie.
- Apăsați CTRL în timp ce desenați pentru a forța ancorarea snapping punctul dvs. către cea mai apropiată locație, independent de distanța.
- Apăsați SHIFT în timp ce desenați constrain al doilea punct pe orizontală sau pe verticală în raport cu primul punct.
- Apăsați tasta CTRL + Z sau apăsați pe ['Image: Draft UndoLine.png pentru a anula ultimul punct.
- Apăsați butonul ESC sau butonul Anulare pentru a întrerupe comanda curentă.
- Dacă sunt selectate mai multe linii Draft Lines, ele pot fi transformate într-un filament prin apăsarea butonului Upgrade Draft.
Notes
- A Draft Line can be edited with the Draft Edit command.
- Draft Lines and Draft Wires can be joined with the Draft Wire command, the Draft Join command or the Draft Upgrade command.
Preferences
See also: Preferences Editor and Draft Preferences.
- To change the initial focus of the task panel to the Length input box: Edit → Preferences → Draft → General → Set focus on Length instead of X coordinate. Note that you must move the pointer in the 3D View for the change to take effect.
- If the Edit → Preferences → Draft → General → Create Part primitives if possible option is checked, the command will create a Part Line instead of a Draft Line.
Properties
Proprietăți
- DATEStart: Punctul de pornire
- DATEEnd: Punctul final
- DATESubdivisions: Împărțirea liniei cu numărul de subdiviziuni dat introduced in 0.16/ro
Scripting
Script-Programare
Instrumentul Linie poate fi utilizat în macros și din consola Python utilizând următoarea funcție:
To create a Draft Line use the make_line method (introduced in 0.19) of the Draft module. This method replaces the deprecated makeLine method.
line = make_line(p1, p2)
line = make_line(LineSegment)
line = make_line(Shape)
- Creează un obiect
Lineîntre cei două puncte punctelep1șip2, fiecare definit caFreeCAD.Vector - Creează un obiect
Linedintr-unPart.LineSegment - Creează un obiect
Linede la primul vârf la ultimul vârf alShapedată - Se va folosi versiunea curentă Draft Linestyle
Exempluː
import FreeCAD as App
import Draft

doc = App.newDocument()

p1 = App.Vector(0, 0, 0)
p2 = App.Vector(1000, 500, 0)
p3 = App.Vector(-250, -500, 0)
p4 = App.Vector(500, 1000, 0)

line1 = Draft.make_line(p1, p2)
line2 = Draft.make_line(p3, p4)

doc.recompute()
Această pagină este preluată de la https://wiki.freecad.org/Draft_Line