The external Render Workbench should be used instead.

Introdução
A Bancada Raytracing é utilizada para gerar imagens fotorrealísticas de modelos ao processá-las com um renderizador externo.
The ![]() Raytracing Workbench is used to generate photorealistic images of your models by processing them with an external renderer.
Raytracing Workbench is used to generate photorealistic images of your models by processing them with an external renderer.
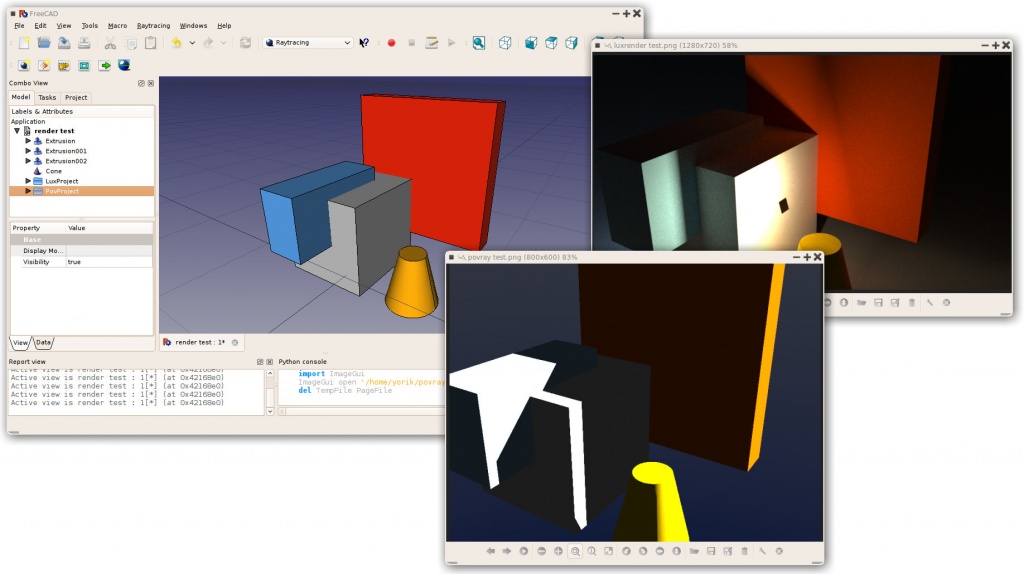
A bancada Raytracing trabalha com works with templates, os quais são arquivos de projetos que definem uma cena para o seu modelo 3D. Você pode colocar luzes e geometrias, como planos de base, e também contém espaços reservados para a posição da câmera e para as informações do material dos objetos na cena. O projeto pode ser exportado para um arquivo pronto para renderização ou renderizado diretamente no FreeCAD.
Atualmente, dois renderizadores são suportados: povray e luxrender. Para poder renderizar a partir do FreeCAD, pelo menos um desses programas deve ser instalado e configurado em seu sistema. No entanto, se nenhum renderizador estiver instalado, você ainda poderá exportar um arquivo de projeto para ser renderizado em outro momento.
The Raytracing workbench is essentially obsolete. New development is happening in the Render Workbench, which is intended as its replacement. This workbench is fully programmed in Python so it is much easier to extend than the current workbench which is programmed in C++. Nevertheless, the information in this page is generally useful for the new workbench, as both modules work basically in the same way.
Typical workflow
Fluxo de trabalho típico
- Crie ou abra um projeto do FreeCAD, adicione alguns objetos sólidos ( Part-based ou PartDesign-based); malhas atualmente não são suportadas.
- Crie um projeto de Raytracing (povray ou luxrender).
- Selecione os objetos que você deseja adicionar ao projeto Raytracing e adicione-os.
- Exportar o arquivo do projeto ou renderizá-lo diretamente.

Workflow of the Raytracing Workbench; the workbench prepares a project file from a given template, and then calls an external program to produce the actual rendering of the scene. The external renderer can be used independently of FreeCAD.
Tools
Project tools
These are the main tools for exporting your 3D work to external renderers.
 New PovRay project: Insert new PovRay project in the document
 New LuxRender project: Insert new LuxRender project in the document
 Insert part: Insert a view of a Part in a raytracing project
 Reset camera: Matches the camera position of a raytracing project to the current view
 Export project: Exports a raytracing project to a scene file for rendering in an external renderer
 Render: Renders a raytracing project with an external renderer
Utilities
These are helper tools to perform specific tasks manually.
 Export view to povray: Write the active 3D view with camera and all its content to a povray file
 Export camera to povray: Export the camera position of the active 3D view in POV-Ray format to a file
 Export part to povray: Write the selected Part (object) as a povray file
Preferences
 Preferences: Preferences available in for the Raytracing tools.
Tutorials
Creating a povray file manually
The utility tools described above allow you to export the current 3D view and all of its content to a Povray file. First, you must load or create your CAD data and position the 3D View orientation as you wish. Then choose "Utilities → Export View..." from the raytracing menu.
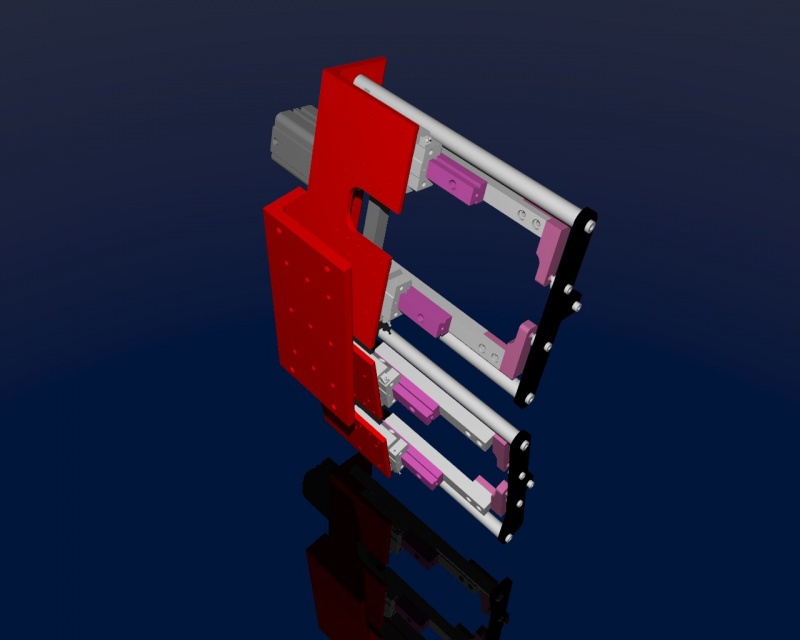
You will be asked for a location to save the resulting *.pov file. After that you can open it in Povray and render:

As usual in a renderer you can make big and nice pictures:
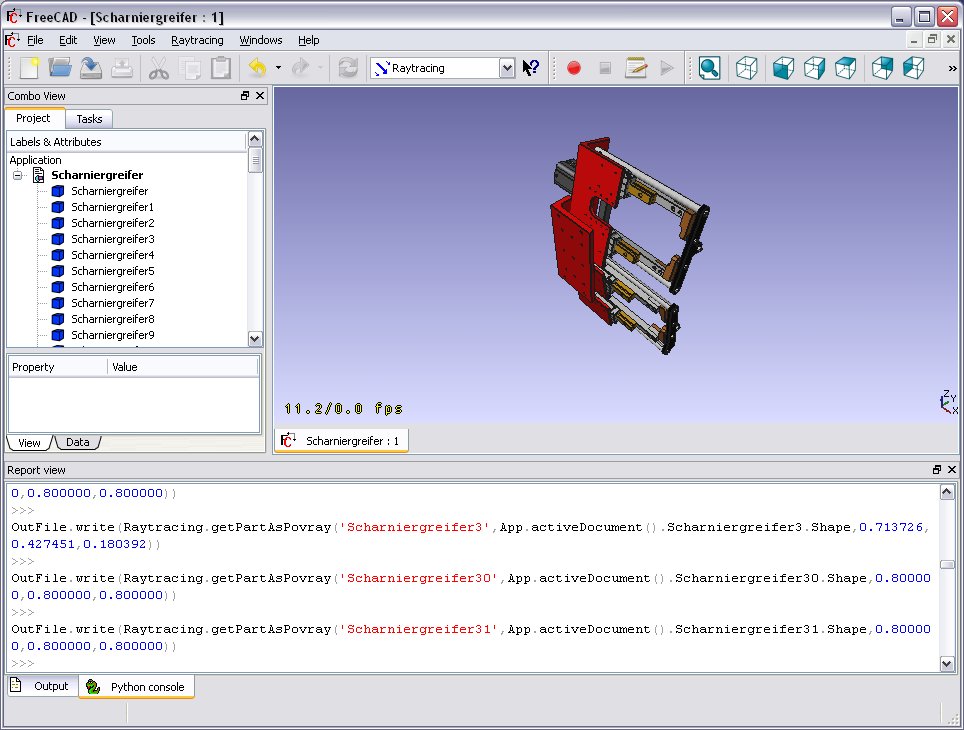
Scripting
See the Raytracing API example for information on writing scenes programmatically.
Links
POV-Ray
LuxRender
Future possible renderers to implement
Exporting to Kerkythea
Although direct export to the Kerkythea XML-File-Format is not supported yet, you can export your Objects as Mesh-Files (.obj) and then import them in Kerkythea.
- if using Kerkythea for Linux, remember to install the WINE-Package (needed by Kerkythea for Linux to run)
- you can convert your models with the help of the mesh workbench to meshes and then export these meshes as .obj-files
- If your mesh-export resulted in errors (flip of normals, holes ...) you may try your luck with netfabb studio basic
- Free for personal use, available for Windows, Linux and Mac OSX.
- It has standard repair tools which will repair you model in most cases.
- another good program for mesh analysing/repairing is Meshlab
- Open Source, available for Windows, Linux and Mac OSX.
- It has standard repair tools which will repair you model in most cases (fill holes, re-orient normals, etc.)
- you can use "make compound" and then "make single copy" or you can fuse solids to group them before converting to meshes
- remember to set in Kerkythea an import-factor of 0.001 for obj-modeler, since Kerkythea expects the obj-file to be in m (but standard units-scheme in FreeCAD is mm)
- Within WIndows 7 64-bit Kerkythea does not seem to be able to save these settings.
- So remember to do that each time you start Kerkythea
- if importing multiple objects in Kerkythea you can use the "File → Merge" command in Kerkythea
Development
These pages refer to the new workbench, programmed in Python, meant to replace the current Raytracing Workbench.
- Render Workbench
- Render Workbench (announcement only, no discussion)
- FreeCAD Renderer Workbench improvements
Esta página foi obtida de https://wiki.freecad.org/Raytracing_Workbench