The external Render Workbench should be used instead.

Introduction
The ![]() Raytracing Workbench is used to generate photorealistic images of your models by processing them with an external renderer.
Raytracing Workbench is used to generate photorealistic images of your models by processing them with an external renderer.
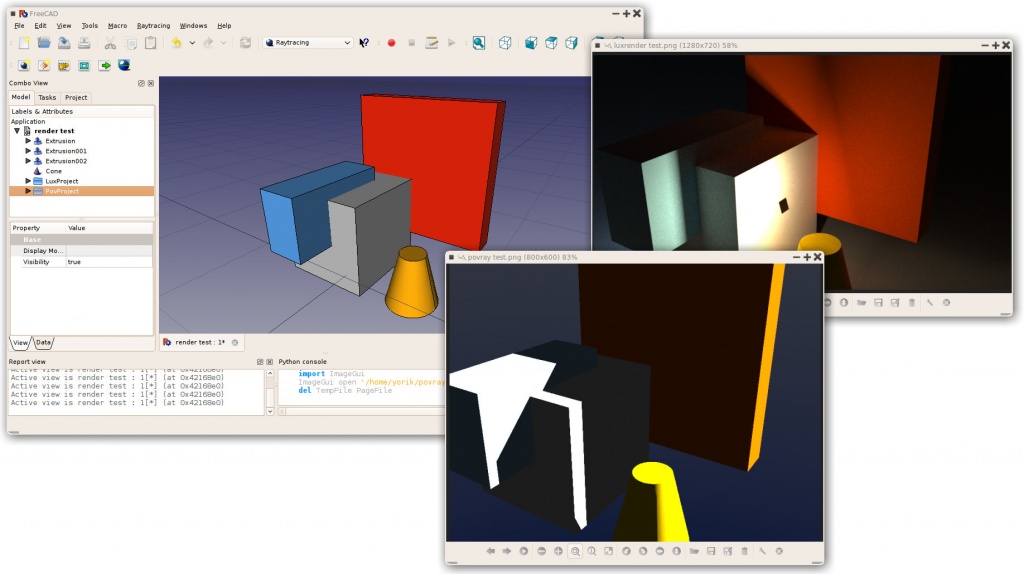
The Raytracing Workbench works with templates, which are project files that define a scene for your 3D model. You can place lights and geometry such as ground planes, and it also contains placeholders for the position of the camera, and for the material information of the objects in the scene. The project can then be exported to a ready-to-render file, or be rendered directly within FreeCAD.
Currently, two renderers are supported: POV-Ray and LuxRender. To be able to render from within FreeCAD, at least one of these programs must be installed and configured in your system. However, if no renderer is installed, you will still be able to export a project file to be rendered at another time.
The Raytracing workbench is obsolete, the external Render Workbench is its replacement. Nevertheless, the information on this page is generally useful for the new workbench, as both basically work in the same way.
Typical workflow
- Create or open a FreeCAD project, add some solid objects (Part-based or PartDesign-based); meshes are currently not supported.
- Create a Raytracing project (povray or luxrender).
- Select the objects that you wish to add to the Raytracing project and add them.
- Export the project file or render it directly.

Workflow of the Raytracing Workbench; the workbench prepares a project file from a given template, and then calls an external program to produce the actual rendering of the scene. The external renderer can be used independently of FreeCAD.
Tools
Project tools
These are the main tools for exporting your 3D work to external renderers.
 New PovRay project: Insert new PovRay project in the document
 New LuxRender project: Insert new LuxRender project in the document
 Insert part: Insert a view of a Part in a raytracing project
 Reset camera: Matches the camera position of a raytracing project to the current view
 Export project: Exports a raytracing project to a scene file for rendering in an external renderer
 Render: Renders a raytracing project with an external renderer
Utilities
These are helper tools to perform specific tasks manually.
 Export view to povray: Write the active 3D view with camera and all its content to a povray file
 Export camera to povray: Export the camera position of the active 3D view in POV-Ray format to a file
 Export part to povray: Write the selected Part (object) as a povray file
Preferences
 Preferences: Preferences available in for the Raytracing tools.
Tutorials
Creating a povray file manually
The utility tools described above allow you to export the current 3D view and all of its content to a Povray file. First, you must load or create your CAD data and position the 3D View orientation as you wish. Then choose "Utilities → Export View..." from the raytracing menu.
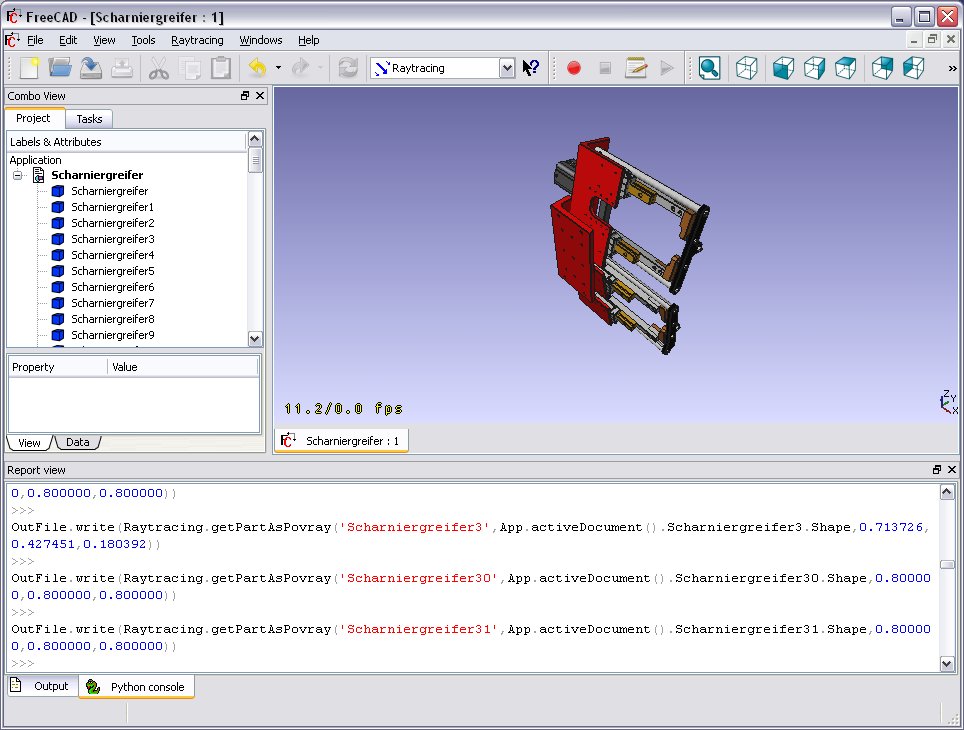
You will be asked for a location to save the resulting *.pov file. After that you can open it in Povray and render:

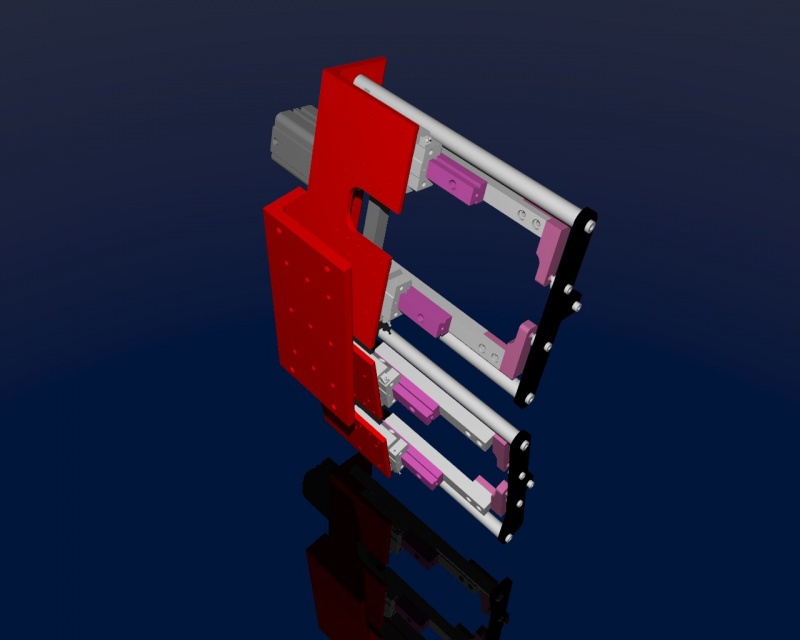
As usual in a renderer you can make big and nice pictures:
Scripting
See the Raytracing API example for information on writing scenes programmatically.
Links
POV-Ray
LuxRender
Future possible renderers to implement
Exporting to Kerkythea
Although direct export to the Kerkythea XML-File-Format is not supported yet, you can export your Objects as Mesh-Files (.obj) and then import them in Kerkythea.
- if using Kerkythea for Linux, remember to install the WINE-Package (needed by Kerkythea for Linux to run)
- you can convert your models with the help of the mesh workbench to meshes and then export these meshes as .obj-files
- If your mesh-export resulted in errors (flip of normals, holes ...) you may try your luck with netfabb studio basic
- Free for personal use, available for Windows, Linux and Mac OSX.
- It has standard repair tools which will repair you model in most cases.
- another good program for mesh analysing/repairing is Meshlab
- Open Source, available for Windows, Linux and Mac OSX.
- It has standard repair tools which will repair you model in most cases (fill holes, re-orient normals, etc.)
- you can use "make compound" and then "make single copy" or you can fuse solids to group them before converting to meshes
- remember to set in Kerkythea an import-factor of 0.001 for obj-modeler, since Kerkythea expects the obj-file to be in m (but standard units-scheme in FreeCAD is mm)
- Within WIndows 7 64-bit Kerkythea does not seem to be able to save these settings.
- So remember to do that each time you start Kerkythea
- if importing multiple objects in Kerkythea you can use the "File → Merge" command in Kerkythea
Development
These pages refer to the new workbench, programmed in Python, meant to replace the current Raytracing Workbench.
- Render Workbench
- Render Workbench (announcement only, no discussion)
- FreeCAD Renderer Workbench improvements
Bu sayfa şu adresten alınmıştır https://wiki.freecad.org/Raytracing_Workbench