| Thema |
|---|
| TechDraw |
| Niveau |
| Anfänger |
| Zeit zum Abschluss |
| 10 Minuten |
| Autoren |
| Andergrin |
| FreeCAD-Version |
| 0.19 |
| Beispieldateien |
| None |
| Siehe auch |
| None |
Einleitung
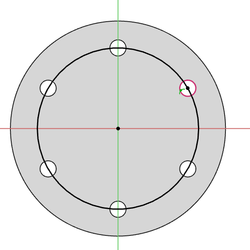
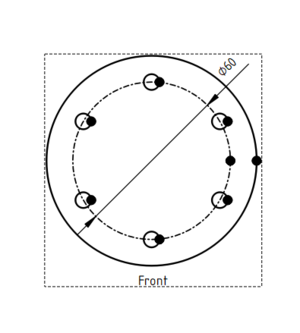
This tutorial explains how to add a pitch circle to a TechDraw view. It assumes that the model is a
PartDesign Body with at least three holes in a circular pattern. For the circle a separate sketch will be created. A similar procedure can be used in other situations and to add other annotation-like elements to TechDraw views.
In FreeCAD version 0.20 and above a pitch circle can be created with the TechDraw ExtensionHoleCircle tool.


Create the sketch for the circle
- Activate the
PartDesign Body. This will also activate the
PartDesign Workbench, if required.
- In the 3D view select the correct face belonging to the body.
- Create a new sketch with the
PartDesign NewSketch command.
- The sketch will be attached to the selected face.
- Call the
Sketcher External command.
- Select three circular edges (holes) from the body.
- Use the
Sketcher Create3PointCircle command to create a circle constrained to the center points of the external geometry.
- The sketch should now be fully constrained.
- Close the sketch.
Create the TechDraw view
- Switch to the
TechDraw Workbench.
- If you don't have one already: create a
TechDraw page.
- Make sure the 3D view is properly aligned.
- Hold down the Ctrl key and in the Tree view select the body and the sketch that was just just created.
- Insert a new view by calling the
TechDraw View command.
- Switch to the TechDraw page.
- Select the circle.
- Call the
TechDraw DecorateLine command.
- Change the Style and Weight of the circle.
Diese Seite wird abgerufen von https://wiki.freecad.org/TechDraw_Pitch_Circle_Tutorial