|
|
| Menu location |
|---|
| TechDraw → Add Lines → Leader Line |
| Workbenches |
| TechDraw |
| Default shortcut |
| None |
| Introduced in version |
| 0.19 |
| See also |
| TechDraw RichTextAnnotation, TechDraw WeldSymbol |
Description
The TechDraw LeaderLine tool adds a line to a View. Other annotation objects (such as Rich Text Annotations) can be connected to the leaderline to form complex annotations.
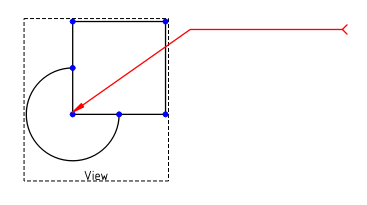
Leaderline added to a View
Usage create
- Select a View.
- There are several ways to invoke the tool:
- Press the
 Leader Line button.
 - Select the TechDraw → Add Lines → Leader Line option from the menu.
- Press the
- A task panel opens.
- Press the Pick Points button.
- Pick the first point on the page to define the start point of the line.
- Pick the next point on the page. Hold down Ctrl to snap to multiples of 22.5° angles. Optionally use a double-click instead of a single-click to finish entering points.
- Optionally add more points.
- If you have not double-clicked a point: press the Save Points button.
- Optionally change the Start Symbol, End Symbol, Color, Width and Style of the leader. See Properties for more information.
- Press the OK button.
Usage edit
- Double-click a Leaderline in the Tree View.
- A task panel opens.
- To edit the points:
- Press the Edit Points button.
- The Leaderline is marked with temporary nodes.
- Drag one or more of the nodes to a new position.
- Press the Save Changes button.
- Optionally change the Start Symbol, End Symbol, Color, Width and Style of the leader. See Properties for more information.
- Press the OK button.
Notes
- You cannot add or remove points from an existing Leaderline.
- If no points were specified at creation time a short line is placed at the center of the View. There is no way to fix such a line, it should be deleted.
- By default the Leader line auto horizontal preference is checked. This means that the last line segment of new Leaderlines is drawn horizontally. If there is only one segment the result is then a single horizontal line.
- You can turn off this auto horizontal feature for existing Leaderlines by changing their DataAuto Horizontal property.
Properties
Data
Base
- DataStart Symbol (
Enumeration): The symbol at the start of the leaderline. Options: Filled Arrow,
  Open Arrow,
  Tick,
Tick,  Dot,
Dot,  Open Circle,
  Fork,
Fork,  Filled Triangle, None.
 - DataEnd Symbol (
Enumeration): The symbol at the end of the leaderline. Idem. - DataX (
Distance): The X-coordinate of the leaderline relative to the View. - DataY (
Distance): The Y-coordinate of the leaderline relative to the View.
Leader
- DataLeader Parent (
Link): The View the leaderline is attached to. - DataWay Points (
VectorList): The points of the leaderline. - DataScalable (
Bool): Specifies if the leaderline scales with DataLeader Parent. - DataAuto Horizontal (
Bool): Specifies if the last leaderline segment is forced to be horizontal.
View
Base
- ViewKeep Label (
Bool): Not used. - ViewStack Order (
Integer): Over or underlap relative to other drawing objects. introduced in 0.21
Line Format
- ViewColor (
Color): The color of the leaderline. - ViewLine Style (
Enumeration): The style of the leaderline. Options: NoLine, Continuous,
  Dash,
Dash,  Dot,
Dot,  DashDot,
  DashDotDot.
 - ViewLine Width (
Length): The width of the leaderline.
Scripting
See also: Autogenerated API documentation and FreeCAD Scripting Basics.
The LeaderLine tool can be used in macros and from the Python Console by using the following functions:
myPage = FreeCAD.ActiveDocument().Page
myBase = FreeCAD.ActiveDocument().View
leaderObj = FreeCAD.ActiveDocument.addObject("TechDraw::DrawLeaderLine", "DrawLeaderLine")
FreeCAD.activeDocument().myPage.addView(leaderObj)
FreeCAD.activeDocument().leaderObj.LeaderParent = myBase
#first waypoint is always (0,0,0)
#rest of waypoints are positions relative to (0,0,0)
leaderObj.WayPoints = [p0,p1,p2]
leaderObj.X = 5
leaderObj.Y = 5
This page is retrieved from https://wiki.freecad.org/TechDraw_LeaderLine