|
|
| Ubicación en el Menú |
|---|
| Croquizador → Restricciones del Croquizador → Bloquear |
| Entornos de trabajo |
| Croquizador, Diseño de Piezas |
| Atajo de teclado por defecto |
| Ninguno |
| Introducido en versión |
| - |
| Ver también |
| Croquizador RestringirBloque |
"Crea una restricción de bloqueo sobre el elemento seleccionado"
Descripción
Esta restricción trata de restringir completamente cualquier elemento seleccionado.
The ![]() Sketcher ConstrainLock tool applies horizontal dimension and vertical dimension constraints to points. If a single point is selected the constraints reference the origin of the sketch. If two or more points are selected the constraints reference the last point in the selection.
Sketcher ConstrainLock tool applies horizontal dimension and vertical dimension constraints to points. If a single point is selected the constraints reference the origin of the sketch. If two or more points are selected the constraints reference the last point in the selection.
Debido a que FreeCAD aún está en desarrollo - esta herramienta presenta un comportamiento extraño cuando se intenta 'bloquear' cualquier cosa que no sea un punto. Por ejemplo (para V0.12 R4802), cuando se bloquea una circunferencia por su contorno y no por su punto central, aparece una restricción horizontal y una vertical en el letrero de diálogo pero no en la ventana gráfica.
Funcionamiento
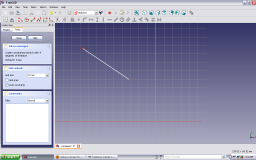
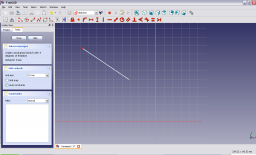
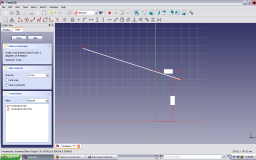
- En primer lugar es necesario resaltar una entidad que quieras restringir. Por las razones mencionadas anteriormente es preferible sólo destacar un punto.
-
El destacado de un elemento de dibujo se logra moviendo el ratón sobre el elemento y pulsando el botón izquierdo del ratón.
Un elemento destacado cambiará su color a verde.
-
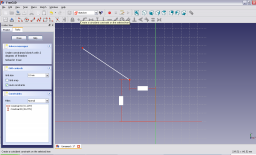
Una vez que un elemento está destacado, pulsar con el botón izquierdo del ratón en la restricción de bloquear sirve para bloquear el elemento destacado en su ubicación. Esto normalmente se manifiesta como dos restricciones: Una distancia horizontal desde el origen de coordenadas del dibujo, y una restricción vertical desde el origen del sistema de coordenadas. Estas se establecen por defecto para las coordenadas actuales del punto.
-
Las restricciones Vertical y Horizontal que forman el bloqueo se pueden editar haciendo doble clic en la restricción apropiada para ser editada ya sea en el dibujo o en la pestaña de restricciones del panel. Esto abrirá un letrero de diálogo para editar la restricción. Pulsar en la componente horizontal de la restricción produce:
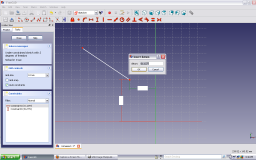 .
. - Introduce el valor deseado en el letrero de diálogo y pulsa OK.
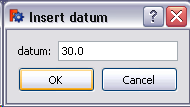
- El nuevo valor de la restricción se aplica al dibujo.
- La restricción vertical se puede editar de forma similar para restringir el punto a la ubicación deseada.
See also: Drawing aids.
Continue mode
- Make sure there is no selection.
- There are several ways to invoke the tool:
- introduced in 1.0: If the Dimensioning constraints preference is set to
Single tool(default): press the down arrow to the right of the
 button and select the
  Lock Position option from the dropdown.
 - If this preference has a different value (and in 0.21 and below): press the Lock Position button.
- Select the Sketch → Constraints → Lock Position option from the menu.
- introduced in 1.0: Right-click in the 3D View and select the Dimension → Lock Position option from the context menu.
- Use the keyboard shortcut: K then L.
- introduced in 1.0: If the Dimensioning constraints preference is set to
- The cursor changes to a cross with the tool icon.
- Select a single point.
- Two constraints are added.
- Optionally keep creating constraints.
- To finish, right-click or press Esc, or start another geometry or constraint creation tool.
Run-once mode
- Select one or more points.
- Invoke the tool as described above, or with the following additional option:
- Right-click in the Elements section of the Sketcher Dialog and select the Lock Position option from the context menu.
- Right-click in the Elements section of the Sketcher Dialog and select the
- Depending on the selection two or more constraints are added.
Notes
- There is no automatic prompt to edit the constraint values. If required values can be edited manually.
Esta página ha sido recuperada de https://wiki.freecad.org/Sketcher_ConstrainLock