| Argomento |
|---|
| Analisi agli elementi finiti |
| Livello di difficoltà |
| Base |
| Tempo di esecuzione |
| Autori |
| Sudhanshu Dubey |
| Versione di FreeCAD |
| 0.19 o superiore |
| Files di esempio |
| Vedere anche |
| Nessuno |
Introduzione
Questo esempio ha lo scopo di mostrare come simulare il sesto esempio di Elmer GUI Tutorials, Equazione elettrostatica - Capacità di due palline , utilizzando i nuovi Esempi di FEM. Illustra come impostare l'esempio, studiarne le varie parti, risolverlo usando il solver Elmer e visualizzare i risultati usando Clip Filter.
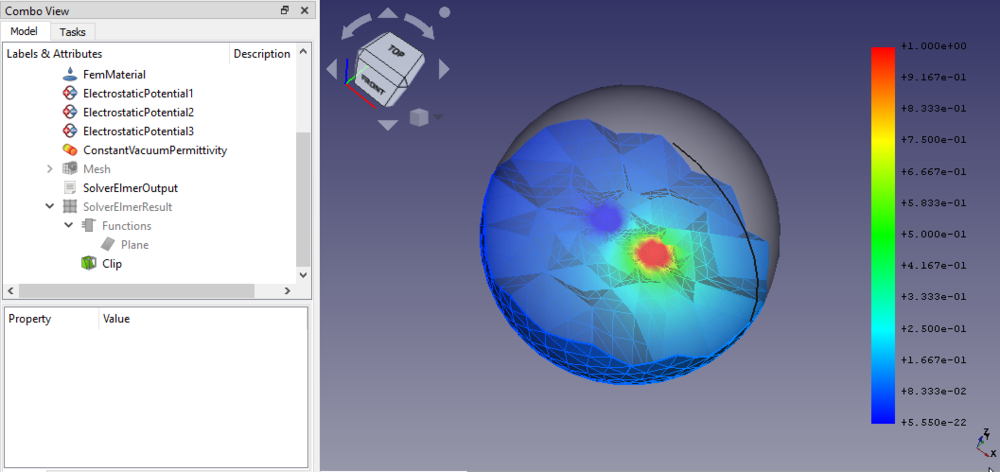
The final result of this tutorial
Requirements
- A compatible version of FreeCAD designated in the tutorial overview.
- Use the Help → About FreeCAD to see the version of FreeCAD installed
- No external software is needed for loading the example, viewing the mesh and geometry as well as for visualizing the results.
- For solving the finite element analysis (FEA), the solver software Elmer must be installed on your computer. See this page for how to install Elmer.
Set up the example
Load FEM Workbench
- Start FreeCAD, the Start Workbench should be loaded
- Switch to
 FEM workbench.
Load the example
- Go to Utilities →
 Open FEM examples.
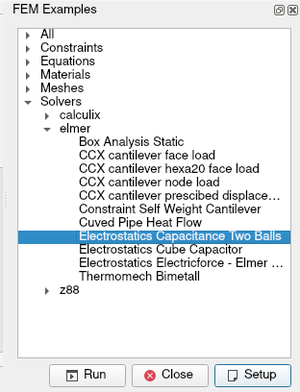
 - When the GUI opens, find and open "Electrostatics Capacitance Two Balls". You can easily find the example in All or in Solvers → Elmer. For opening the example, either double click on it or select it and click Setup.
Understanding the Simulation Case
This case presents the solution of the capacitance of perfectly conducting balls in free space. A voltage difference between the balls results to electric charge being introduced to the system. The balls have also self-capacitance that comes from the voltage difference with the far field. Therefore a symmetric capacitance matrix with of size 2 × 2 needs to be solved. The capacitances may be computed from two different voltage configurations.
Understanding the Model
- The model contains three spheres.
- The two smaller ones are the perfectly conducting balls.
- The bigger one is to simulate the surrounding air.
- The two smaller spheres are fused together and then that fusion is is cut from the bigger sphere.
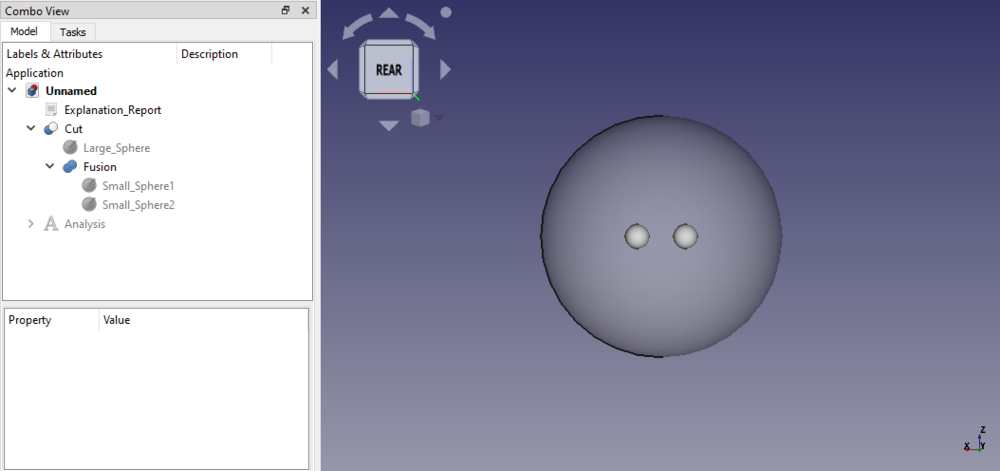
The initial model
Analysis container and its objects
The objects used in this electrostatic analysis:
 Analysis container
 SolverElmer
 Electrostatic, the electrostatics equation
 FemMaterial, a fluid material to represent the surrounding air
 ElectrostaticPotential, constraints (3 of them)
 ConstantVaccumPermittivity, optional
 Mesh, a Gmsh mesh
 MeshRegion, a mesh region for the smaller spheres
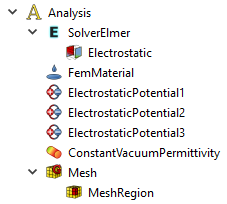
The objects as they appear in the Tree View
Running the FEA
- In Tree View double click on the solver object .
- Click on Write in the same task panel. Watch the log window until it prints "write completed". You can ignore the warning about the vacuum permittivity that might appear.
- Click on Run. Since this is a small analysis it should take a few seconds to run so wait till you see "ELMER SOLVER FINISHED AT" in the output.
- Click on Close in the task panel after the run is finished.
- Two new result objects should be created in the Tree View,
 SolverElmerResult and
  SolverElmerOutput.
If you get an error message on solver binary or similar when triggering the analysis, check the installation of Elmer.
Visualizing Results
- Make sure the mesh is invisible. If not, select the Mesh object and press Space to toggle the visibility.
- Also make sure the Cut object is invisible.
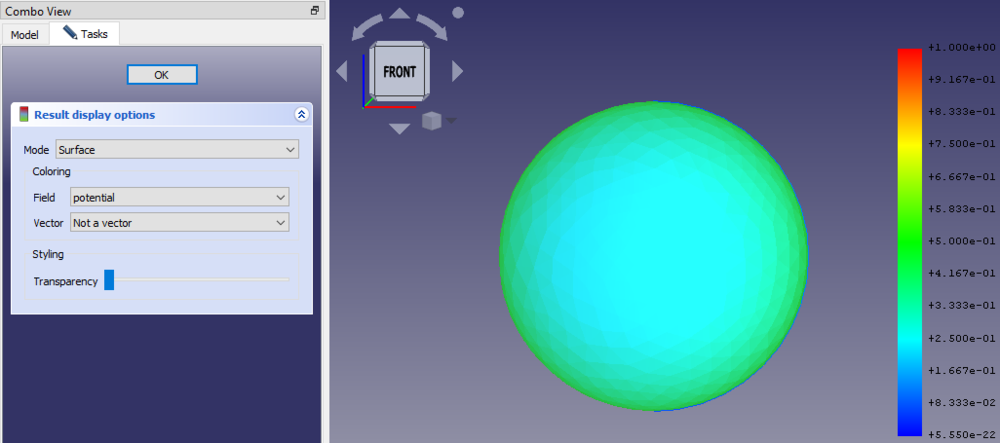
- Double click on the SolverElmerResult object to open its task dialog.
- Change the "Field" to "potential" and press OK.
- You will notice that the color of the sphere has changed to blue and that the gradient on the right is showing values from 0 to 1. It should look something like this:
Post Processing the Result
- While we have successfully visualised the potential result, currently we are only seeing the zero potential in the air surrounding the two balls. To view the potential on the balls we need to apply a clip filter.
- In the Tree View select the SolverElmerResult object and then from the tool bar click on the button
 Region Clip Filter.
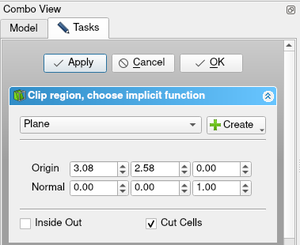
 - This will open a dialog with the filter configurations. Click there on the button
 Create and choose
  Plane. This adds a plane through the center of the sphere at which the result mesh is cut. To smooth the cut face, check the option Cut Cells. Eventually click Apply.
- In the Tree View there is a new entry called Functions. It contains the created Plane. Make it invisible using Space.
- Double-click on the Clip object in the Tree View.
- Change the "Field" to "potential" and press OK.
- Toggle the visibility of the SolverElmerResult object using Space and you should see something like this:
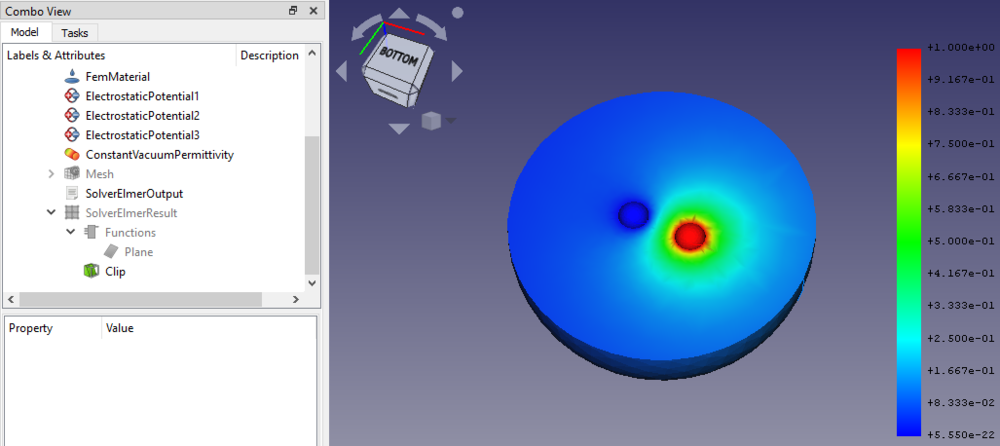
Now we can clearly see that potential distribution in and around the balls.
Note that when ![]() Apply Changes is on, you would have been able to select the "Field" in the clip dialog directly and not to reopen it after the plane was created.
Apply Changes is on, you would have been able to select the "Field" in the clip dialog directly and not to reopen it after the plane was created.
Finding the Capacitance
- Our actual focus is to find the capacitance which is contained in the SolverElmerOutput.
- Double click on SolverElmerOutput to open it. Scroll down till you find:
StatElecSolve: Capacitance matrix computation performed (i,j,C_ij)
StatElecSolve:   1  1    5.07016E+00
StatElecSolve:   1  2    1.69328E+00
StatElecSolve:   2  2    5.07201E+00
- Here, our desired result is
C12 = 1.69328. This value is close to the1.691given in the Elmer GUI Tutorials. We can get an even closer value by making a finer Mesh Region but this activity is left for the user. Also, the user is advised to play with the Clip Filter to get a visual result similar to the first picture of this tutorial.
Questa pagina è recuperata da https://wiki.freecad.org/FEM_Example_Capacitance_Two_Balls