Introduction
The purpose of this page is to cover beginner level examples of the PySide GUI manager (there are accompanying pages PySide Intermediate Examples and PySide Advanced Examples).
Newcomers to GUI programming may stumble over the word "widget". Its meaning outside of computing is usually given as:
"a small gadget or mechanical device, especially one whose name is unknown or unspecified"
For GUI work such as PySide the term "widget" is most often used to refer to the visible elements of the GUI - windows, dialogs, and input/output features. All visible elements of PySide are called widgets, and, for those who are interested, they all descend from a common parent class, QWidget. In addition to the visible elements PySide also offers widgets for networking, XML, multimedia, and database integration.
A widget that is not embedded in a parent widget is called a window and usually windows have a frame and a title bar. The most common types of windows are the "main window" (from the Class QMainWindow) and the various subclasses of the dialog (from the Class QDialog). One big difference is that QDialog is modal (i.e. the user can not do anything outside of the Dialog window while it is open) and the QMainWindow is non-modal which allows the user to interact with other windows in parallel.
This guide is a shortcut list for getting a PySide program working quickly under FreeCAD, it isn't intended to teach Python or PySide. Some sites that do that are:
- PySide tutorial at zetcode.com
- PySide/PyQt Tutorial at PythonCentral.io
- PySide 1.0.7 Reference at Srinikom.github.io (note this is a reference, not a tutorial)
Import statement
PySide is not loaded with Python by default, it must be requested prior to using it. The following commands:
from PySide import QtCore
from PySide import QtGui
cause the 2 parts of PySide to be loaded:
- QtGui holds classes for managing the Graphic User Interface.
- QtCore holds classes that do not directly relate to the management of the GUI (e.g. timers and geometry).
Although it is possible to only import the one that is needed, generally they are both needed and both imported.
The import statements are not repeated in the snippets below; it is assumed that it is done at the beginning in each case.
Simplest Example
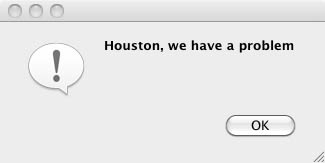
The simplest interaction with PySide is to present a message to the user which they can only accept:
reply = QtGui.QMessageBox.information(None,"","Houston, we have a problem")
Yes or No Query
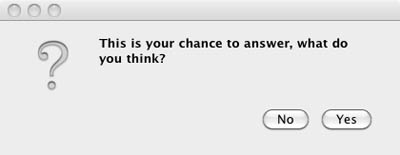
The next most simple interaction is to ask for a yes/no answer:
reply = QtGui.QMessageBox.question(None, "", "This is your chance to answer, what do you think?",
         QtGui.QMessageBox.Yes | QtGui.QMessageBox.No, QtGui.QMessageBox.No)
if reply == QtGui.QMessageBox.Yes:
         # this is where the code relevant to a 'Yes' answer goes
         pass
if reply == QtGui.QMessageBox.No:
         # this is where the code relevant to a 'No' answer goes
         pass
Enter Text Query
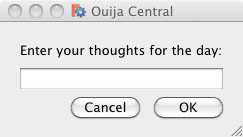
The next code snippet asks the user for a piece of text - note this can be any key on the keyboard really:
reply = QtGui.QInputDialog.getText(None, "Ouija Central","Enter your thoughts for the day:")
if reply[1]:
	# user clicked OK
	replyText = reply[0]
else:
	# user clicked Cancel
	replyText = reply[0] # which will be "" if they clicked Cancel
Remember that even if the user enters only digits, "1234" for example, they are strings and must be converted to number representation with either of the following:
anInteger = int(userInput) # to convert to an integer from a string representation

aFloat = float(userInput) # to convert to a float from a string representation
More Than 2 Buttons
The final Beginner Level example is of how to build a dialog with an arbitrary number of buttons. This example is programmatically too complex to be invoked from a single Python statement so in some ways it should be on the next page which is PySide Intermediate Examples. But on the other hand this is often all that is needed without getting into complex GUI definitions, so the code is placed at the end of this page rather than the beginning of the next.
from PySide import QtGui, QtCore

class MyButtons(QtGui.QDialog):
	""""""
	def __init__(self):
		super(MyButtons, self).__init__()
		self.initUI()
	def initUI(self):
		option1Button = QtGui.QPushButton("Option 1")
		option1Button.clicked.connect(self.onOption1)
		option2Button = QtGui.QPushButton("Option 2")
		option2Button.clicked.connect(self.onOption2)
		option3Button = QtGui.QPushButton("Option 3")
		option3Button.clicked.connect(self.onOption3)
		option4Button = QtGui.QPushButton("Option 4")
		option4Button.clicked.connect(self.onOption4)
		option5Button = QtGui.QPushButton("Option 5")
		option5Button.clicked.connect(self.onOption5)
		#
		buttonBox = QtGui.QDialogButtonBox()
		buttonBox = QtGui.QDialogButtonBox(QtCore.Qt.Horizontal)
		buttonBox.addButton(option1Button, QtGui.QDialogButtonBox.ActionRole)
		buttonBox.addButton(option2Button, QtGui.QDialogButtonBox.ActionRole)
		buttonBox.addButton(option3Button, QtGui.QDialogButtonBox.ActionRole)
		buttonBox.addButton(option4Button, QtGui.QDialogButtonBox.ActionRole)
		buttonBox.addButton(option5Button, QtGui.QDialogButtonBox.ActionRole)
		#
		mainLayout = QtGui.QVBoxLayout()
		mainLayout.addWidget(buttonBox)
		self.setLayout(mainLayout)
		# define window		xLoc,yLoc,xDim,yDim
		self.setGeometry(	250, 250, 0, 50)
		self.setWindowTitle("Pick a Button")
		self.setWindowFlags(QtCore.Qt.WindowStaysOnTopHint)
	def onOption1(self):
		self.retStatus = 1
		self.close()
	def onOption2(self):
		self.retStatus = 2
		self.close()
	def onOption3(self):
		self.retStatus = 3
		self.close()
	def onOption4(self):
		self.retStatus = 4
		self.close()
	def onOption5(self):
		self.retStatus = 5
		self.close()

def routine1():
	print ('routine 1')

form = MyButtons()
form.exec_()
if form.retStatus==1:
	routine1()
elif form.retStatus==2:
	routine2()
elif form.retStatus==3:
	routine3()
elif form.retStatus==4:
	routine4()
elif form.retStatus==5:
	routine5()
Each piece of code under test would be in a function with the name 'routine1()', 'routine2()', etc. As many buttons as you can fit on the screen may be used. Follow the patterns in the code sample and add extra buttons as needed - the Dialog box will set it's width accordingly, up to the width of the screen.

There is a line of code:
buttonBox = QtGui.QDialogButtonBox(QtCore.Qt.Horizontal)
which causes the buttons to be in a horizontal line. To put them into a vertical line, change the line of code to read:
buttonBox = QtGui.QDialogButtonBox(QtCore.Qt.Vertical)
This page is retrieved from https://wiki.freecad.org/PySide_Beginner_Examples