FreeCAD Logo FreeCAD 1.0
  • Английский Африкаанс Арабский Белорусский Каталанский Чешский Немецкий Греческий Испанский Испанский Баскский Финский Филиппинский Французский Галисийский Хорватский Венгерский Индонезийский Итальянский Японский Кабильский Корейский Литовский Нидерландский Норвежская букмол Польский Португальский Португальский Румынский Русский Словацкий Словенский Сербский Шведский Турецкий Украинский Валенсианский Вьетнамский Китайский Китайский
  • Возможности
  • Скачать
  • Блог
  • Документация
    Индекс документации Приступая к работе Пользовательская документация Руководство по FreeCAD Документация верстаков Документация по кодированию на Python Документация по коду C++ Уроки Часто задаваемые вопросы Политика конфиденциальности О программе FreeCAD
  • Внести вклад
    Как помочь Sponsor Сообщить об ошибке Сделать запрос Задачи и финансирование Руководство по участию в разработке Руководство для разработчиков Переводы
  • Сообщество
    Кодекс поведения Форум The FPA GitHub GitLab Codeberg Mastodon Matrix IRC IRC via Webchat Gitter Discord Reddit Twitter Facebook LinkedIn Календарь
  • ♥ Donate

Donate

$
Информация о SEPA
Пожалуйста, настройте банковский перевод SEPA:
Beneficiary: The FreeCAD project association
IBAN: BE04 0019 2896 4531
BIC/SWIFT: GEBABEBBXXX
Банковское агентство: BNP Paribas Fortis
Адрес: Rue de la Station 64, 1360 Perwez, Belgium

While Stripe doesn't support monthly donations, you can still become a sponsor! Simply make a one-time donation equivalent to 12 months of support, and you'll gain access to the corresponding sponsoring tier. It's an easy and flexible way to contribute.

If you are not sure or not able to commit to a regular donation, but still want to help the project, you can do a one-time donation, of any amount.

Choose freely the amount you wish to donate one time only.

You can support FreeCAD by sponsoring it as an individual or organization through various platforms. Sponsorship provides a steady income for developers, allowing the FPA to plan ahead and enabling greater investment in FreeCAD. To encourage sponsorship, we offer different tiers, and unless you choose to remain anonymous, your name or company logo will be featured on our website accordingly.

from 1 USD / 1 EUR per month. You will not have your name displayed here, but you will have helped the project a lot anyway. Together, normal sponsors maintain the project on its feet as much as the bigger sponsors.

from 25 USD / 25 EUR per month. Your name or company name is displayed on this page.

from 100 USD / 100 EUR per month. Your name or company name is displayed on this page, with a link to your website, and a one-line description text.

from 200 USD / 200 EUR per month. Your name or company name and logo displayed on this page, with a link to your website and a custom description text. Companies that have helped FreeCAD early on also appear under Gold sponsors.

Instead of donating each month, you might find it more comfortable to make a one-time donation that, when divided by twelve, would give you right to enter a sponsoring tier. Don't hesitate to do so!

Choose freely the amount you wish to donate each month.

Please inform your forum name or twitter handle as a notein your transfer, or reach to us, so we can give you proper credits!

Tutorial
Topic
Example Combined Footing
Level
Intermediate
Time to complete
Authors
Shiv Charan
FreeCAD version
0.20
Example files
See also
None

Описание

The Reinforcement FootingRebars tool allows the user to create reinforcing bars inside a Footing Arch Structure object.

This tool is part of the Reinforcement Workbench, an external workbench that can be installed with the Addon Manager.

In this example we will create Combined Footing Reinforcement as shown in below figure.

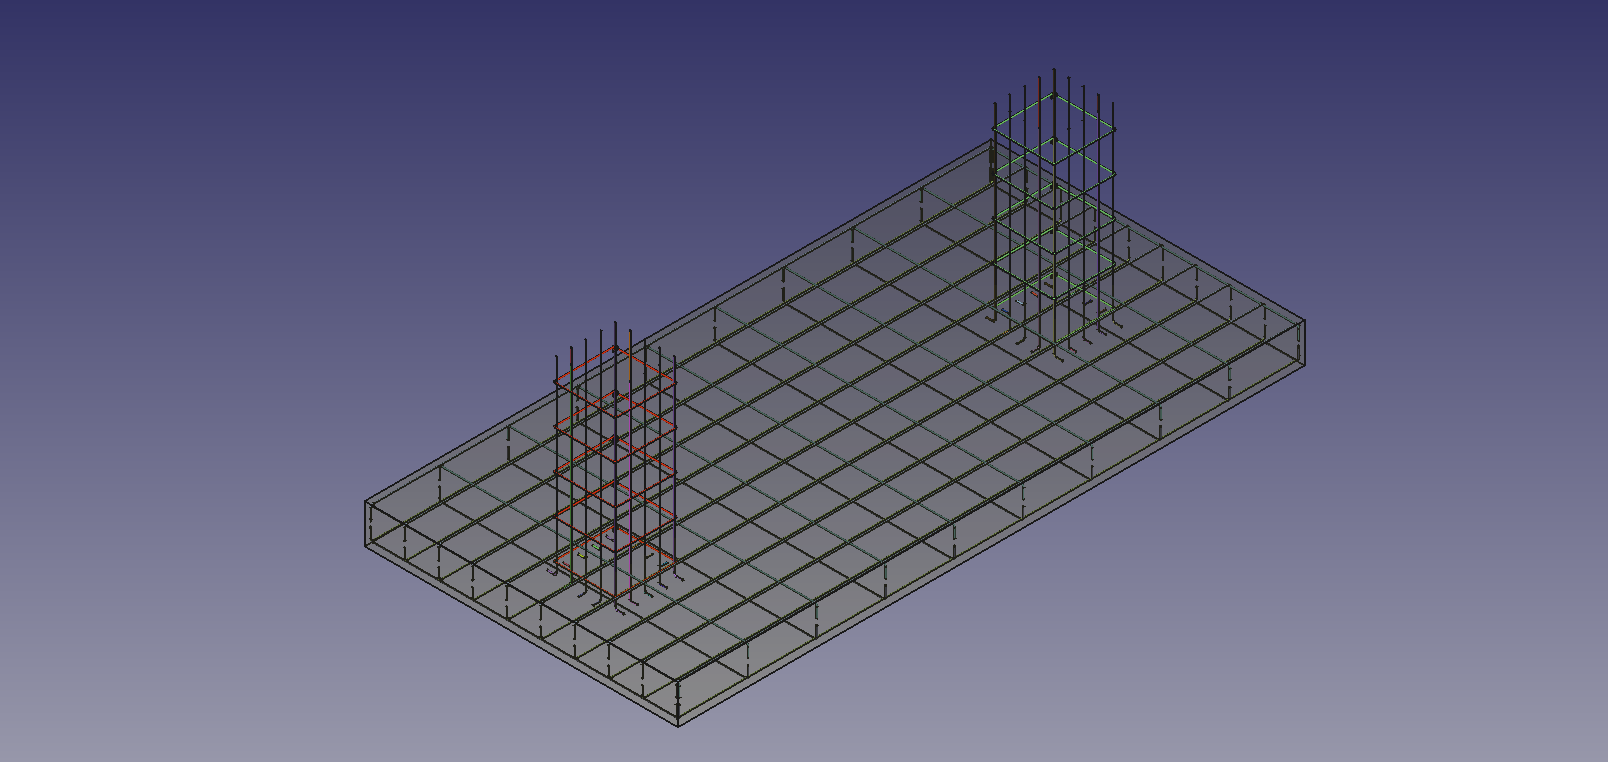
A Example of Combined Footing reinforcement in Footing Arch Structure

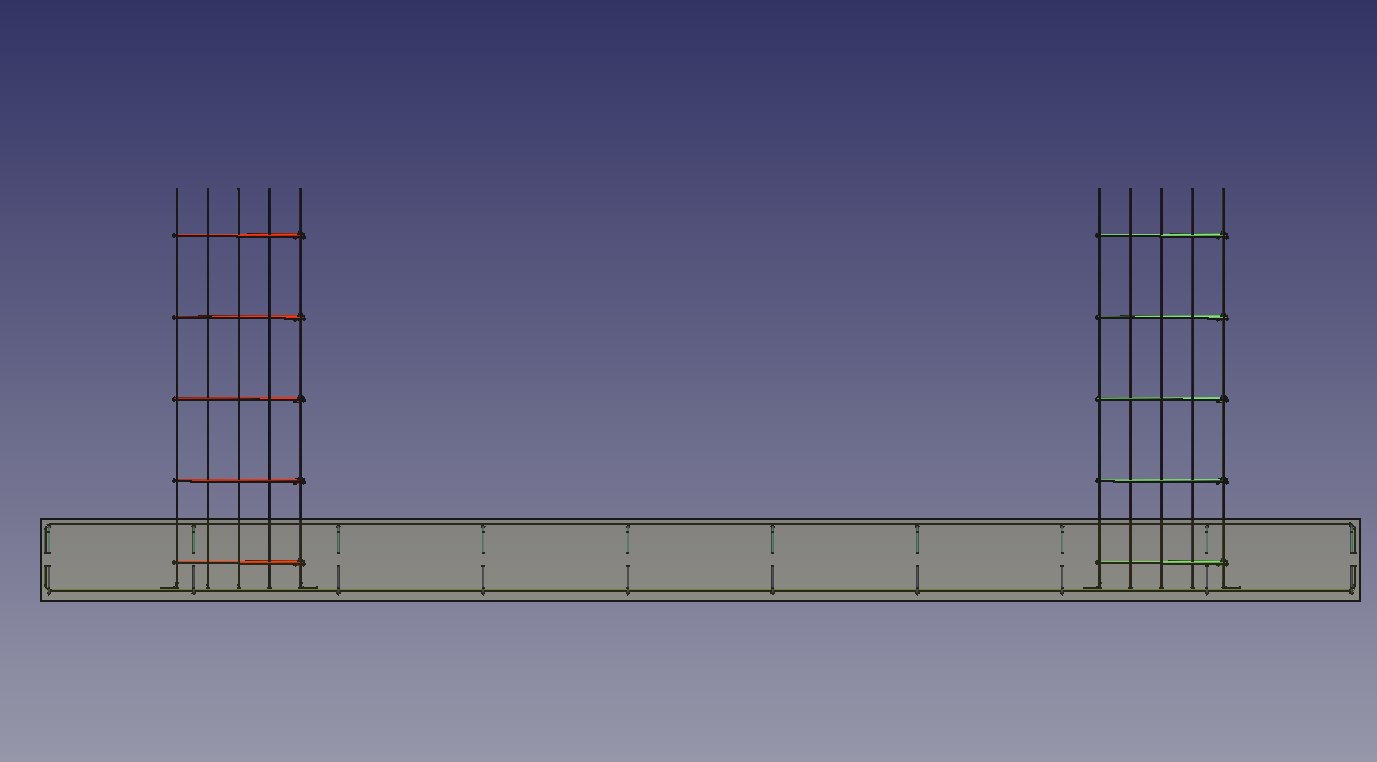
Right view of given Footing Reinforcement example

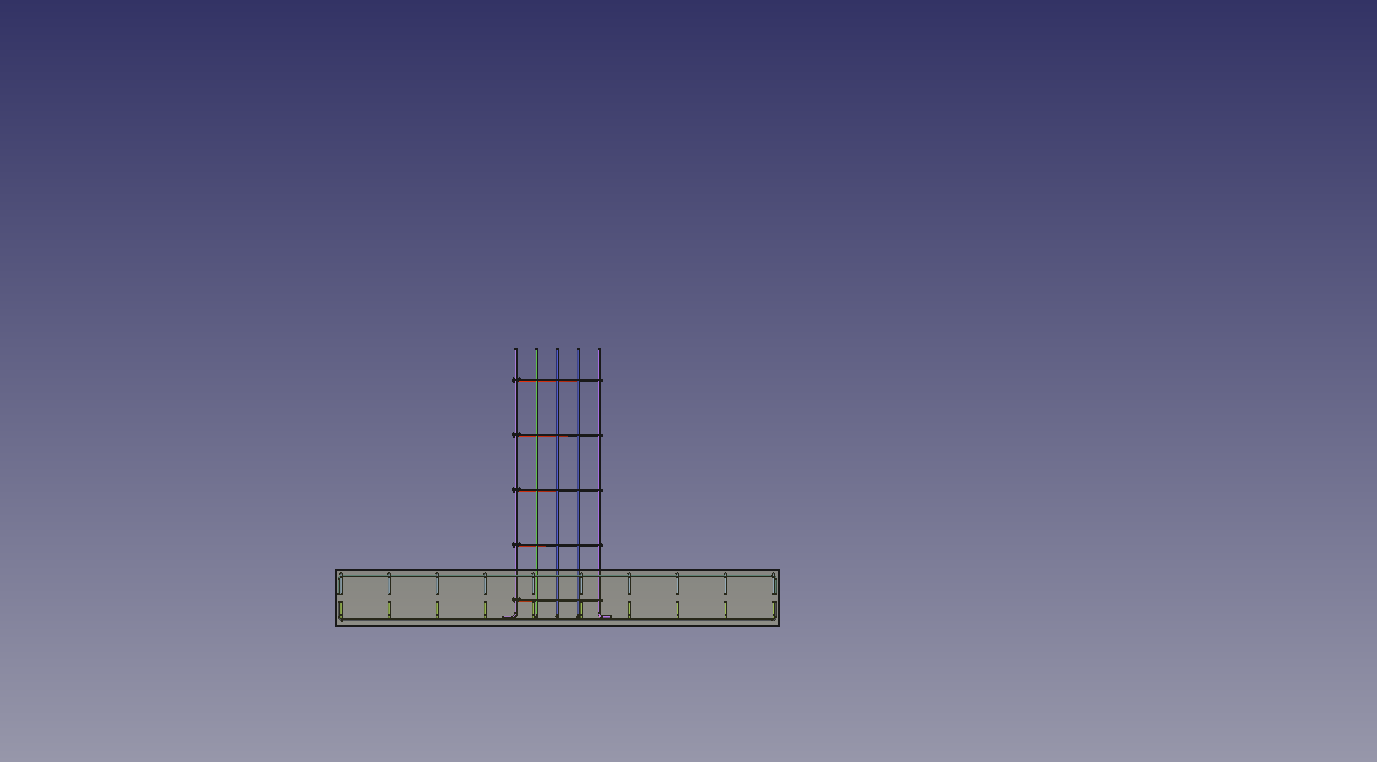
Front view of given Footing Reinforcement example

Usage

1. Select vertical face of a previously created Footing Arch Structure object as shown in below image.

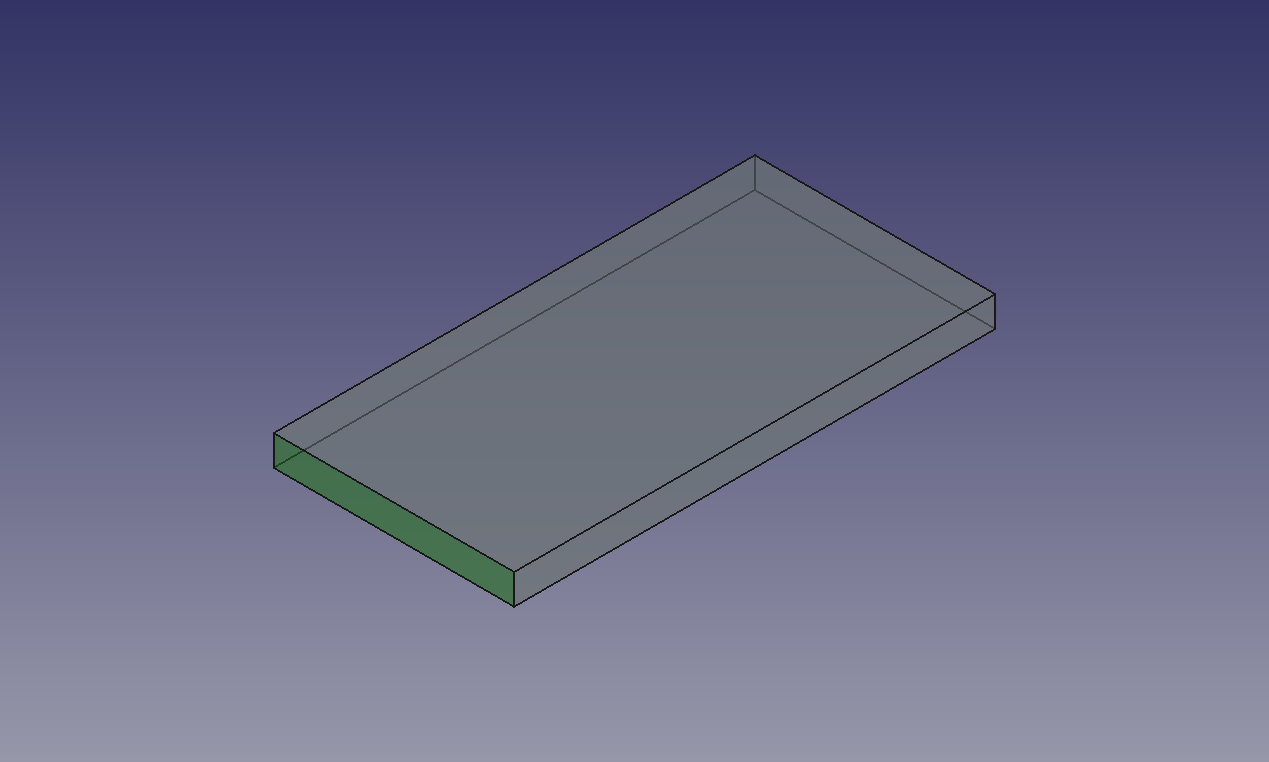
Selected face for Footing Arch Structure

2. Then select Footing Reinforcement from the rebar tools.

3. A footing reinforcement dialog box will pop-out on screen as shown below.

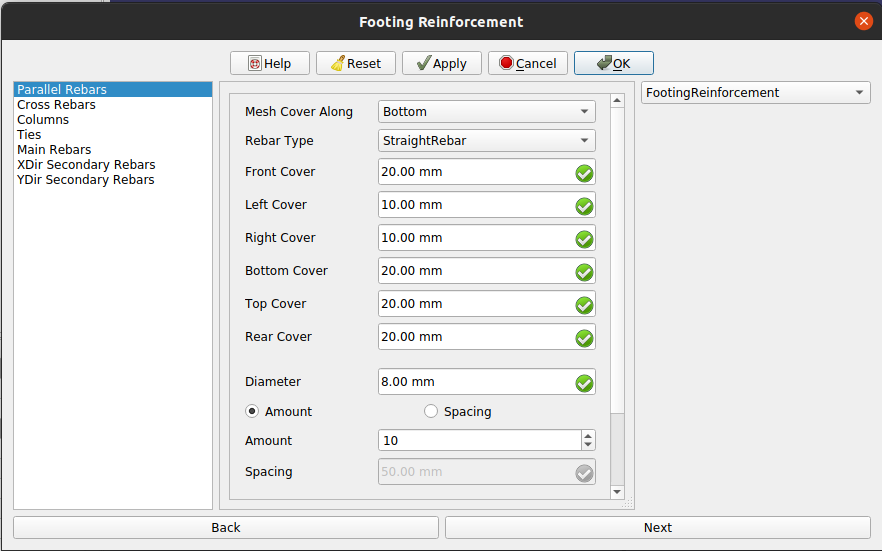
Dialog Box for the Footing Reinforcement

4. Select the desired rebar type and other input data for rebars in parallel direction of selected face in footing reinforcement mesh as show in below image.

5. Now click on Next button or select Cross Rebars in list view and desired data for input data for rebars in cross direction of selected face in footing reinforcement mesh as show in below image.

6. click next or click on Columns in list view and fill desired input for columns in footing reinforcement. Here you can select to add secondary rebars in columns or not.

7. click next or click on Ties in list view and fill desired input for Ties in columns of footing reinforcement.

8. click next or click on Main rebars in list view and fill desired input for main rebars in columns of footing reinforcement.

Only if secondary rebars check is enable then:

9. click next or click on XDir Secondary rebar in list view and fill desired input for secondary rebars in X direction in a column in footing reinforcement.

10. click next or click on YDir Secondary rebar in list view and fill desired input for secondary rebars in Y direction in a column in footing reinforcement.

11. Click OK or Apply or Finish to generate Footing reinforcement.

12. Click Cancel to exit the dialog box.

Эта страница получена от https://wiki.freecad.org/Example_Combined_Footing

Свяжитесь с нами!
Forum GitHub Mastodon Matrix IRC Gitter.im Discord Reddit Twitter Facebook LinkedIn

©Команда FreeCAD. Авторы изображений (сверху вниз): ppemawm, r-frank, epileftric, regis, regis, rider_mortagnais, bejant.

Этот проект поддерживается: , KiCad Services Corp. и другие спонсоры

GitHubУлучшить эту страницу на GitHub