Descrizione
The FHSegment tool inserts a FastHenry segment object.
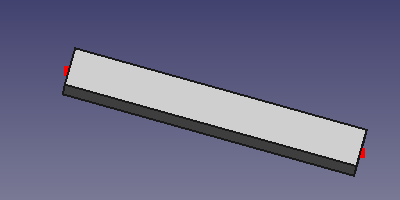
FastHenry FHSegment
Utilizzo
The FHSegment object can be based on the position of a ![]() Draft Line object, or on two existing
Draft Line object, or on two existing ![]() FHNodes that will be the FHSegment end points, or you can select the 3D location of the two end points, where two additional FHNodes will be created.
FHNodes that will be the FHSegment end points, or you can select the 3D location of the two end points, where two additional FHNodes will be created.
- Press the
 EM FHSegment button, or press E then S keys.
 - Click a first point on the 3D View, or type coordinates and press the
 add point button.
 - Click a second point on the 3D View, or type coordinates and press the add point button.
In alternativa, si può anche:
- Select two FHNode objects
- Press the EM FHSegment button, or press E then S keys.
Oppure:
- Select one or multiple Draft Line object(s)
- Press the EM FHSegment button, or press E then S keys. As many FHSegment objects will be created as the Draft Line objects.
Note:
- If you create a FHSegment object based on a Draft Line object, you can NOT freely move the FHSegment or the end point FHNodes. The FHSegment will always be constrained to the base object. To change the position of the FHSegment, or of its end point, apply the change to the underlying Draft Line object (the base object is hidden by default, you can show it again by selecting the object in the tree and pressing Space.
- If the FHSegment object has no base object
baseobj, its position is controlled by the starting and ending FHNodes. You cannot change a FHSegment position by changing its Placement.
Opzioni
- To enter coordinates manually, simply enter the numbers, then press Enter between each X-, Y- and Z-component. You can press the add point button when you have the desired values to insert the point.
- Press Esc or the Close button to abort the current command.
Proprietà
- DatiBase: The base object this component is built upon (a Draft Line)
- DatiNodeStart: the starting FHNode
- DatiNodeEnd: the ending FHNode
- DatiWidth: the FHSegment width ('w' segment parameter in FastHenry)
- DatiHeight: the FHSegment height ('h' segment parameter in FastHenry)
- DatiSigma: the FHSegment conductivity ('sigma' segment parameter in FastHenry)
- Datiww: the FHSegment cross-section direction along the width ('wx', 'wy', 'wz' segment parameter in FastHenry)
- Datinhinc: the Number of filaments in the height direction ('nhinc' segment parameter in FastHenry)
- Datinwinc: the Number of filaments in the width direction ('nwinc' segment parameter in FastHenry)
- Datirh: the ratio of adjacent filaments in the height direction ('rh' segment parameter in FastHenry)
- Datirw: the ratio of adjacent filaments in the width direction ('rw' segment parameter in FastHenry)
Script
See also: FreeCAD Scripting Basics.
The FHSegment object can be used in macros and from the Python console by using the following function:
segment = makeFHSegment(baseobj=None, nodeStart=None, nodeEnd=None, width=None, height=None, name='FHSegment')
- Creates a
FHSegmentobject. baseobjis the Draft Line object that can be used as base for the FHSegment. IfnodeStartandnodeEndare specified, they have priority over thebaseobj, andbaseobjis ignored.nodeStartis the segment starting node FHNode object.nodeEndis the segment ending node FHNode object.widthis the segment width. Defaults toEMFHSEGMENT_DEF_SEGWIDTH.heightis the segment height. Defaults toEMFHSEGMENT_DEF_SEGHEIGHT.nameis the name of the object
Esempio:
import FreeCAD, EM

fhnode1 = EM.makeFHNode(X=1.0,Y=0,Z=0)
fhnode2 = EM.makeFHNode(X=0,Y=1.0,Z=0)

fhsegment = EM.makeFHSegment(nodeStart=fhnode1, nodeEnd=fhnode2)
Questa pagina è recuperata da https://wiki.freecad.org/EM_FHSegment