This documentation is not finished. Please help and contribute documentation.
GuiCommand model explains how commands should be documented. Browse Category:UnfinishedDocu to see more incomplete pages like this one. See Category:Command Reference for all commands.
See WikiPages to learn about editing the wiki pages, and go to Help FreeCAD to learn about other ways in which you can contribute.
|
|
| Menu location |
|---|
| CAM → Face |
| Workbenches |
| CAM |
| Default shortcut |
| None |
| Introduced in version |
| - |
| See also |
| None |
Description
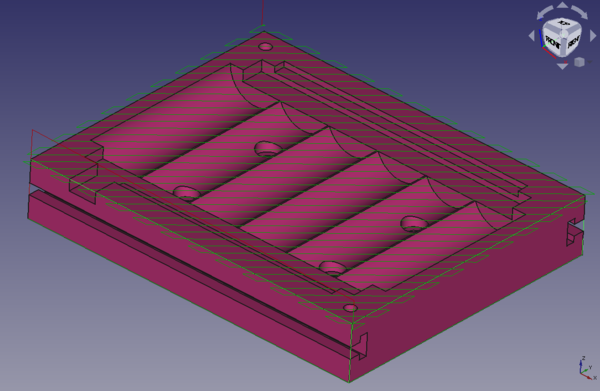
The ![]() CAM MillFace command creates a path to perform a facing operation on a horizontal surface. This operation is generally used:
CAM MillFace command creates a path to perform a facing operation on a horizontal surface. This operation is generally used:
- to smooth out a rough stock surface,
- to mill selected face(s) to desired depth in preparation for performing subsequent clearing operations within the boundary of the regions affected by this operation,
- or to apply a finishing surface to the selected face(s).
This operation contains a DataBoundaryShape property that allows for a modified selection area based upon the selected face(s).
Usage
- Select one or more faces to be surfaced. Note: If selected faces exist at different heights, then all will be milled to the Final Depth setting.
- There are several ways to invoke the command:
- Press the
 Face button.
 - Select the CAM → Face option from the menu.
- Press the
- Select the correct DataBoundaryShape setting to modify the milling area based on the face(s) selected as Base Geometry.
- Adjust the other properties as needed. They are listed further below.
Caveats
- Using it on an inclined plane may produce unexpected results: it will still produce a path to cut a horizontal surface. The extent of the cut will be the vertical projection of the inclined plane, performed at a height corresponding to the lowest point in that plane.
- Since the CAM tools work on the geometry of the selected edges/faces only, and do not relate to the rest of the 3D model, the paths will not go beyond the bounds of the chosen plane, even if it is surrounded by unused stock or air. This will leave unmachined corners. These can sometimes removed with one of the dress-up tools to be found on the CAM menu.
Vertical face milling
- This tool will not work on a vertical plane or vertical non planar surface. Vertical operations can be achieved by using the face profile tool or edge profile tool. These will need the selection of a face or closed loop of edges including the top or bottom edge of the vertical surface desired). The extent of the path can then be reduced using the Boundary Dress-up tool to be found on the CAM menu. With the Dress-up tool, select Create Box option and reduce the size to limit the scope of the profile path. These settings will not allow the origin of the boundary box to be moved, however. This must be done by adjusting the Placement settings in the Tree View.
- This will work on compound surfaces such as several vertical planes or cylindrical surfaces joined together, so long as they form one continuous surface.
Options
Empty
Properties
Note : The names of some Properties in this list differ a little from the same settings used in the Task Window Editor.
Data
Base
Note: It is suggested that you do not edit the Placement property of path operations. Rather, move or rotate the CAM Job model as needed.
- DataPlacement: Overall placement [position and rotation] of the object - with respect to the origin (or origin of parent object container)
- DataAngle: Angle in degrees applied to rotation of the object around Axis property value
- DataAxis: Axis (one or multiple) around which to rotate the object, set in sub-properties: X, Y, Z
- DataX: X-axis value
- DataY: Y-axis value
- DataZ: Z-axis value
- DataPosition: Position of the object, set in sub-properties: X, Y, Z - with respect to the origin (or origin of parent object container)
- DataX: X-distance value
- DataY: Y-distance value
- DataZ: Z-distance value
- DataLabel: User-provided name of the object (UTF-8)
Depth
- DataClearance Height: The height needed to clear clamps and obstructions
- DataFinal Depth: Final Depth of Tool- lowest value in Z
- DataFinish Depth: Maximum material removed on final pass.
- DataSafe Height: The above which Rapid motions are allowed.
- DataStart Depth: Starting Depth of Tool- first cut depth in Z
- DataStep Down: Incremental Step Down of Tool
Face
- DataBoundaryShape: Shape to use for calculating Boundary
- DataClearEdges: Clear edges of surface (Only applicable to BoundBox)
- DataExcludeRaisedAreas: Exclude milling raised areas inside the face.
- DataOffset Pattern: Clearing pattern to use. (Select in which manner the horizontal movements should be done.)
Path
- DataActive: Make False, to prevent operation from generating code
- DataBase: The base geometry for this operation
- DataComment: An optional comment for this Operation
- DataCoolant Mode: The coolant mode for this operation.
- DataCycle Time: The cycle time estimation for this operation.
- DataTool Controller: Defines the Tool controller used in the Operation
- DataUser Label: User assigned label
- DataCut Mode: The direction that the toolpath should go around the part ClockWise (CW) or CounterClockWise (CCW)
- DataExtra Offset: Extra offset to apply to the operation. Direction is operation dependent.
- DataStartAt: Start pocketing at center or boundary
- DataStep Over: Percent of cutter diameter to step over on each pass
- DataZig Zag Angle: Angle of the zigzag pattern
- DataOffset Pattern: Clearing pattern to use
- DataMin Travel: Use 3D Sorting of Path
- DataKeep Tool Down: Attempts to avoid unnecessary retractions.
Rotation
- DataAttempt Inverse Angle: Automatically attempt Inverse Angle if initial rotation is incorrect.
- DataEnable Rotation: Enable rotation to gain access to pockets or areas not normal to Z axis.
- DataInverse Angle: Inverse the angle of the rotation. Example: change a rotation from -22.5 to 22.5 degrees.
- DataLimit Depth To Face: Enforce the Z-depth of the selected face as the lowest value for final depth. Higher user values for final depth will be observed.
- DataReverse Direction: Reverse orientation of Operation by 180 degrees.
Start Point
- DataStart Point: The custom start point for the path of this operation.
- DataX: X-distance value
- DataY: Y-distance value
- DataZ: Z-distance value
- DataUse Start Point: Make True, if manually specifying a Start Point. Set the start point in the property data Start Point field.
View
Empty
Scripting
See also: FreeCAD Scripting Basics.
Example:
#Place code example here.
This page is retrieved from https://wiki.freecad.org/CAM_MillFace