|
|
| Menu location |
|---|
| Arch → Site |
| Workbenches |
| Arch |
| Default shortcut |
| S I |
| Introduced in version |
| - |
| See also |
| Arch Floor, Arch Building |
Descriere
Site-ul Arch este un obiect special care combină proprietățile unui obiect standard al grupului FreeCAD și a obiectelor Arch. Este deosebit de potrivit pentru a reprezenta un întreg sit de proiect sau teren. În cazul lucrărilor arhitecturale bazate pe IFC, se utilizează cea mai mare parte pentru a vă organiza modelul, conținând obiecte building. Site-ul este, de asemenea, folosit pentru a gestiona și a afișa un teren fizic și poate calcula volumul de pământ care trebuie adăugat sau eliminat.
Cum se folosește
- Optionally, select one or more objects to be included in your new site
- Press the
 Arch Site button, or press the S then I keys
Opţiuni
- After creating a site, you can add more objects to it by drag and dropping them in the Tree View or by using the
 Arch Add tool. This only determines which object is part of the given site, and has no effect on the terrain itself.
 - You can remove objects from a site by drag and dropping them out of it the Tree View or by using the
 Arch Remove tool
 - You can add a terrain object by editing the Site's Terrain property. The terrain must be an open shell or surface.
- You can add volumes to be added or subtracted from the base terrain, by double-clicking the Site, and adding objects to its Subtractions or Additions groups. The objects must be solids.
- The Extrusion Vector property can be used to solve some problems that can appear when working with subtractions and additions. In order to perform those additions/subtractions, the terrain surface is extruded into a solid, which is then appropriately unioned/subtracted. Depending on the terrain topology, this extrusion might fail with the default extrusion vector. You might therefore be able to remedy the problem by changing this to a different value.
Proprietăți
Data
Site
- DateTerrain: The base terrain of this site
- DateAddress: The street and housenumber of this site
- DatePostal Code: The postal or zip code of this site
- DateCity: The city of this site
- DateCountry: The country of this site
- DateLatitude: The latitude of this site
- DateLongitude: The longitude of this site
- DateUrl: An url that shows this site in a mapping website
- DateProjected Area: The area of the projection of this object onto the XY plane
- DatePerimeter: The perimeter length of this terrain
- DateAddition Volume: The volume of earth to be added to this terrain
- DateSubtraction Volume: The volume of earth to be removed from this terrain
- DateExtrusion Vector: An extrusion vector to use when performing boolean operations
- DateRemove Splitter: Remove splitters from the resulting shape
- DateNorth Deviation: The angle between the true North and the north direction in this document
- VizualizareSolar Diagram: Shows or hides the solar diagram
- VizualizareSolar Diagram Color: The color of the solar diagram
- VizualizareSolar Diagram Position: The position of the solar diagram
- VizualizareSolar Diagram Scale: The scale of the solar diagram
View
Compass
- VizualizareCompass (
Bool): Default isFalse. Shows or hides the compass. - VizualizareCompass Position (
Vector): The position of the compass relative to the site placement. - VizualizareCompass Rotation (
Angle): The rotation of the compass relative to the site. - VizualizareUpdate Declination (
Bool): Default isFalse. Update the declination value based on the compass rotation.
Site
- VizualizareOrientation (
Enumeration): Default isProject North. When set toTrue Norththe whole geometry will be rotated to match the true north of this site. - VizualizareSolar Diagram (
Bool): Default isFalse. Shows or hides the sun path diagram. See Solar and wind diagrams. - VizualizareSolar Diagram Color (
Color): The color of the sun path diagram. - VizualizareSolar Diagram Position (
Vector): The position of the sun path diagram. - VizualizareSolar Diagram Scale (
Float): The scale of the sun path diagram. - VizualizareWind Rose (
Bool): Default isFalse. Shows or hides the wind rose diagram (requires the EPW File data property filled, and the Ladybug Python module installed. See Solar and wind diagrams).
Typical workflow
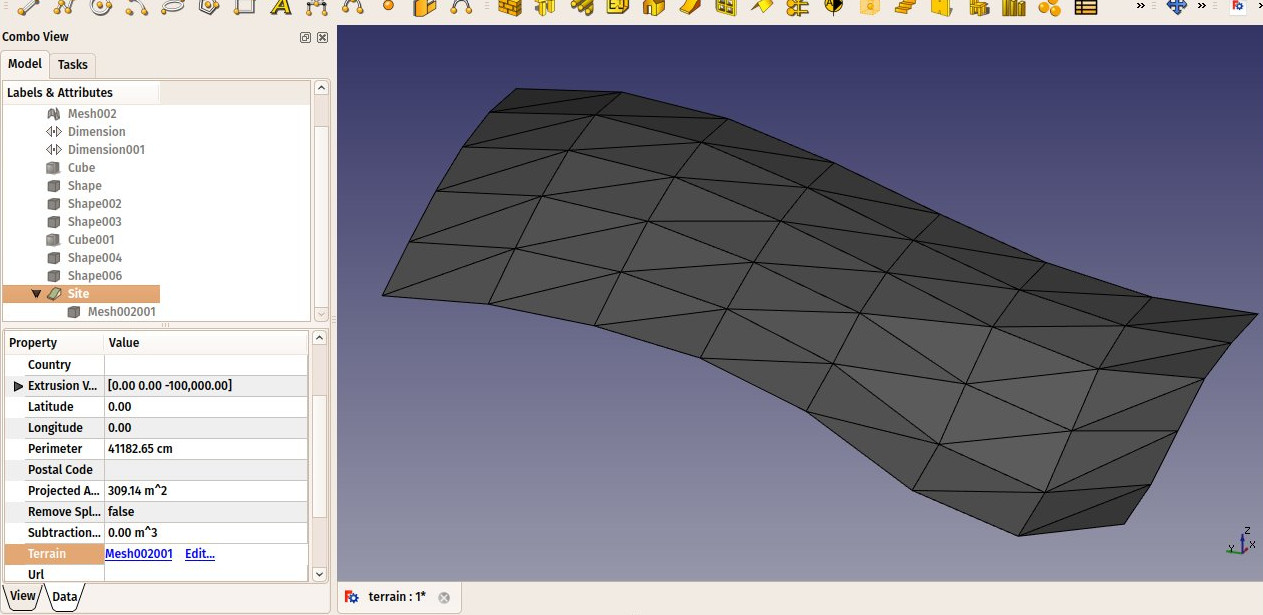
Start by creating an object that represents your terrain. It must be an open surface, not a solid. For example, it is easy to import mesh data, that can be turned into a Part Shape from menu Part -> Create Shape from Mesh.... Then, create a Site object, and set its Terrain property to the Part we just created:
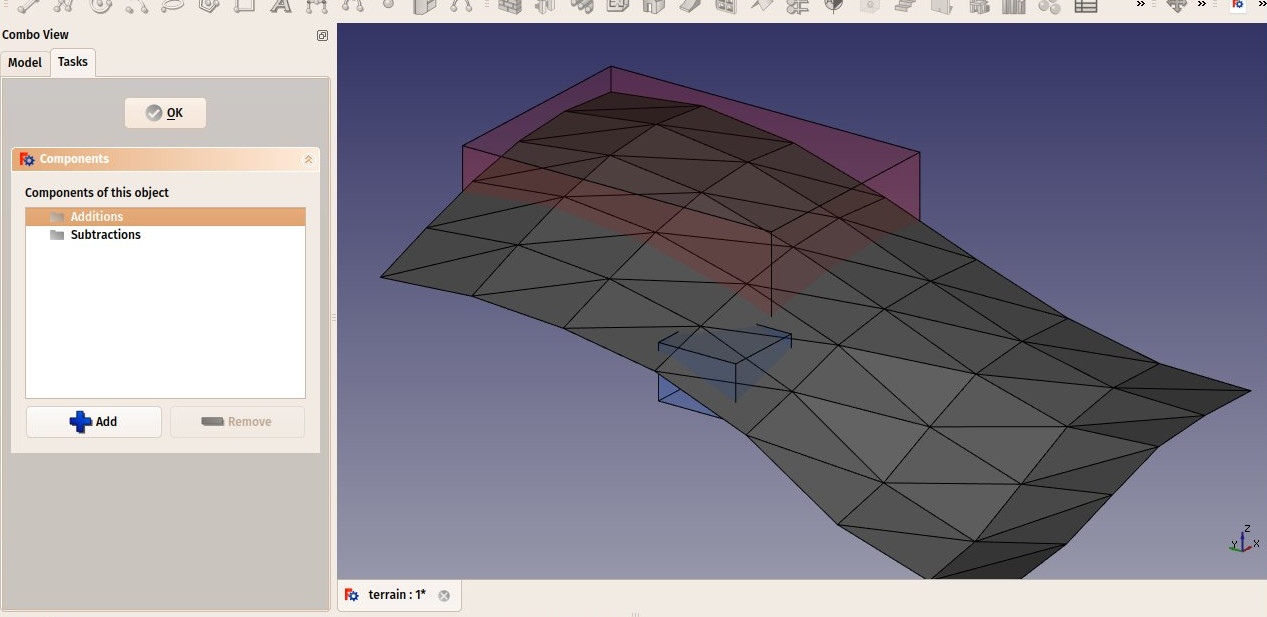
Create some volumes (they must be solids) that represent the areas that you wish to be excavated or filled. Double-click the Site object in the Tree View, and add these volumes to the Additions or Subtractions groups. Click OK.
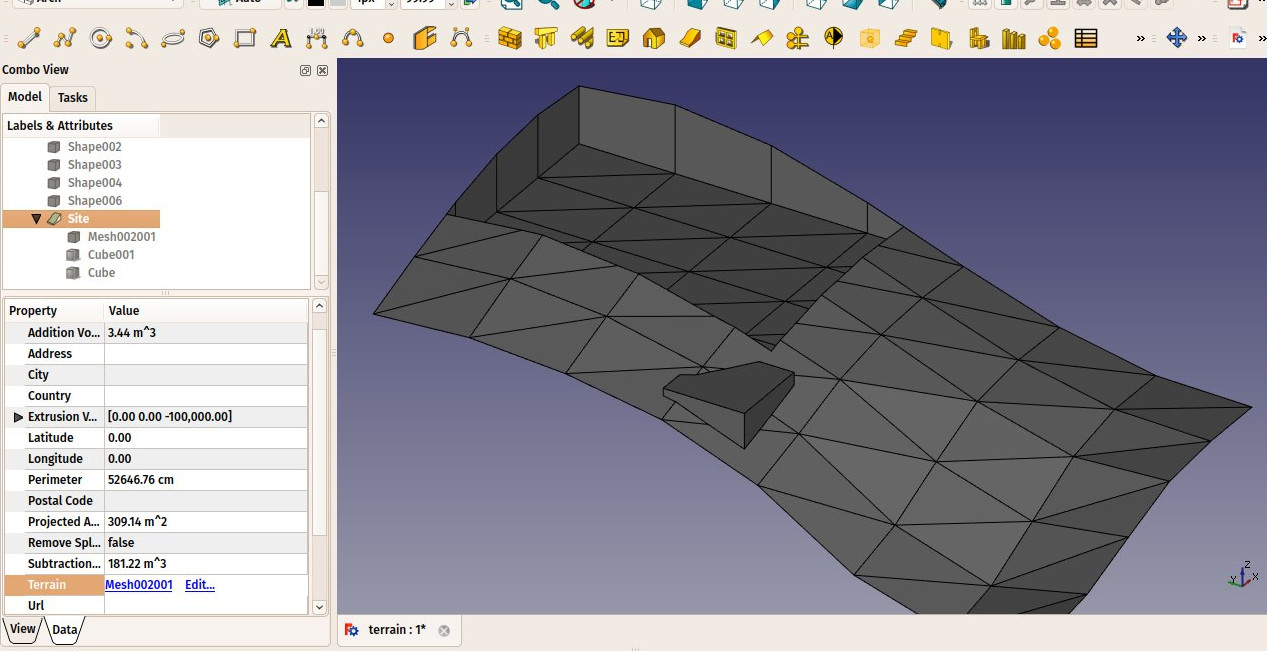
The site geometry will be recomputed and the areas, perimeter, and volumes properties recalculated.
Solar diagram
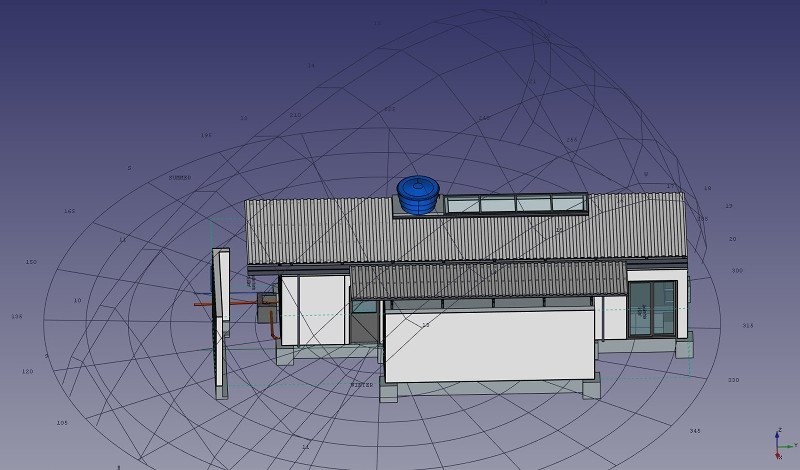
If pysolar is installed on your system, Arch Sites can display a solar diagram. For this, Longitude, Latitude and NorthDeviation properties must be correctly set, and SolarDiagram view property turned on. introduced in 0.17
Notes
- The diagram can be scaled, oriented and centered on a specific point in the model. It can also be turned on and off. At this point it is a visual rather than functional feature, and provided for display purposes only.
- If you don't have Ladybug, pysolar (version 0.7 and above) is still supported to generate sun path diagrams, but not wind roses. However, Ladybug is a much more powerful tool that will probably be used more in the future, so we recommend using it instead of pysolar. Ladybug can be installed simply via the pip Python package manager.
Scripting
Scrip-Programare
Instrumentul Site poate fi utilizat în macros și de la consola python utilizând următoarele funcții:
Site = makeSite(objectslist=None, baseobj=None, name="Site")
creează un site incluzând obiectele din lista dată.
Exempluː
import FreeCAD, Draft, Arch

p1 = FreeCAD.Vector(0, 0, 0)
p2 = FreeCAD.Vector(2000, 0, 0)
baseline = Draft.makeLine(p1, p2)
Wall = Arch.makeWall(baseline, length=None, width=150, height=2000)
FreeCAD.ActiveDocument.recompute()

Building = Arch.makeBuilding([Wall])
Site = Arch.makeSite([Building])

FreeCAD.ActiveDocument.recompute()
FreeCAD.Gui.ActiveDocument.ActiveView.viewIsometric()
Solar diagram
As long as the pysolar module is present, a sun path diagram can be added to the site. Set the longitude, latitude and declination angles as appropriate, as well as an adequate scale for the size of your model.
At this time, the diagram serves only informative purposes and is there for visual display. For a sun path diagram that enables visualizing shadows and interactively changing dates and times, the best option is to use an external website that allows uploading 3D models. Some of them support .obj and .stl formats for instance, which can be exported to with FreeCAD.
Please note that Pysolar 0.7 or above is required, and this version only works with Python 3.
Site.Longitude = -46.38
Site.Latitude = -23.33
Site.Declination = 30
# Uncomment if you want to show the compass
# Site.ViewObject.Compass = True

Site.ViewObject.SolarDiagram = True
Site.ViewObject.SolarDiagramScale = 10000
FreeCAD.ActiveDocument.recompute()
Solar diagram independent of Site
O diagramă de însorire poate fi creată cu :
Node = makeSolarDiagram(longitude, latitude, scale=1, complete=False)
- Creates a sun path diagram as a Pivy node, using
longitudeandlatitude, with an optionalscale. - If
completeisTrue, the 12 months are drawn, which shows the full solar analemma.
import FreeCADGui, Arch

Node = Arch.makeSolarDiagram(-46.38, -23.33, scale=10000, complete=True)
FreeCAD.Gui.ActiveDocument.ActiveView.getSceneGraph().addChild(Node)
Această pagină este preluată de la https://wiki.freecad.org/Arch_Site