|
|
| Menu location |
|---|
| Part → Project on Surface |
| Workbenches |
| Part |
| Default shortcut |
| None |
| Introduced in version |
| 0.19 |
| See also |
| None |
Description
The ![]() Part ProjectionOnSurface command projects a shape onto a face from another object. It can for example be used to project logos or text objects.
Part ProjectionOnSurface command projects a shape onto a face from another object. It can for example be used to project logos or text objects.
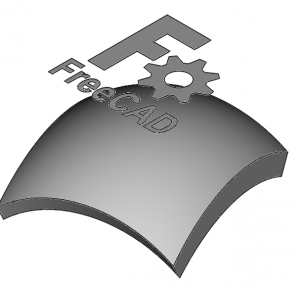

Projection of a logo on a curved surface.
Usage
- Make sure you have at least two objects in your document; the "source" object that you wish to project, and the "target" object where the projection will be made.
- There are several ways to invoke the command:
- Press the
 Project on Surface button.
 - Select the Part → Project on Surface option from the menu.
- Press the
- The Projection on Surface task panel opens.
- Click on Select Projection Surface, and then click on the "target" surface where the projection will be created.
- Then click on the specific button to choose the type of subelement that you want to add to your projection object.
- Add Face: select a source face.
- Add Wire: select a source edge. The command will extract the entire wire to which the edge belongs. For example, by choosing a single edge of a polygon, it will project the entire polygon.
- Add Edge: select a source edge. The command will only project the selected edge.
- Once a button is depressed, pick a subelement in the 3D View. If you wish to deselect it, pick the same element again.
- When you are satisfied with your selection, press the same Add… button to leave the selection mode.
- Then click on the specific radio button to choose the type of projection shape to create.
 Show all: it will show all types of closed wires and edges on the target surface. If a "face" subelement was selected in the previous step, a preview of a solid object extruded from the projection will be shown, depending on the value of Extrude height.
- Show faces: it will show a preview of a filled face on the target surface. This will only work if you selected a "face" subelement in the previous step; if you selected a closed "wire", only the edges (no face) will be created as projection; if you selected "edges", only those edges will be created as projection.
- Show edges: it will show a preview of the edges on the target surface. This will work whether you added a "face", "wire", or "edge" subelement in the previous step; even if you added a filled "face", only the edges will be created as projection.
- Press the OK to complete the operation and produce the new projection object.
Notes:
- The projection direction is automatically taken from the camera direction in the 3D View at the moment the command is launched.
- To change the direction, move the camera, and press Get Current Camera Direction.
- Alternatively press the X, Y, or Z buttons to set the projection direction to the main global axes, +X, -X, +Y, -Y, +Z, or -Z.
- However, do notice that changing the projection direction won't automatically update the projection preview; in order to do this, you must re-select the geometry by pressing the Add… buttons and picking the subelements again.
Options
- Extrude height: it is the height of the solid shape that is created by extruding the projected face, from the target surface and along the negative of the projection direction. For example, if the projection direction is along +Y
(0, 1, 0), the extrusion will be created in the direction -Y(0, -1, 0). This solid extrusion will only be created if the subelement selected was a closed face, by pressing the Add Face button, and by choosing the Show all option. - Solid depth: it is the distance that the projection object is moved along the projection direction. Negative values will displace the object in the opposite direction; this allows creating a projection that is offset from the target surface.
Limitations
The projection algorithm sometimes is not able to create a valid projection face. If this happens a solid extrusion won't be able to be created either.
If this happens:
- Check if your source face is valid; try running the
 Part CheckGeometry command for clues.
 - Check if the projection direction is valid. Can the source face be realistically projected onto the target surface? Would a straight projection hit the surface? Adjust the camera so that the source face is in front of the target surface, and try again.
- Try to use the Show edges option. Are the edges projected correctly? Try to create a face with the edges by hand.
The projection done in the Part workbench is not parametric. If you need a parametric workflow, please consult with the Projection class, which is a Python scripted object, intended for programmatic use.
Links
- Forum thread: Project faces onto bent surface
This page is retrieved from https://wiki.freecad.org/Part_ProjectionOnSurface