|
|
| Description |
|---|
| Cette macro crée une grille paramétrique en forme de nid d'abeille. Les propriétés paramétriques sont contenues dans un tableur. Vous pouvez également modifier l'objet de base de la grille en nid d'abeille pour obtenir d'autres réseaux intéressants, tels que cette caisse à œufs en modifiant l'objet hexagone de base avec un ellipsoïde en forme d'oeuf. Il est possible de modifier le rayon des hexagones, la séparation entre les hexagones, etc. via un tableur inclus. Version macro : 2020.10.30 Date dernière modification : 2020-10-30 Version FreeCAD : 0.17 et plus Téléchargement : Icône de la barre d'outils Auteur: TheMarkster |
| Auteur |
| TheMarkster |
| Téléchargement |
| Icône de la barre d'outils |
| Liens |
| Page des macros Comment installer une macro Comment créer une barre d'outils |
| Version Macro |
| 2020.10.30 |
| Dernière modification |
| 2020-10-30 |
| Version(s) FreeCAD |
| 0.17 et plus |
| Raccourci clavier |
| None |
| Voir aussi |
| None |
Description
Cette macro crée une grille paramétrique en forme de nid d'abeille. Les propriétés paramétriques sont contenues dans un tableur.
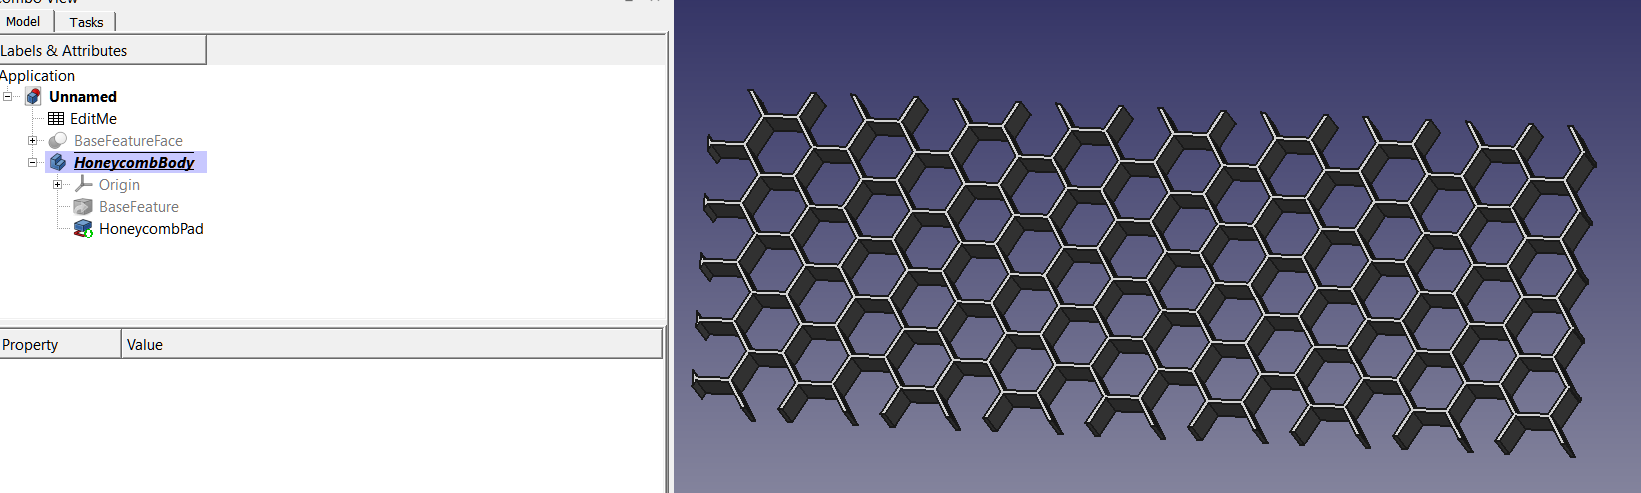
Vous pouvez également modifier l'objet de base de la grille en nid d'abeille pour obtenir d'autres réseaux intéressants, tels que cette caisse à œufs en modifiant l'objet hexagone de base avec un ellipsoïde en forme d'oeuf:

Script
Icône de la barre d'outils 
Macro_FCHoneycombMaker.FCMacro
# -*- coding: utf-8 -*-
"""
***************************************************************************
*   Copyright (c) 2018-2019 <TheMarkster>                                 *
*                                                                         *
*   This file is a supplement to the FreeCAD CAx development system.      *
*                                                                         *
*   This program is free software; you can redistribute it and/or modify  *
*   it under the terms of the GNU Lesser General Public License (LGPL)    *
*   as published by the Free Software Foundation; either version 2 of     *
*   the License, or (at your option) any later version.                   *
*                                                                         *
*   This software is distributed in the hope that it will be useful,      *
*   but WITHOUT ANY WARRANTY; without even the implied warranty of        *
*   MERCHANTABILITY or FITNESS FOR A PARTICULAR PURPOSE.  See the         *
*   GNU Library General Public License at http://www.gnu.org/licenses     *
*   for more details.                                                     *
*                                                                         *
*   For more information about the GNU Library General Public License     *
*   write to the Free Software Foundation, Inc., 59 Temple Place,         *
*   Suite 330, Boston, MA  02111-1307 USA                                 *
*                                                                         *
***************************************************************************
"""


"""
FCHoneycombMaker

This is a macro to aid in creation of a honeycomb grid.  Parameters,
including hexagon radius, separation between hexagons, etc., can be modified via an included spreadsheet.
"""

__title__ = "FCHoneycombMaker"
__author__ = "TheMarkster"
__url__ = "https://github.com/mwganson/FCHoneycombMaker"
__Wiki__ = "https://github.com/mwganson/FCHoneycombMaker/blob/master/README.md"
__date__ = "2020.10.30" #year.month.date
__version__ = __date__


import FreeCAD
import math
import Part,Draft,DraftTools
from PySide import QtCore, QtGui
import ProfileLib.RegularPolygon
import Sketcher

RADIUS = 2
SEPARATION = .25
PLATE_WIDTH = 20
PLATE_LENGTH = 55
PLATE_HEIGHT = 5

FreeCAD.Console.PrintMessage ('\nFCHoneycombMaker v'+__version__+'\n')


def makeHexagonSketch(sketchName):
    #would use the polygon tool, but is buggy and sometimes creates squares instead of hexagons, so the manual way
    sketch = App.ActiveDocument.getObject(sketchName)
#we just place the vertices any old where and then constrain them into place later
    sketch.addGeometry(Part.LineSegment(App.Vector(-2.000000,1.448548,0),App.Vector(0.500515,2.469759,0)),False)
    sketch.addGeometry(Part.LineSegment(App.Vector(0.500515,2.469759,0),App.Vector(2.000000,1.696951,0)),False)
    sketch.addConstraint(Sketcher.Constraint('Coincident',0,2,1,1))
    sketch.addGeometry(Part.LineSegment(App.Vector(2.000000,1.696951,0),App.Vector(2.736140,-0.676675,0)),False)
    sketch.addConstraint(Sketcher.Constraint('Coincident',1,2,2,1))
    sketch.addGeometry(Part.LineSegment(App.Vector(2.736140,-0.676675,0),App.Vector(1.000000,-2.415493,0)),False)
    sketch.addConstraint(Sketcher.Constraint('Coincident',2,2,3,1))
    sketch.addGeometry(Part.LineSegment(App.Vector(1.000000,-2.415493,0),App.Vector(-3.000000,-1.000000,0)),False)
    sketch.addConstraint(Sketcher.Constraint('Coincident',3,2,4,1))
    sketch.addGeometry(Part.LineSegment(App.Vector(-3.000000,-1.000000,0),App.Vector(-2.000000,1.365748,0)),False)
    sketch.addConstraint(Sketcher.Constraint('Coincident',4,2,5,1))
    sketch.addConstraint(Sketcher.Constraint('Coincident',5,2,0,1))
    sketch.addGeometry(Part.Circle(App.Vector(0.000000,0.000000,0),App.Vector(0,0,1),3.535498),False) #construction circle
    sketch.addConstraint(Sketcher.Constraint('Coincident',6,3,-1,1))
    sketch.addConstraint(Sketcher.Constraint('Radius',6,3.535498))
    sketch.setDatum(7,App.Units.Quantity('2.000000 mm'))
    sketch.addConstraint(Sketcher.Constraint('PointOnObject',4,2,6)) #constrain all vertices to the circumference
    sketch.addConstraint(Sketcher.Constraint('PointOnObject',0,1,6))
    sketch.addConstraint(Sketcher.Constraint('PointOnObject',0,2,6))
    sketch.addConstraint(Sketcher.Constraint('PointOnObject',1,2,6))
    sketch.addConstraint(Sketcher.Constraint('PointOnObject',2,2,6))
    sketch.addConstraint(Sketcher.Constraint('PointOnObject',3,2,6))
    sketch.toggleConstruction(6)
    sketch.addConstraint(Sketcher.Constraint('Equal',5,0)) #set all lines equal
    sketch.addConstraint(Sketcher.Constraint('Equal',0,1))
    sketch.addConstraint(Sketcher.Constraint('Equal',1,2))
    sketch.addConstraint(Sketcher.Constraint('Equal',2,3))
    sketch.addConstraint(Sketcher.Constraint('Equal',3,4))
    sketch.addConstraint(Sketcher.Constraint('Horizontal',0)) #make one of them horizontal
    sketch.setExpression('Constraints[7]', u'EditMe.radius')


if not App.ActiveDocument:
    App.newDocument()
if hasattr(App.ActiveDocument,"EditMe"):
    raise StandardError("FCHoneycombMaker Error: Please run only once per document.  Create a new document and try again.\n")

worksheet = App.ActiveDocument.addObject("Spreadsheet::Sheet", "EditMe")
worksheet.setColumnWidth('A',150)
set = worksheet.set

worksheet.mergeCells('A11:G25')
msg1 = """Instructions:

You should only run the macro once unless you want to start again from scratch.

Edit the values in column B to define your honeycomb.  You can also edit the objects (plate, arrays, etc.), but it's
probably better to do all the editing here in the spreadsheet at least until you get it more or less like you want it before
doing some final tweaking directly on the objects.

Hexagon radius -- the circumradius of the individual hexagons (circle with each vertex on its circumference).

Hexagon separation -- distance between each hexagon, the thickness of the grid produced after cutting the hexagons from the plate.

Plate dimensions -- sets the dimensions of the plate out of which the honeycomb can be cut.  These values are used to calculate
the countX and countY variables.  You can delete the plate object if you wish to apply the hexagon arrays to a different structure.

Tweak X,Y,Z -- Edit these to move both hexagon arrays independently of the plate object, for example to center the arrays inside
the plate.

CountX and CountY -- number of hexagons in the 2 arrays.  These are calculated based on the plate size, radius of hexagons, and
separation between them, but you will probably want to modify these manually.  Just remember if you modify them you are replacing
the formulas in those cells with immediate values, and thus they won't be recalulated for you if other changes are made.

If you would prefer a round plate, simply delete the plate object and replace it with a cylinder, and then use the Tweak values
and countX and countY variables to arrange the hexagon arrays to your liking.

"""
set('A13', msg1)


aliases={'radius':'B2', 'separation':'B3', 'width':'B4', 'length':'B5', 'height':'B6', 'tweakX':'B8','tweakY':'B9','tweakZ':'B10',
'xInterval':'E2', 'yInterval':'E3', 'firstX':'E4', 'firstY':'E5','countX':'E6', 'countY':'E7','array2XPos':'E8','array2YPos':'E9',

 }

for k,v in aliases.items():
   worksheet.setAlias(v,k)


set('A1', 'User Variables')
set('D1','Calculated Values')
set('A2', 'Hexagon Radius:')
set(aliases['radius'], str(RADIUS))
set('A3', 'Hexagon Separation:')
set(aliases['separation'], str(SEPARATION))
set('A4', 'Grid Width:')
set(aliases['width'], str(PLATE_WIDTH))
set('A5', 'Grid Length:')
set(aliases['length'], str(PLATE_LENGTH))
set('A6', 'Grid Height:')
set(aliases['height'], str(PLATE_HEIGHT))
set('A8', 'Tweak X:')
set(aliases['tweakX'],u'0')
set('A9', 'Tweak Y:')
set(aliases['tweakY'],u'0')
set('A10', 'Tweak Z:')
set(aliases['tweakZ'],u'0')


set('D2','X Interval:')
set(aliases['xInterval'],'=2*sin(60deg)*(B2*2+(B3-0.267949*B2))')
set('D3', 'Y Interval:')
set(aliases['yInterval'], '=2*B2+(B3-0.267949*B2)' )
set('D4', 'First X:')
set(aliases['firstX'], '=B2')
set('D5', 'First Y:')
set(aliases['firstY'], '=B2')
set('D6', 'Count X:')
set(aliases['countX'], '=round((B5) / E2) + 2')
set('D7', 'Count Y:')
set(aliases['countY'], '=round((B4) / E3) + 2')
set ('D8', 'Array2 XPos:')
set (aliases['array2XPos'], '=sin(60deg)*(B2*2+B3-0.26794899999999999*B2)')
set ('D9', 'Array2 YPos:')
set (aliases['array2YPos'],'=E3/2')


#xInterval = float(worksheet.getContents(aliases['xInterval']))
xInterval = 2*math.sin(math.pi/180.0*60)*(RADIUS*2+(SEPARATION-0.267949))
yInterval = 2*RADIUS+(SEPARATION-0.267949)
#yInterval = float(worksheet.getContents(aliases['yInterval']))
firstX = RADIUS
firstY = RADIUS

countY = int((PLATE_LENGTH) / yInterval)
countX = int((PLATE_WIDTH) / xInterval)


App.ActiveDocument.addObject("Part::RegularPolygon","HoneycombHexagon")
App.ActiveDocument.HoneycombHexagon.Polygon=6
App.ActiveDocument.HoneycombHexagon.setExpression('Circumradius','EditMe.radius')
hexagonObject = App.ActiveDocument.getObject("HoneycombHexagon")
Gui.ActiveDocument.getObject("HoneycombHexagon").Visibility=False


extrudedHexagonObject = App.ActiveDocument.addObject('Part::Extrusion', 'ExtrudedHexagon')
extrudedHexagonObject.Base = hexagonObject
extrudedHexagonObject.setExpression('LengthFwd','EditMe.height')
extrudedHexagonObject.Solid=True
#extrudedHexagonObject.Placement=App.Placement(App.Vector(firstX,firstY,0),App.Rotation(0,0,0),App.Vector(0,0,0))
extrudedHexagonObject.setExpression('Placement.Base.x','EditMe.firstX+EditMe.tweakX')
extrudedHexagonObject.setExpression('Placement.Base.y','EditMe.firstY+EditMe.tweakY')
extrudedHexagonObject.setExpression('Placement.Base.z', 'EditMe.tweakZ')

xvector = App.Vector(xInterval,0,0)
yvector = App.Vector(0, yInterval,0)
if not hasattr(Draft,"make_ortho_array"):
    row1Array = Draft.makeArray(extrudedHexagonObject, xvector,yvector,countX,countY,name="HoneycombArray1")
    row2Array = Draft.makeArray(extrudedHexagonObject, xvector,yvector,countX,countY,name="HoneycombArray2")
else:
    row1Array = Draft.make_ortho_array(extrudedHexagonObject, v_x=xvector,v_y=yvector,n_x=countX,n_y=countY,use_link=False)
    row2Array = Draft.make_ortho_array(extrudedHexagonObject, v_x=xvector,v_y=yvector,n_x=countX,n_y=countY,use_link=False)
App.ActiveDocument.recompute()
row2Array.Placement = App.Placement(App.Vector(math.sin(60*math.pi/180.0)*(RADIUS*2+(SEPARATION-0.267949)),yInterval,0),App.Rotation(0,0,0),App.Vector(0,0,0))
#row2Array.setExpression('Placement.Base.x','sin(60deg) * (EditMe.radius * 2 + (EditMe.separation-0.267949*EditMe.radius))')
row2Array.setExpression('Placement.Base.x','EditMe.array2XPos')
#row2Array.setExpression('Placement.Base.y','EditMe.yInterval/2.0')
row2Array.setExpression('Placement.Base.y','EditMe.array2YPos')
row1Array.setExpression('IntervalX.x','EditMe.xInterval')
row1Array.setExpression('IntervalY.y','EditMe.yInterval')
row1Array.setExpression('NumberX','EditMe.countX')
row1Array.setExpression('NumberY','EditMe.countY')

row2Array.setExpression('IntervalX.x','EditMe.xInterval')
row2Array.setExpression('IntervalY.y','EditMe.yInterval')
row2Array.setExpression('NumberX','EditMe.countX')
row2Array.setExpression('NumberY','EditMe.countY')

App.activeDocument().addObject("Part::MultiFuse","Fused_Arrays")
#App.activeDocument().Fused_Arrays.Shapes = [App.activeDocument().HoneycombArray1,App.activeDocument().HoneycombArray2,]
App.activeDocument().Fused_Arrays.Shapes = [row1Array,row2Array,]
if not hasattr(Draft,"make_ortho_array"):
    Gui.activeDocument().HoneycombArray1.Visibility=False
    Gui.activeDocument().HoneycombArray2.Visibility=False
else:
    row1Array.Visibility=False
    row2Array.Visibility=False


window = QtGui.QApplication.activeWindow()
items=('Part Design Workbench Body','Part Workbench Object')
item,ok = QtGui.QInputDialog.getItem(window, "Select object type", "Select your object type.  It can be a Part Design body or a Part Cut object.", items, 0, False)
if ok:
    if item == items[0]: #PD Body

        App.ActiveDocument.addObject("Part::Plane", "HoneycombPlane")
        App.ActiveDocument.HoneycombPlane.setExpression('Length', u'EditMe.length')
        App.ActiveDocument.HoneycombPlane.setExpression('Width', u'EditMe.width')
        App.ActiveDocument.HoneycombPlane.setExpression('Placement.Base.x', u'EditMe.array2XPos + EditMe.radius * 2')
        App.ActiveDocument.HoneycombPlane.setExpression('Placement.Base.y', u'EditMe.array2YPos + EditMe.radius * 2')

        App.activeDocument().addObject("Part::Cut","BaseFeatureFace")
        App.ActiveDocument.getObject("BaseFeatureFace").ViewObject.Visibility=False
        App.activeDocument().BaseFeatureFace.Base = App.activeDocument().HoneycombPlane
        App.activeDocument().BaseFeatureFace.Tool = App.activeDocument().Fused_Arrays
        Gui.activeDocument().HoneycombPlane.Visibility=False
        Gui.activeDocument().Fused_Arrays.Visibility=False
        App.ActiveDocument.recompute()
        App.activeDocument().addObject('PartDesign::Body','HoneycombBody')
        App.activeDocument().HoneycombBody.BaseFeature = App.activeDocument().BaseFeatureFace
        Gui.activeView().setActiveObject('pdHoneycombBody', App.activeDocument().HoneycombBody)
        App.activeDocument().HoneycombBody.newObject("PartDesign::Pad","HoneycombPad")
        App.activeDocument().HoneycombPad.Profile = (App.activeDocument().BaseFeature, ["Face1"])
        App.activeDocument().HoneycombPad.Length = 10.0
        App.ActiveDocument.recompute()
        Gui.activeDocument().setEdit('HoneycombPad', 0)
        Gui.activeDocument().hide("BaseFeature")
        App.ActiveDocument.HoneycombPad.setExpression('Length', u'EditMe.height')
        App.ActiveDocument.HoneycombPad.Length2 = 100.000000
        App.ActiveDocument.HoneycombPad.Type = 0
        App.ActiveDocument.HoneycombPad.UpToFace = None
        App.ActiveDocument.HoneycombPad.Reversed = 0
        App.ActiveDocument.HoneycombPad.Midplane = 0
        App.ActiveDocument.HoneycombPad.Offset = 0.000000
        App.ActiveDocument.recompute()
        Gui.activeDocument().resetEdit()
    else: #Part object
        #plate = Part.makeBox(PLATE_WIDTH,PLATE_LENGTH,PLATE_HEIGHT)
        #plate = Part.makeBox(worksheet.B4, worksheet.B5, worksheet.B6)
        App.ActiveDocument.addObject("Part::Box", "Plate")
        plateObject = App.ActiveDocument.getObject("Plate")
        App.ActiveDocument.Plate.setExpression('Length', u'EditMe.length')
        App.ActiveDocument.Plate.setExpression('Width', u'EditMe.width')
        App.ActiveDocument.Plate.setExpression('Height', u'EditMe.height')
        App.ActiveDocument.Plate.setExpression('Placement.Base.x', u'EditMe.array2XPos + EditMe.radius * 2')
        App.ActiveDocument.Plate.setExpression('Placement.Base.y', u'EditMe.array2YPos + EditMe.radius * 2')

        App.activeDocument().addObject("Part::Cut","HoneycombGrid")
        App.activeDocument().HoneycombGrid.Base = App.activeDocument().Plate
        App.activeDocument().HoneycombGrid.Tool = App.activeDocument().Fused_Arrays
        Gui.activeDocument().Plate.Visibility=False
        Gui.activeDocument().Fused_Arrays.Visibility=False


App.ActiveDocument.recompute()
Gui.SendMsgToActiveView("ViewFit")
Liens
Ddocumentation sur https://github.com/mwganson/FCHoneycombMaker
Annonce de la fonction lors d'une conversation sur le forum FCHoneycombMaker Macro
Autres applications similaires à Honeycomb Honeycomb Array
Version
2019-07-04 : première version
Cette page est extraite de https://wiki.freecad.org/Macro_FCHoneycombMaker