TutorialInfo: Topic: Customize Toolbars Level: Beginner Time: 5 minutes Author: User:Mario52 FCVersion: All SeeAlso: Interface_Customization.
Customize Toolbars
Synopsis
This tutorial shows how to add a button for a macro to a custom toolbar.
For more general information see Interface Customization.
Usage
1. Find the Customize Menu
- Click Main Menu → Tools → Customize,
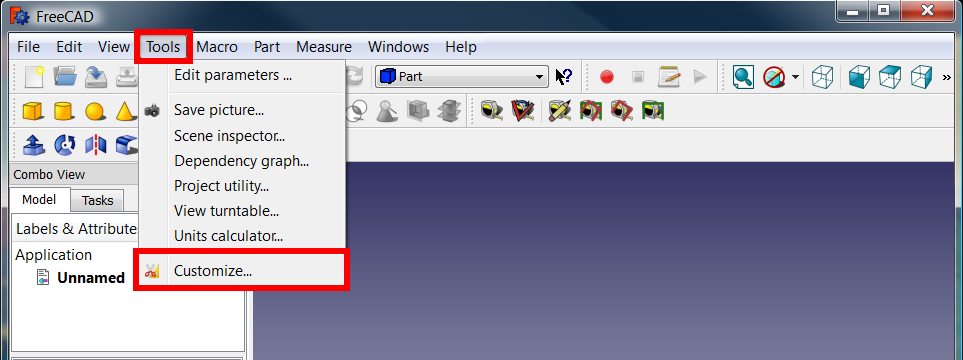
- or right click on any toolbar.
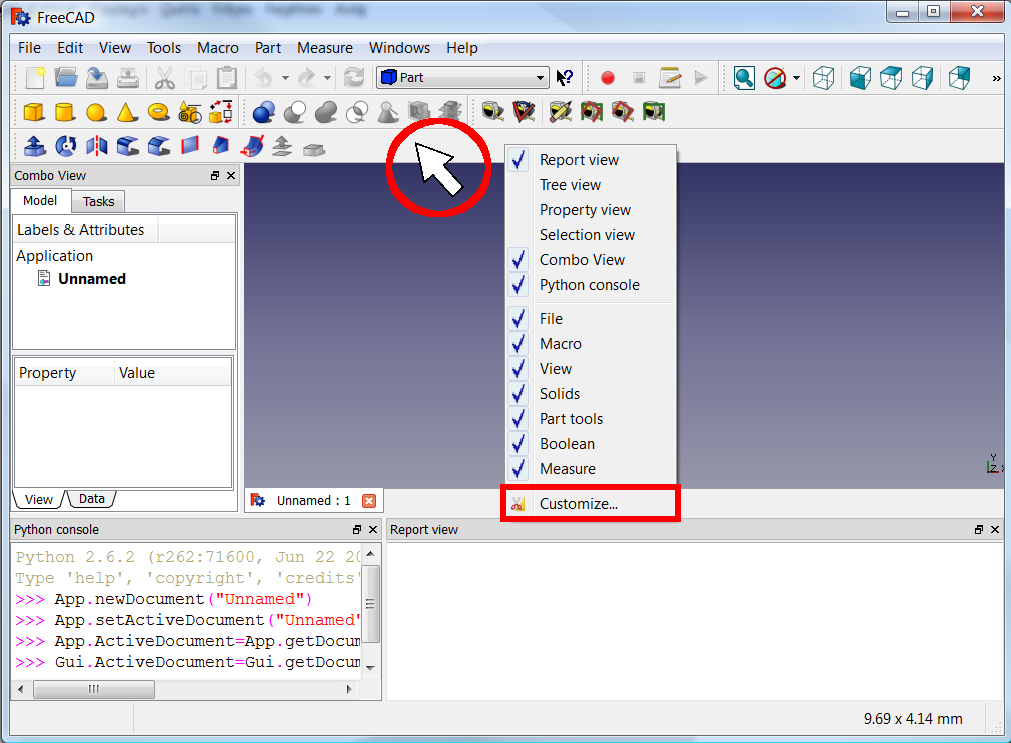
- The Customize window appears.
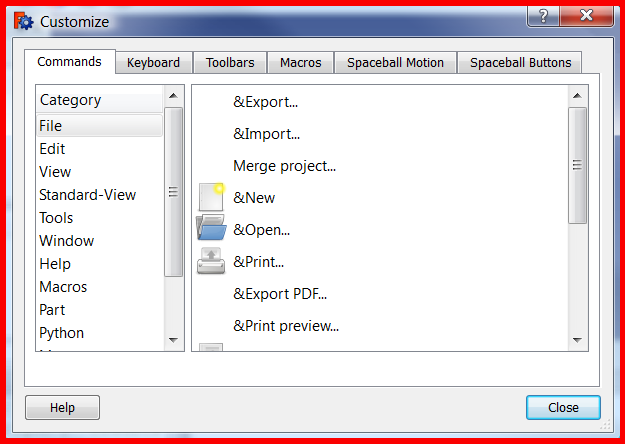
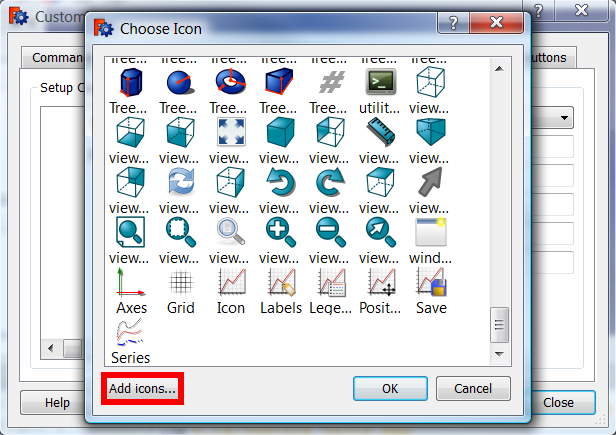
2. Make a Macro to a Macro-Tool
-
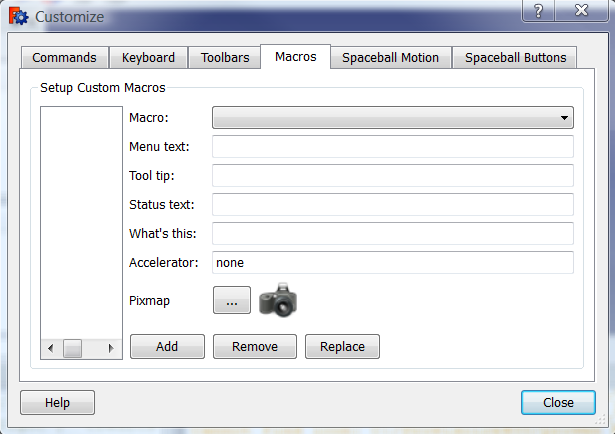
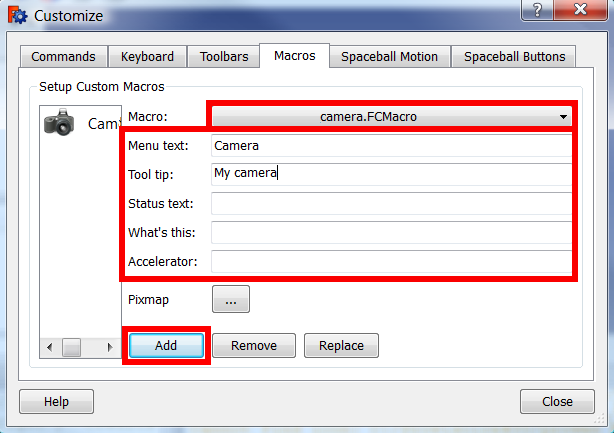
Select the \"Macro\" tab.
-
To add an icon for the provided macro click the Pixmap button (labelled ... ).
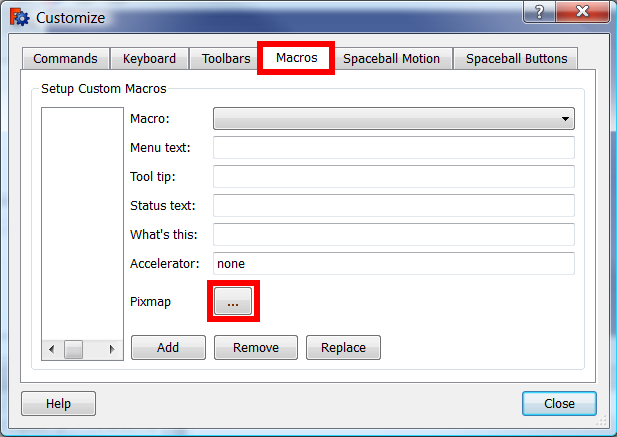
- Search for an appropriate icon from amongst FreeCAD\'s existing icons,
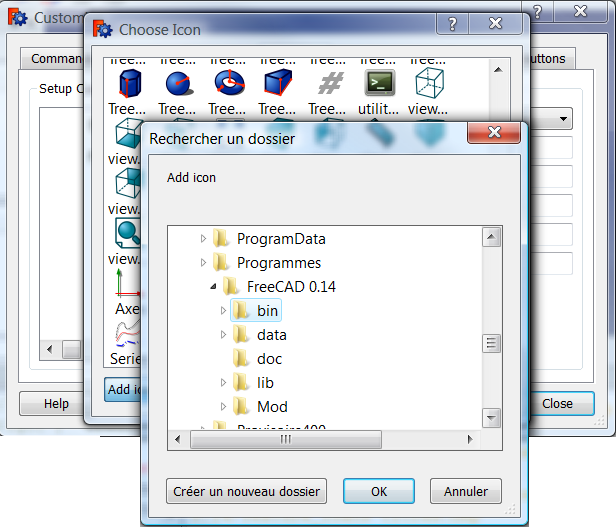
[or add your own icon by clicking Add icons...]. (expand for an example)
[You will get a file selection window, select your custom image file (PNG format, 64x64 pixels)]
- Select your icon and click OK.
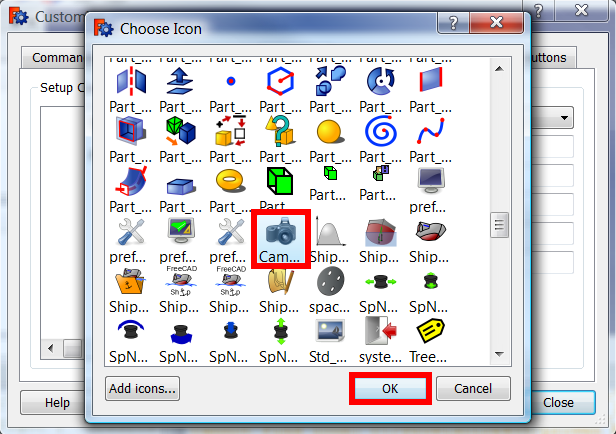
- The icon you selected is now displayed next to the Pixmap button labelled ....
-
Select the provided macro in line Macro: and specify a Menu text: (which will appear as the text label in the menu); also fill in the \'Tool Tip\': (which is the text that will appear when a mouse is over the button on the toolbar); further lines are optional.
-
Click the button Add.
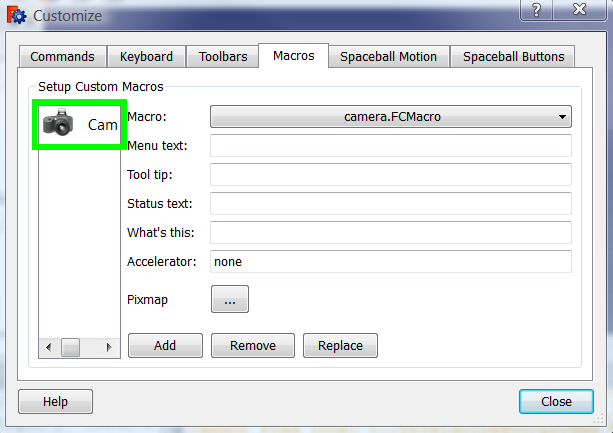
- The button of the macro-tool is now created.
3. Create a toolbar outside the workbench Macro which contains the created Macro-tool
- Select the Toolbars tab and choose the workbench (for which the toolbar is provided) in the drop down on the right (Part in this example).
[Since version 0.15 there is a [ Global toolbar. If this is selected, the provided toolbar will be in each workbench.]
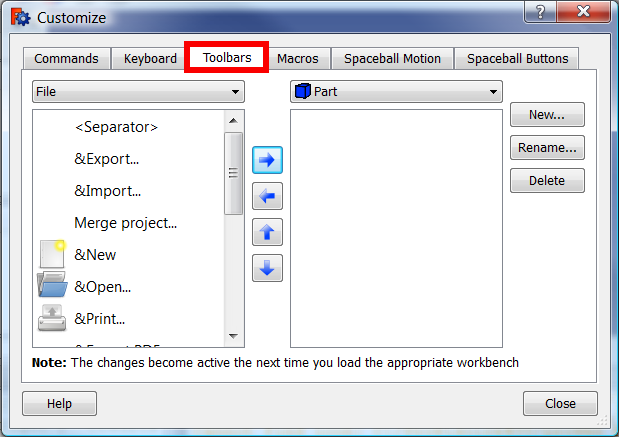
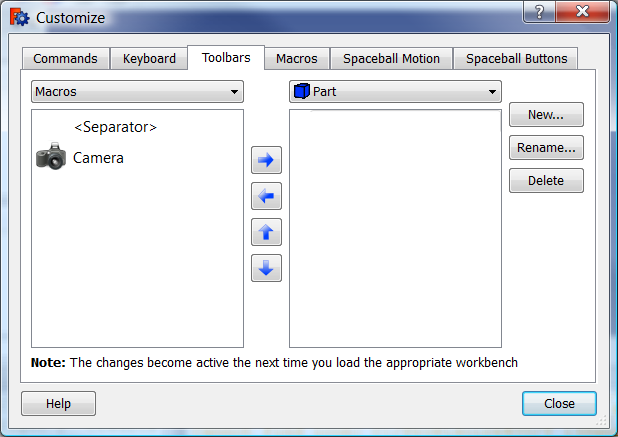
- In the dropdown on the left select Macros.

- The macro-tool with its icon appears in the list.
- Click the button New...
<img alt="Click on \"New\"" src=https://raw.githubusercontent.com/FreeCAD/FreeCAD-documentation/master/wiki/images/CustomizeToolBar_14.png style="width:640px;">
- In the window \"New Toolbar\" enter the name of the provided extra toolbar for the Part Workbench and click OK
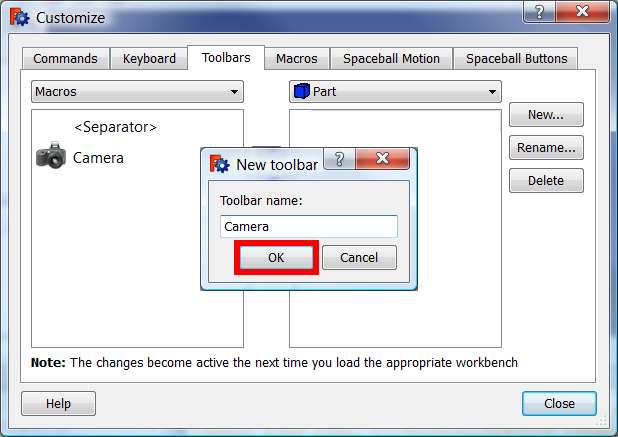
-
The toolbar is now created.
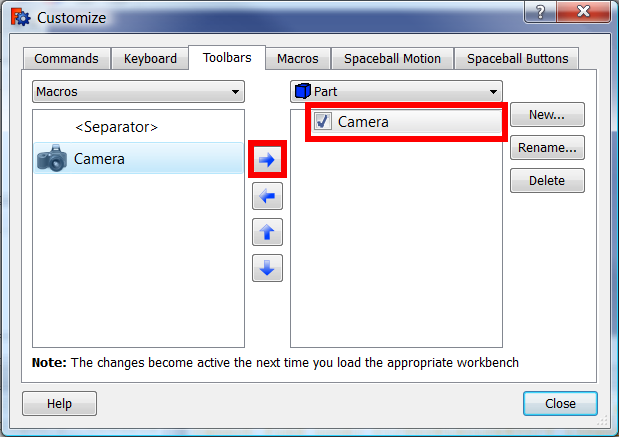
-
To add the created macro-tool to this toolbar, select it in the left window and then click the Button with the arrow pointing right.
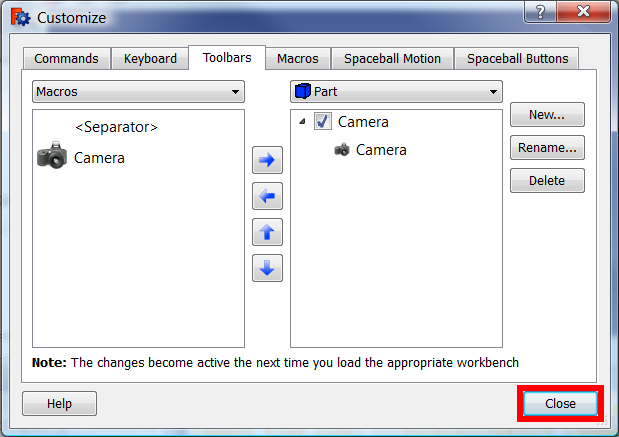
-
You have created now a toolbar called \"Camera\" (with the Macro-tool Camera in it)
-
Click the Close button.
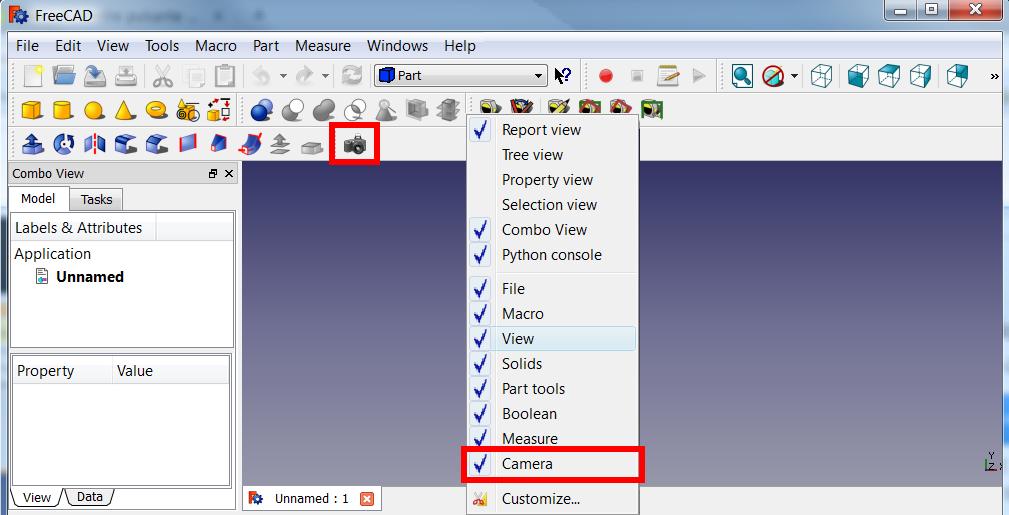
- Your new toolbar is now contained in the toolbars\' right-click menu. Its Icons (in our example only the camera) are visible, if the toolbar is activated (blue checkmark).
⏵ documentation index > Preferences > Customize Toolbars
This page is retrieved from https://github.com/FreeCAD/FreeCAD-documentation/blob/main/wiki/Customize_Toolbars.md